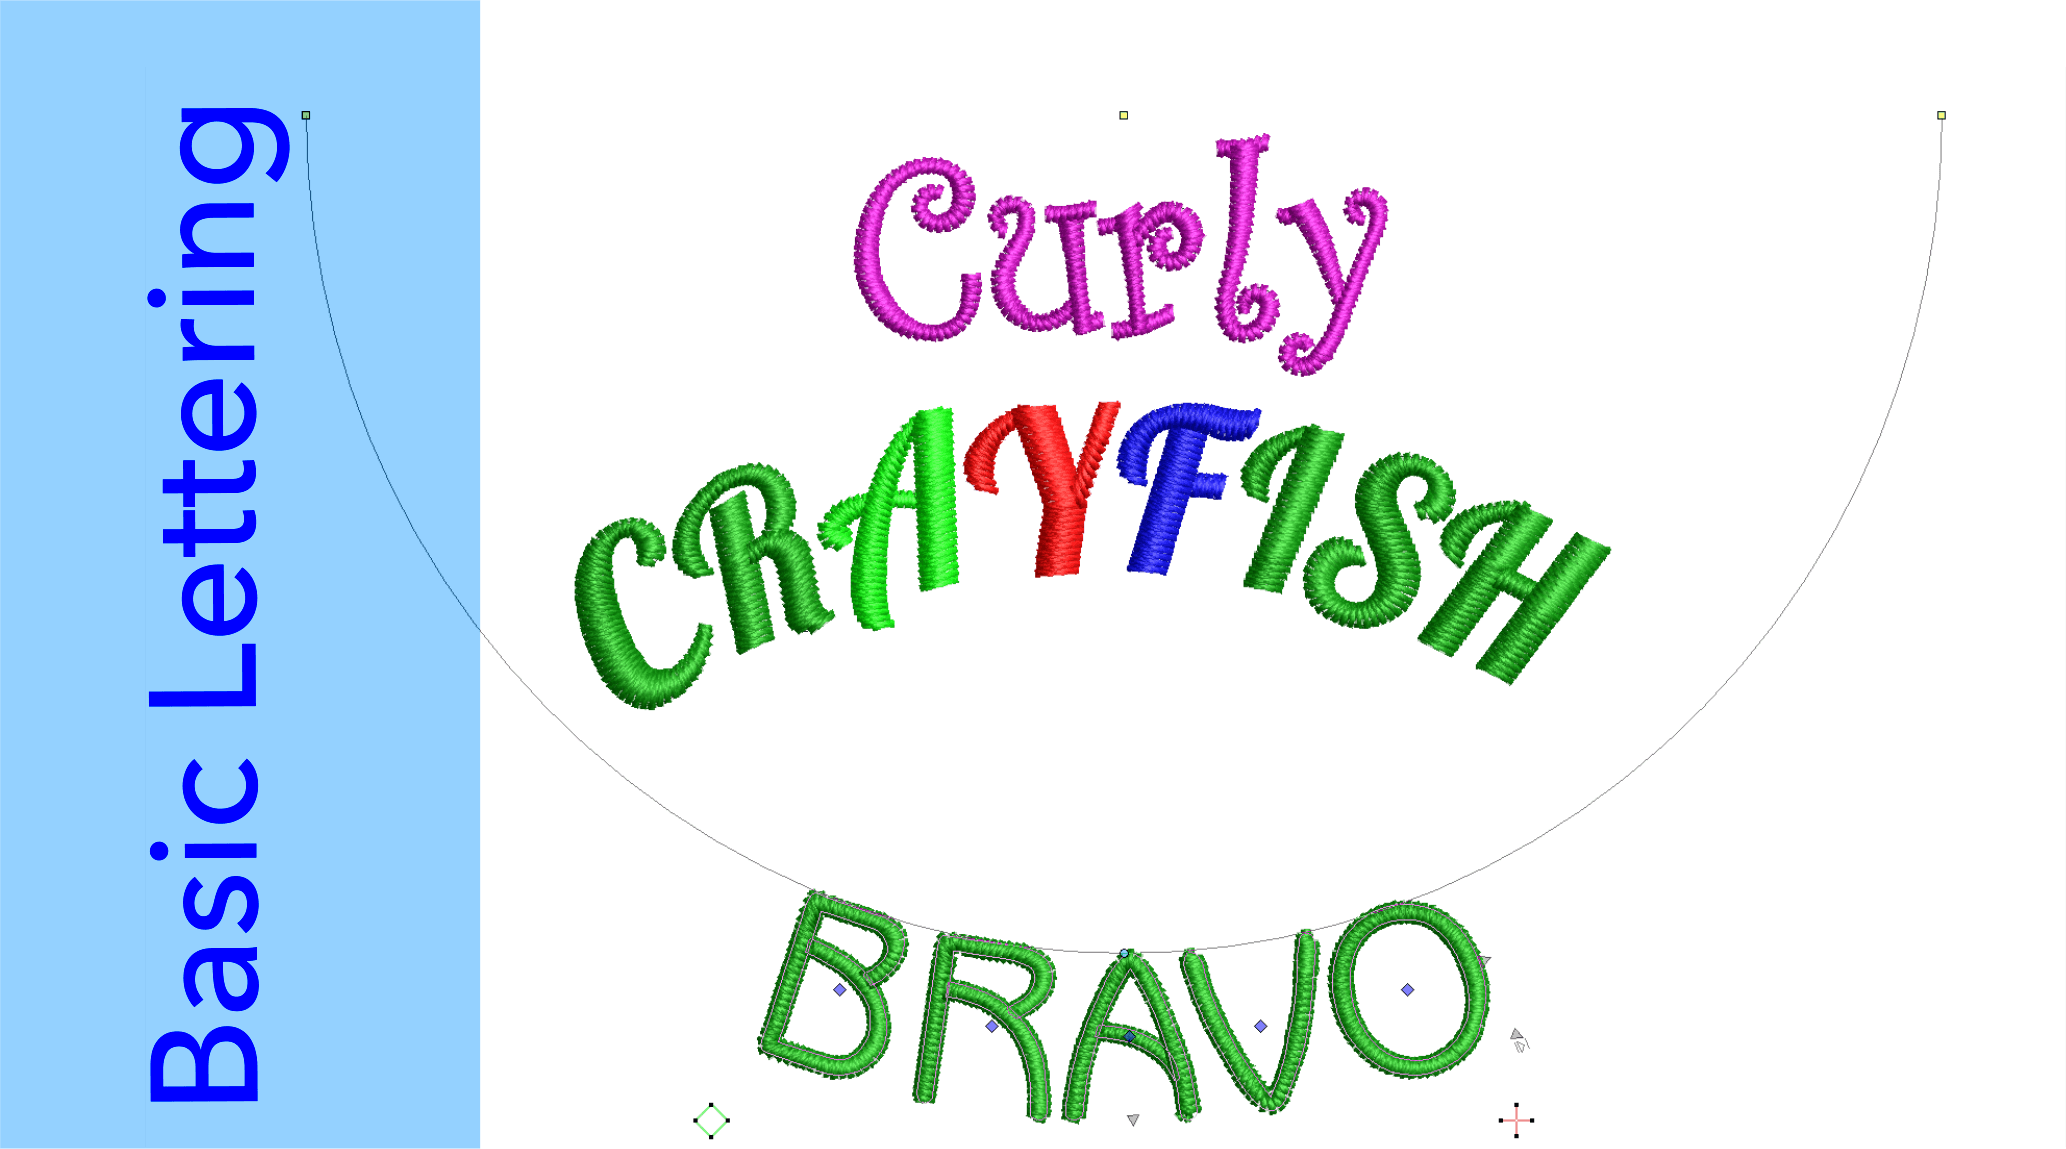
Even the basic Embroidery Studio packages include powerful lettering features.
Easily create lines or paragraphs of the best quality lettering from native .esa fonts or a large selection of TTF’s that are already installed on your computer.
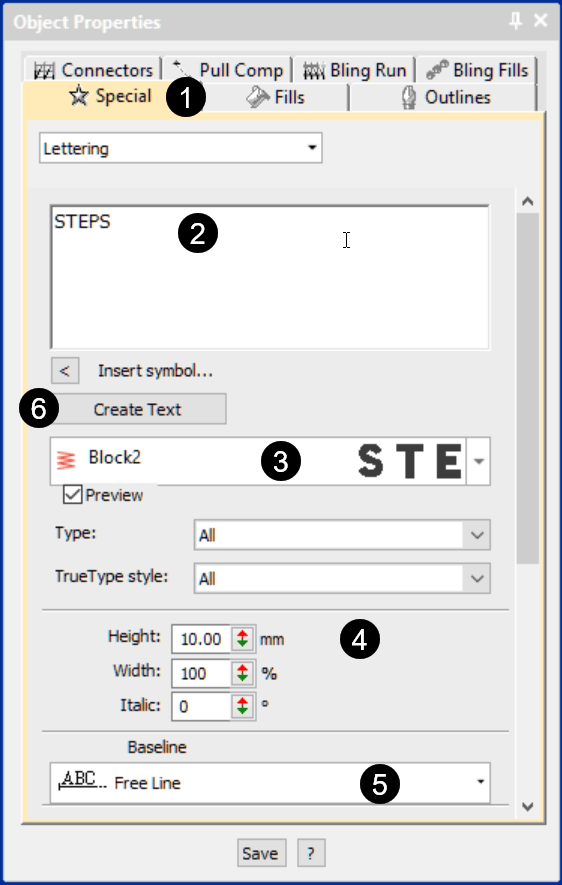
Open the font editor.
Type your letters in the Dialog box.
Choose your font.
Select a size and baseline.
create the text.
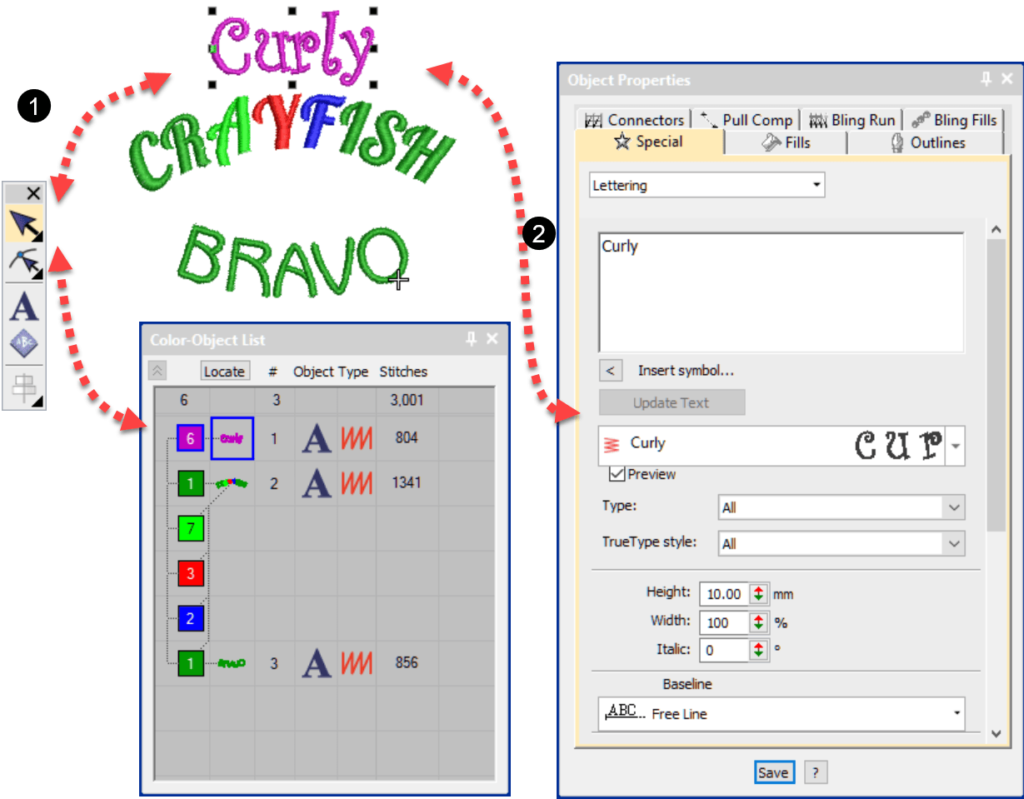
All of the above mentioned properties, selected in the editor are only properties of the lettering object and can be changed after the lettering has been created, simply by selecting the lettering object in Color Object list or in the work area and choosing another property e.g. baseline or font etc.
Select the Object
Change the Properties
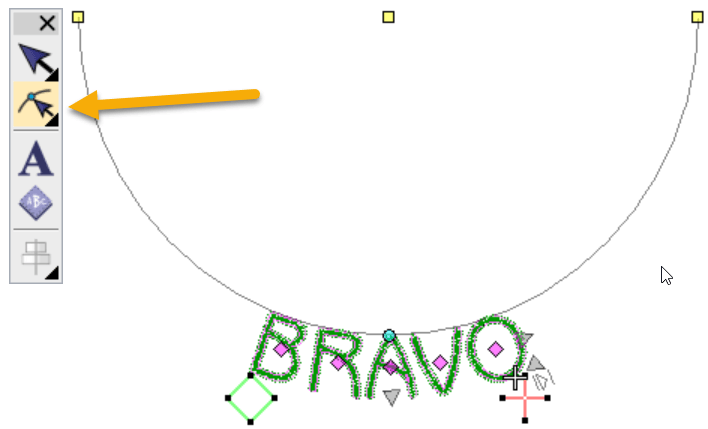
The Reshape Tool – Keyboard shortcut “H” displays the baseline and letter nodes.
Clicking on a node and dragging will change the location of a letter and the shape of the baseline.
See the video below for how to use the Shift and Ctrl Key.
When selecting a lettering node, left clicking activates that letter, right clicking activates that letter and all letters to the right.
why does my wilson embroidery Studie lettering does not look like yours the fonts arent clear like yours and it takes a while to open. im using a brand new computer so it cant be anything to do with my computer.
I am a beginner and im finding hard to get my head around usings it, I was ment to have training from the company i brought it off but know with the Virus thats not going to happen