Breaking News

Compare .emb and .dst

Compare .EMB and .DST files

.EMB = Vector

The embroidery objects created in EmbroideryStudio are vector based, which simply means if the object is resized then the stitch properties including stitch spacing, stitch length, and underlay are maintained. In fact, all the properties relating to the design are preserved and the stitch count is adjusted to maintain the quality of the design.

.DST = Machine File = Individual Stitches

An embroidery machine does not need to know all the properties of a design, simply where to move the hoop to and when to drive the needle and of course when to insert a color change, thread trim, tie off, tie in etc.

In fact, the file is a long list of stitch coordinates that are unrelated.  If a .dst file is increased and made larger, the stitch spacing will be increased without any adjustment to the stitch count.

Conversely, if the design is reduced in size, the spacing and stitch length is compressed and the same number of stitches are included in the design.
I am sure we have all experienced those stitch outs that are as stiff as a board, this is the reason.

raw-dst file
A .dst file in its raw state with every stitch a separate node and no vectorization.

EmbroideryStudio to the rescue​

When you open a .dst file select the Options link to engage the Objects/outlines and Auto connectorsYou only need to do this once and the system will remember your choice.

Now when you open a .dst file the software will inspect the stitch patterns and do its best to recreate object, making it easier for you to edit.

dst-options

Finally, it is impossible for the software to re create the colors, as there was no information in the dst file.  Not all objects will be restored to the original state of the .emb file but the majority of objects will be re-vectorised to assist in editing the design.

Watch it now

More Articles

Elements
John Wright

Batch Convert Machine Files

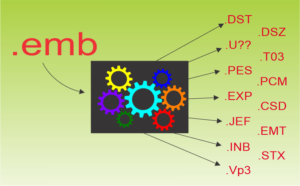
The library feature of EmbroideryStudio provides the means to convert a batch of files to a designated folder. In the following video you will see

Read More »

Leave a Reply

Your email address will not be published. Required fields are marked *