All lettering has maximum and minimum recommended sizes, to find these recommendations go to the HELP MENU and ONLINE MANUAL.
In the Navigation Bar Look for Appendices and Embroidery Fonts. CTRL F will open the Find dialogue to locate the particular font you are looking for.
Notice Adelle font has a recommended minimum of 10 mm and a maximum of 50 mm.
If your PDF reader does not display the Navigation Bar I will provide a link to download one that will at the bottom of the article.
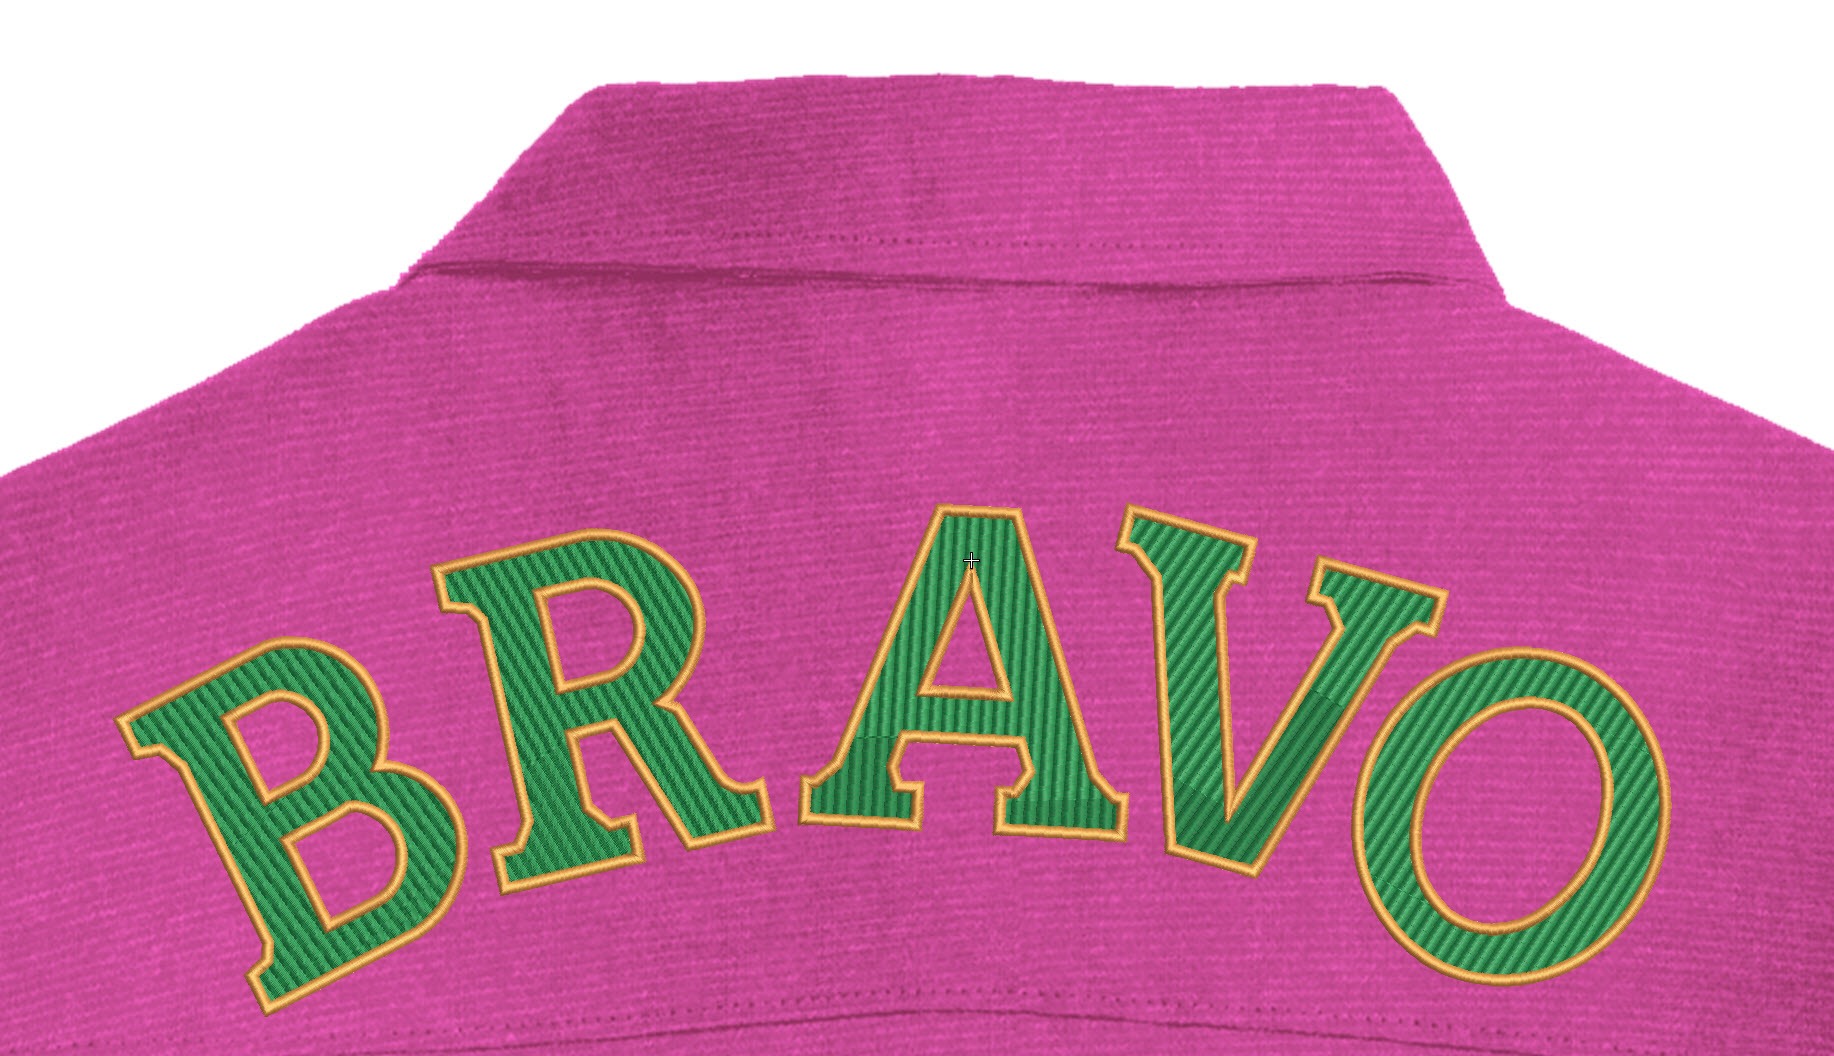
There are a variety of reasons for limits on the size of fonts but probably the most obvious is the column width. In some fonts if the lettering is too large the columns are too wide to stitch nicely and others if they are too small the column is too narrow.
In this article and video I would like to suggest a way to easily solve this problem.
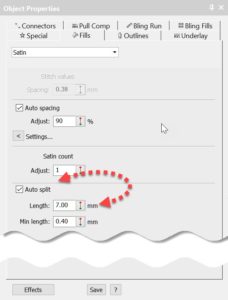
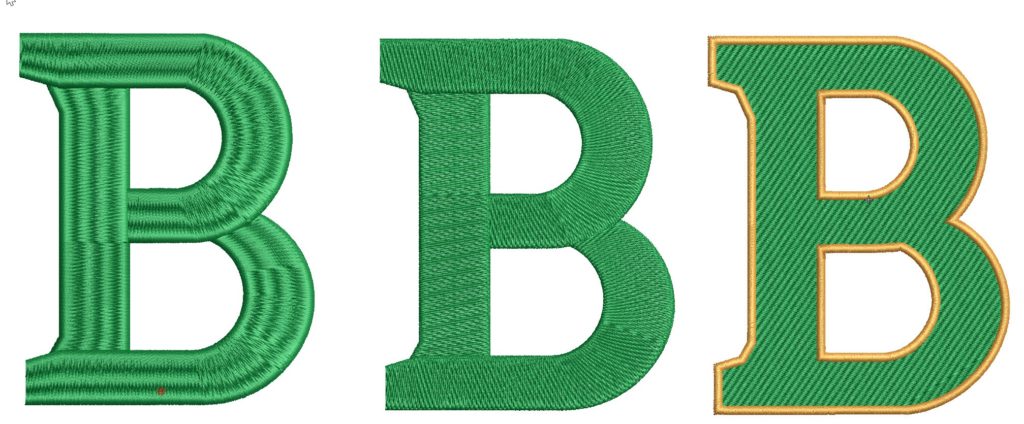
The 2 obvious solutions are to change the properties of the stitch, either add Auto Split to satin or change the fill type to Tatami.
My preferred option is to convert the letter shape to a complex fill object then design my own offset pattern to suit the job. (see image 3 below)
The process involves breaking a line of lettering apart to letter level then making the conversion from there. If the final embroidered letters are to go on a curved baseline, it is better to make these adjustments before breaking the lettering apart.
The shortcut to break objects apart is the CTRL-K key combination.
Now Right Click on the letter and select Convert then Convert to Vector Object.
Once converted either right click again and select convert to Complex Fill from the top of the list OR simply click on the Complex fill tool and nominate the stitch angle.
Applying the Offsets and border/outline is explained in the video.
Adobe reader Download link for Acrobat reader
HI Louis, which font are you looking for and what information do you need?