Templates are designed to save time and give a consistent result for all of your design work. Embroidery Studio 4.2 allows you to save specific property values to 6 of your main digitizing tools.
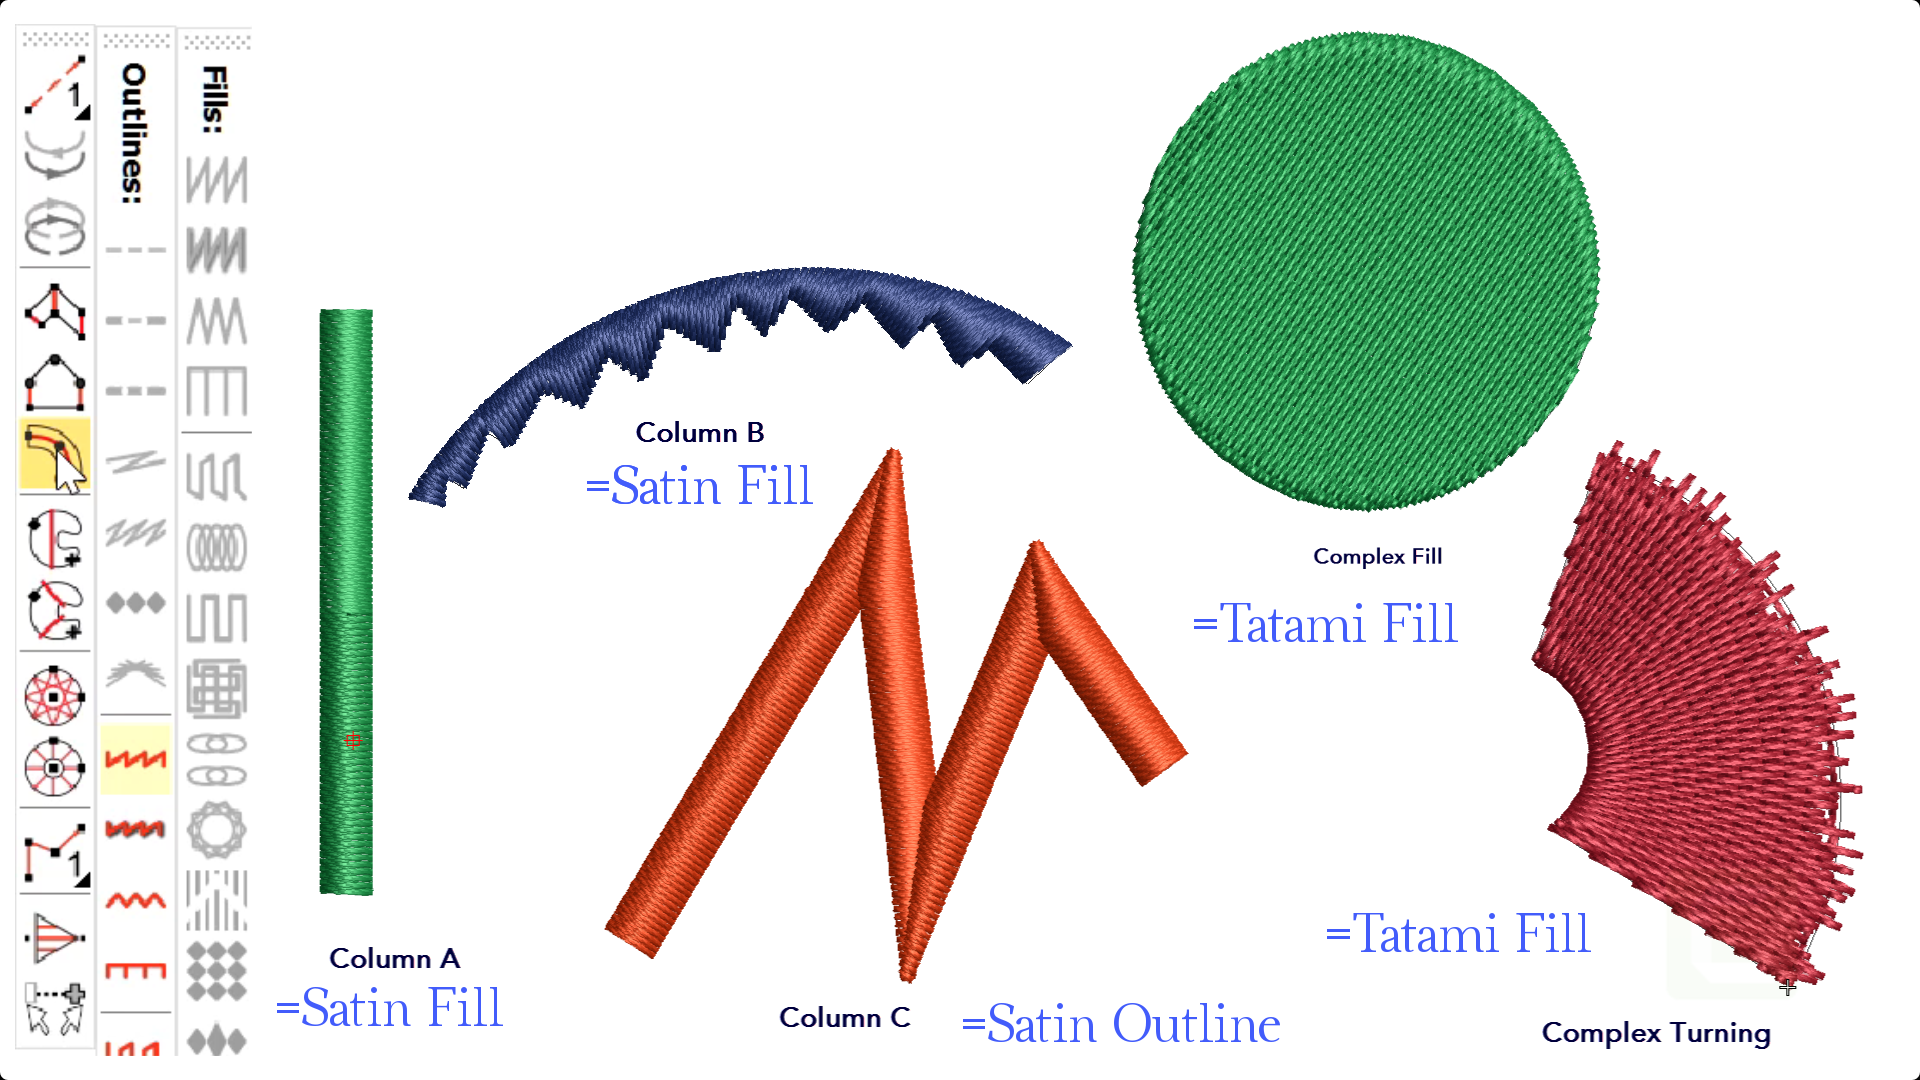
For example you may, in one template prefer the turning satin tool to default to tatami stitch with a specific stitch spacing and underlay value, while in another template the same tool may default to a satin fill and different underlay values.
Make the adjustments and from the Property box choose the SAVE button. Note you do not have to digitize an object to make these changes. Simply alter the settings and SAVE. See the procedure numbered in the image below
To be clear this is not how to set up a Template but is a method of customizing a template for a particular Job.
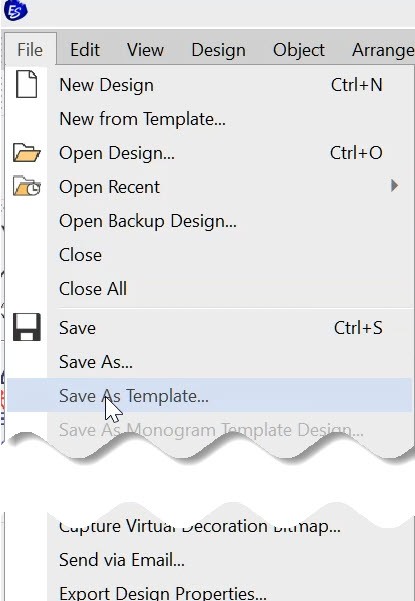
Creating a template is still accomplished by Setting up some basic Template values and saving from the File Menu. As with any other file you can save the new template with a meaningful name. I recommend you set up your Normal/Default template with the properties that are most likely to be common to subsequent templates. e.g. the Color Palette
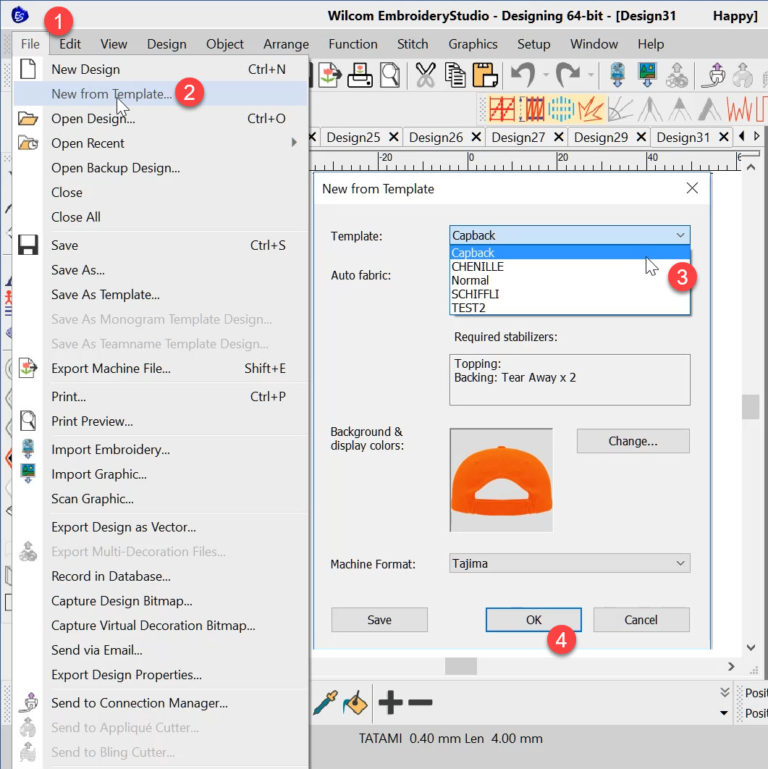
When creating a new file you will have the opportunity to create a new file based on any of your saved templates.

Thank you. Loving Studio E4.2 and the help that I am getting.
Thank you John for these ongoing articles 🙂