How to use Spiral Fill to create a realistic Bluebird design from a photo!
Spiral Fill is a captivating addition to EmbroideryStudio Digital Edition Designing! Enhance your designs with dynamic stitch patterns, adding motion and depth with perfect spirals. Bring your creations to life with this exciting feature.
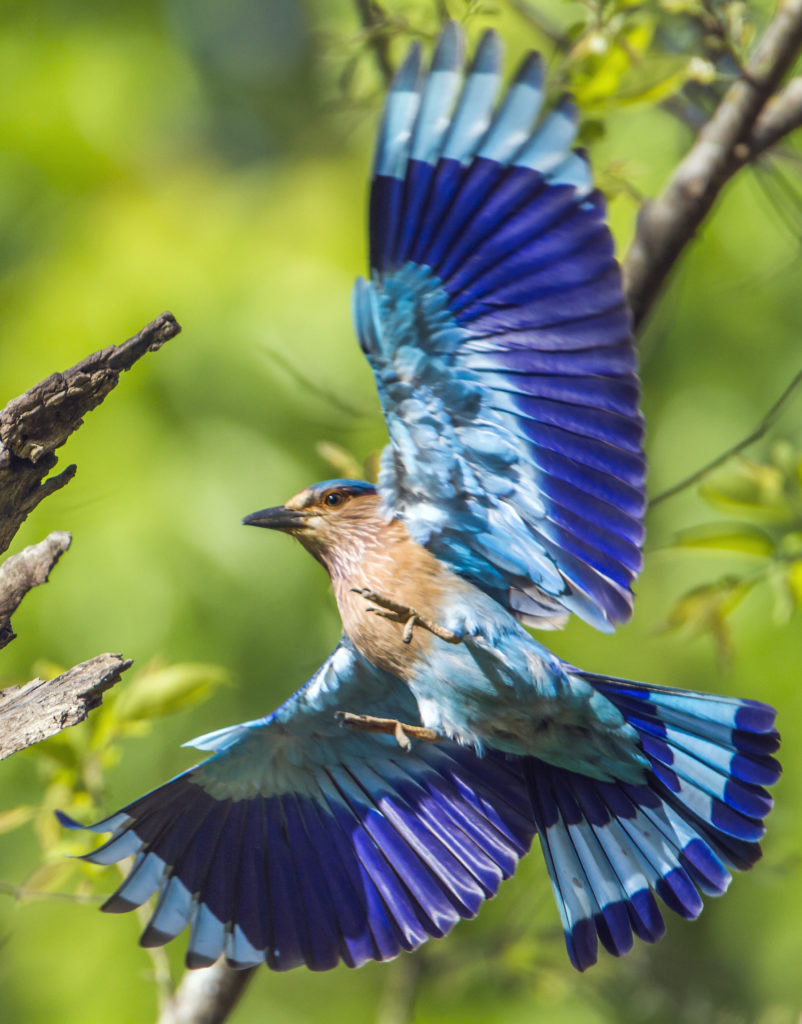
Bluebird Photo
As a digitizer, you may receive photos of fauna or flora, such as trees or birds, specific to a particular area—this could be for golf clubs, residents’ associations, or similar organizations.
The customer might want to create a logo or design based on the image they provide.
This bluebird photo presents us with a perfect opportunity to illustrate.
Let’s dive into the details of how to digitize with Spiral Fill.
How To Control The Stitches
Boundary Points
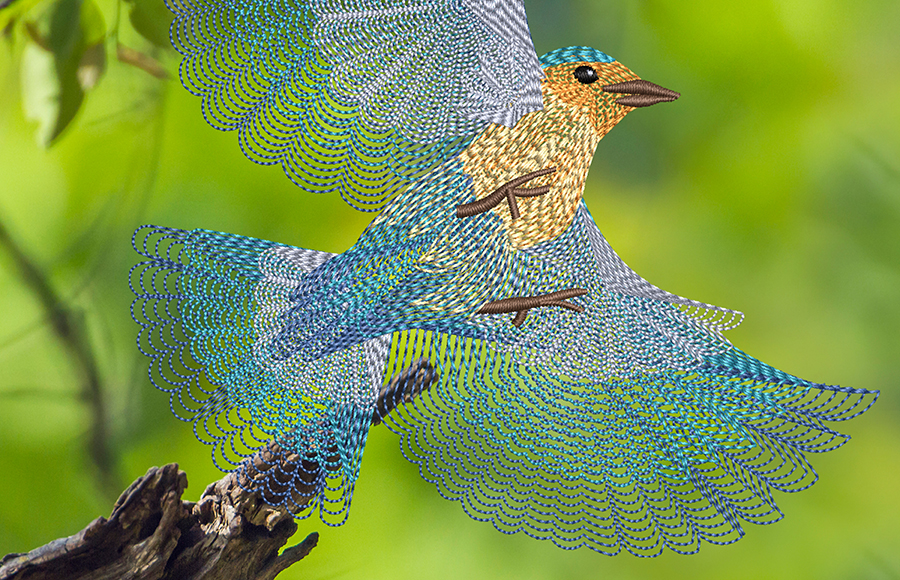
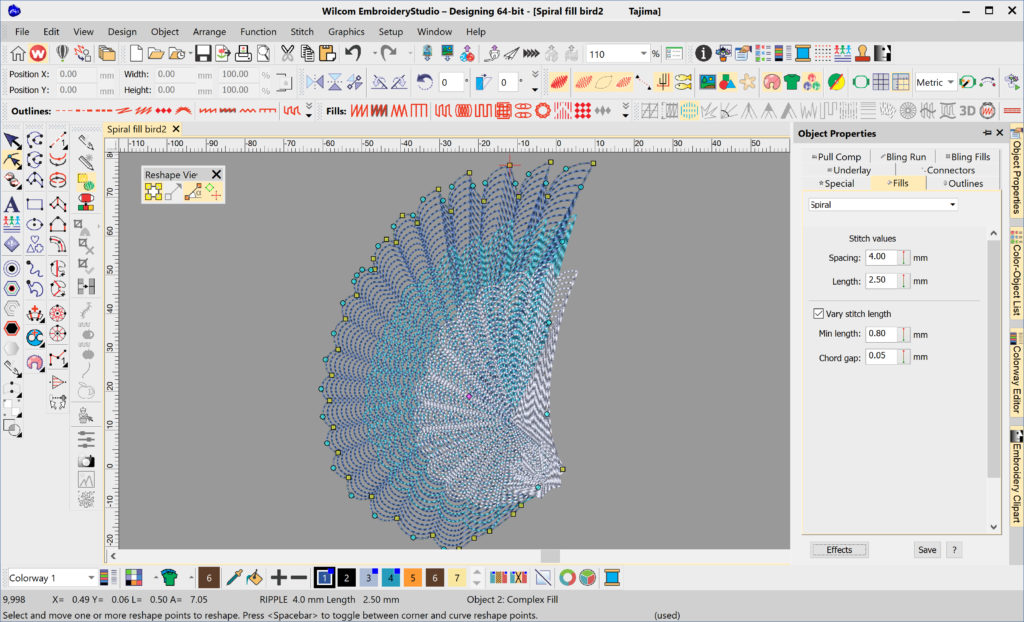
One crucial aspect in creating movement is to start digitizing the boundaries, which are the control points. The first layer of the wing uses Spiral Fill with a 4mm spacing. The next layer is also digitized with a 4mm spacing. The third and final layer of the wing features a 3mm spacing.
Centre Node
Experiment with the center node to locate the epicenter of the feathering and create the effect you are after.
How To Add Texture
Layers
To achieve a realistic object, we require layers of open stitches that will create incredible texture in our bird design.
Colors
The colors applied to the feather layers will enhance the wing effect. In this case, we use various shades of blue, as different tones of a color generally work best to achieve the light and shade of an object.
Look over our shoulder as we digitize with Spiral Fill
Looking to update your existing Wilcom software or trade-in a competitor software?
Benefit from staying up to date with Wilcom’s Trade-in, Update & Save Program.
très bel oiseau
pouvez vous m’envoyer le fichier EMB
merci beaucoup
Michelle, Veuillez remplir vos coordonnées au bas de la page et nous vous l’enverrons par courrier électronique