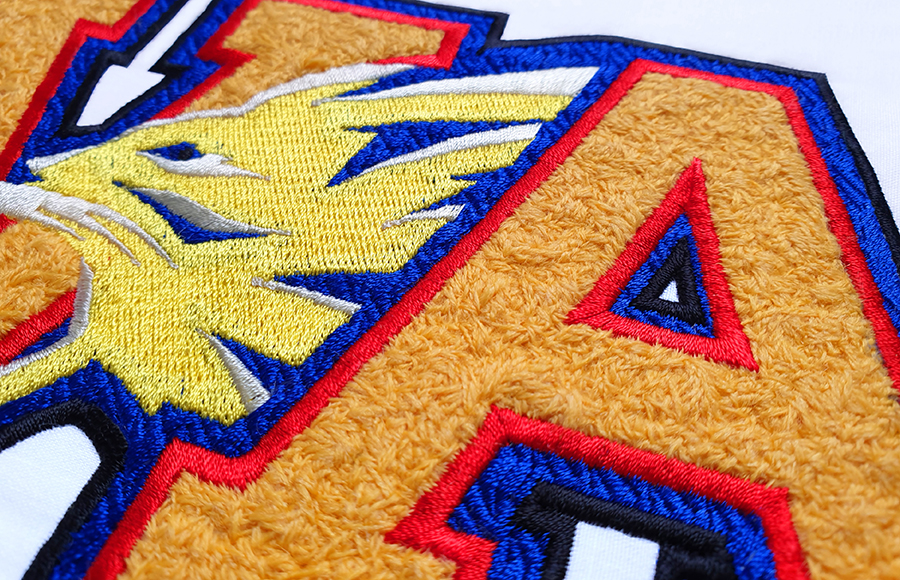
The key to achieving flawless faux chenille is the stitch type and selecting the correct THREAD!
Faux Chenille is created using Wilcom’s EmbroideryStudio’s Stipple Stemstitch Fill and importantly combining it with Maderia’s Burmilana thick woolen thread.
Stipple Stemstitch Fill works best on large areas. When selecting an area or a font, please select a typeface with thick column width. If the column width is too narrow, or the area too small, the Stipple Stemstitch will NOT generate correctly.
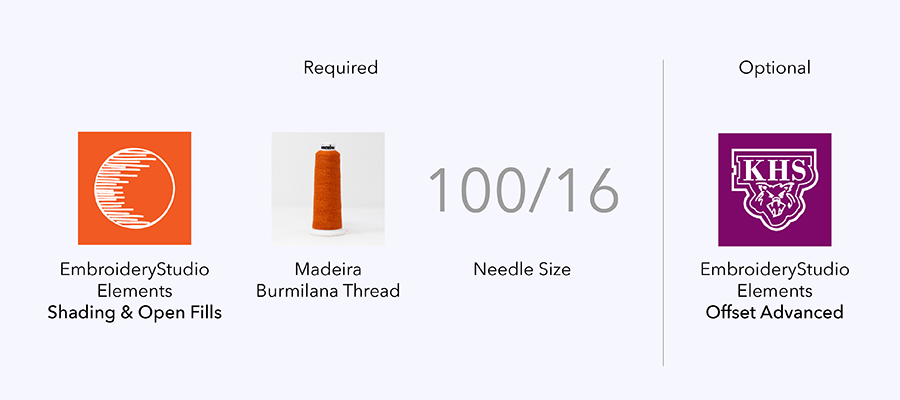
Tools
Step-by-Step Instructions
Wilcoms’ recommendations
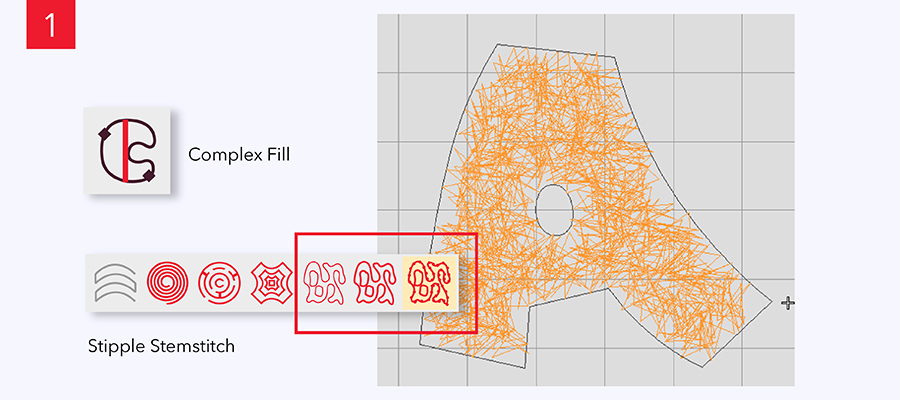
Start Digitizing
Firstly, start by digitizing an object using the ‘Complex Fill’ tool and fill the object with Stipple StemStitch from the Shading & Open Fills Element.
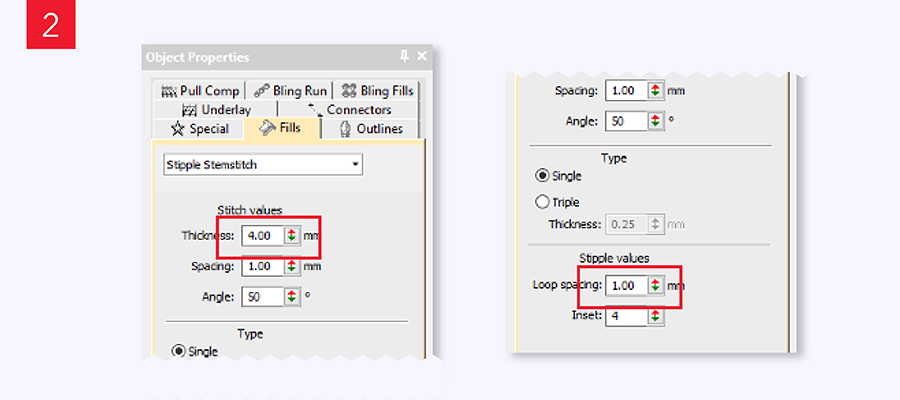
Stipple Stemstitch ‘Fills’ Settings
Increase the Stitch Value, Thickness to 4mm and reduce the Stipple Value, Loop Spacing to 1mm, while leaving the other settings unchanged.
Stipple Stemstitch Edge
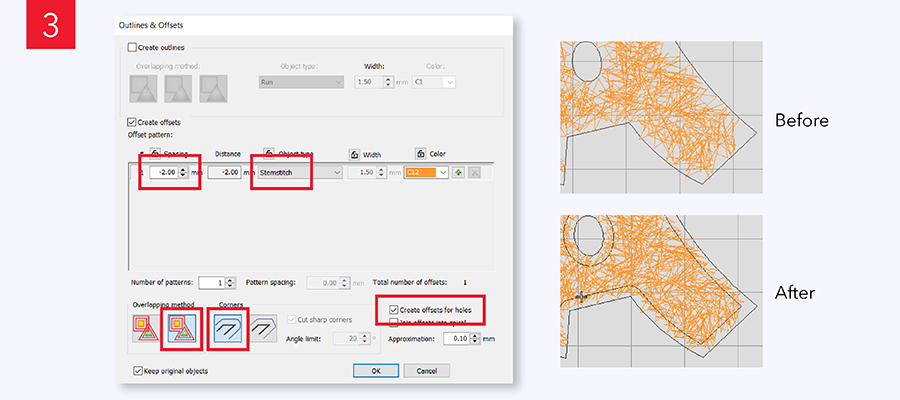
You will notice that the Stipple Stemstitch Fill finishes far from the object edge. Wilcom uses the ‘Outline and Offset’ Tool inside the Offset Advanced Element for this issue.
Select the object and in a single click, create a negative outline setting. Wilcom suggests using ‘-2mm’ offset Spacing while using the Object Type ‘Stemstitch’. Keep the same color as the Stipple Stemstitch. See the full settings in the image.
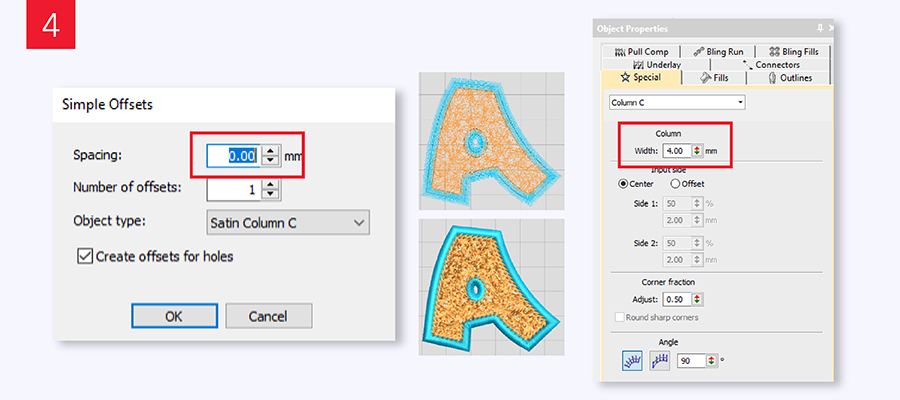
Create a Satin Stitch Border
To create a border with sharp corners select the Stipple Stemstitch Fill and then choose ‘Simple Offset’ and add a ‘0’ spacing. Wilcom suggests a Satin Stitch column width of 4mm thickness. This adds a professional finish.
For the satin stitch border, Wilcom has selected from Madeira’s standard Classic 40 embroidery thread range and not the Burmilana thread.
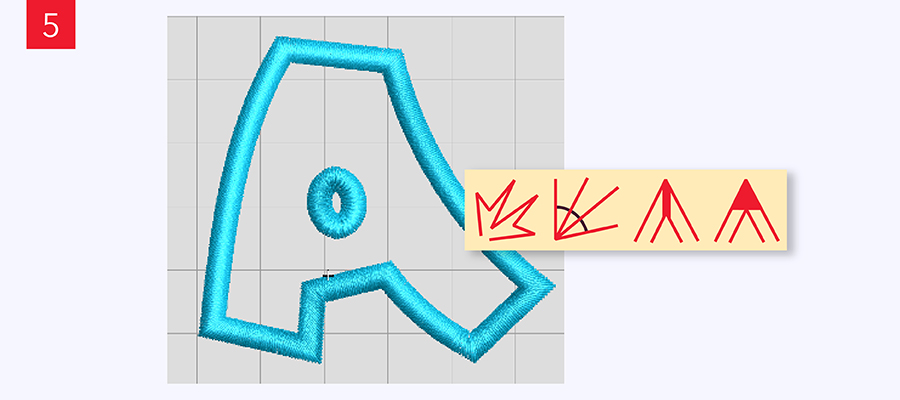
Satin Stitch Settings
Ensure the Satin Stitch has a 0.4 pull compensation setting (this will compensate for the push and pull of the Stipple Stemstitch).
For the Satin Stitch border outline, ensure Shortening, Fractional Spacing, Mitre and Cap corners are checked.
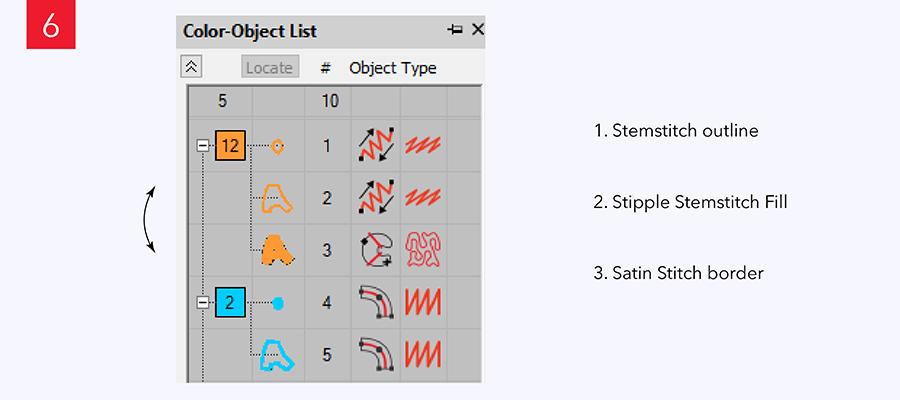
Re-sequencing
Once all the outlines have been created, re-sequence the objects manually, so that the Satin Stitch border is on top. See the order below:
Stemstitch outline ( No underlay)
Stipple Stemstitch Fill (No Underlay)
Satin Stitch border outline (No underlay)
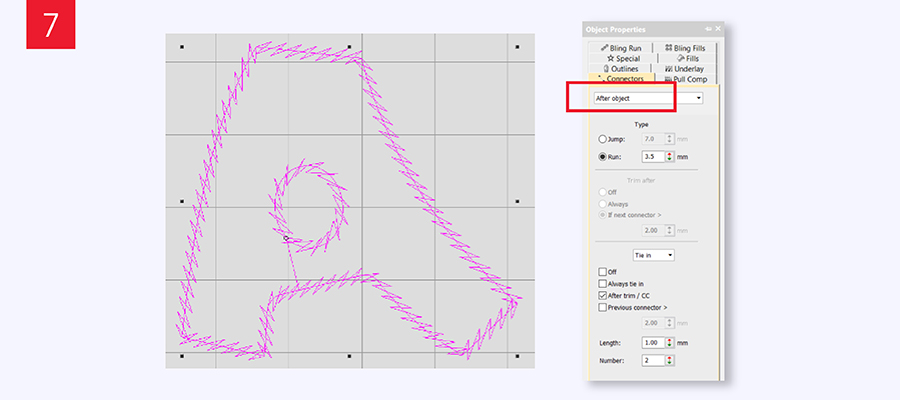
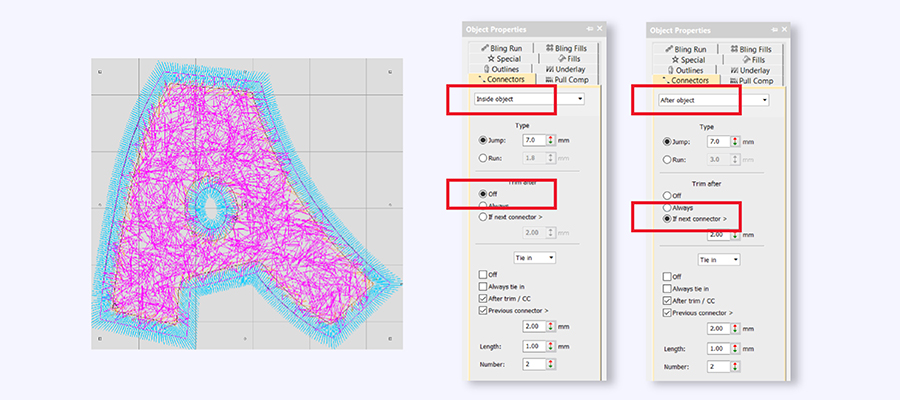
Connector Settings
To avoid jumps or trims between the Stemstitch outlines and the Stipple Stemstitch Fill, please follow these suggested settings for ‘After Object’ and ‘Inside Object’ settings.
Select the stemstitch outline – After Object, the run setting is 3.5mm with After trim / CC checked in the Tie in option.
Then Select the Stipple Stemstitch fill – ‘Inside Object’, the jump setting is 7.0mm, with Trim after set to off.
AND ‘After Object’, the jump setting is 7.0mm, and the Trim after is set to If next connector is 2.0mm.
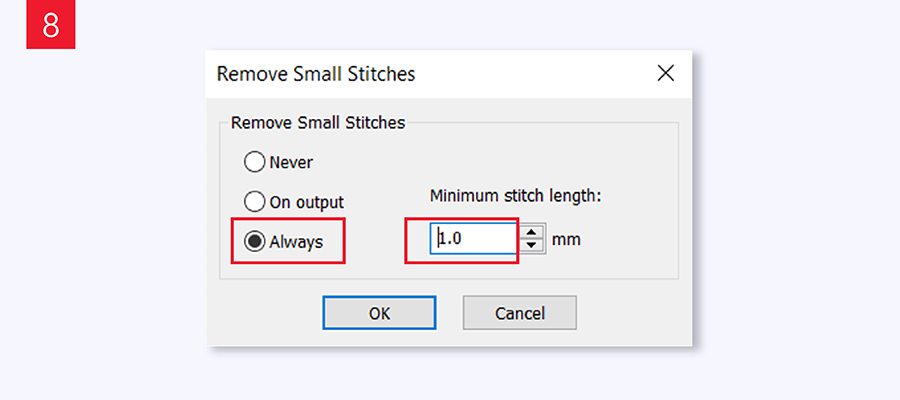
Remove Small Stitches
Lastly, remove small stitches by clicking Design >> Remove Small Stitches
Download the Step-by-Step Instructions as a PDF
Simply fill in the form below and we’ll send it to you