Let’s use the unique stitch type produced by Wilcom’s Photo Flash add-on Element to create something amazing. Photo Flash is traditionally used to quickly transform and convert black-and-white photographic images into realistic embroidery designs. The technique creates even rows of both satin and running stitches connecting at the edges of the bitmap image.
The Photo Flash stitch type automatically handles the spacing of the stitches by concentrating rows of satin stitches in darker areas and thinning them out to run stitches in lighter areas of an image. This produces amazingly realistic black-and-white photo embroidery.
The embroidered image’s resolution is controlled by selecting between ‘coarse,’ ‘medium’ or ‘fine.’ This controls the overall concentration and thickness of the rows with added options to control row angles.
Let’s experiment with the attributes of the Photo Flash stitch type to create an exciting logo.
It was surprisingly quick and easy to create a commercial logo for a local winery
1
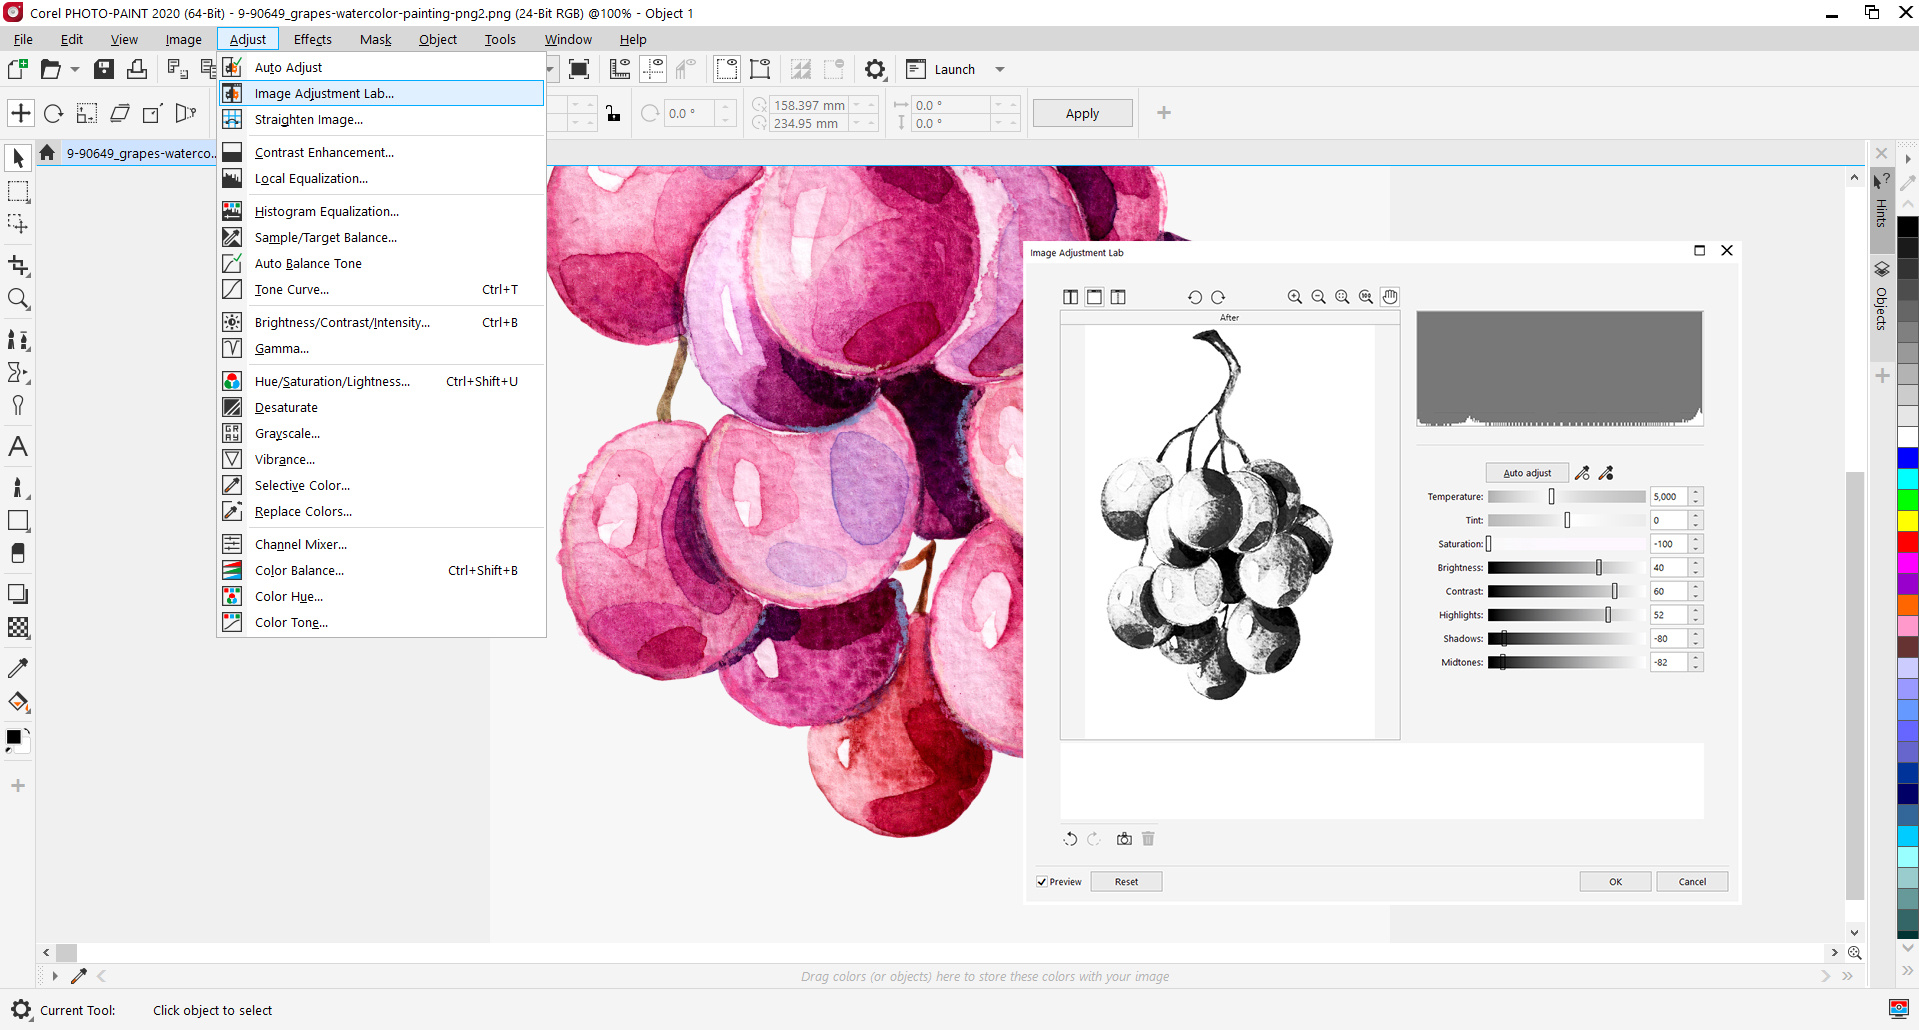
Photo Flash works best with a high-contrast image. Take the bitmap image of the grapes into your favorite graphics software to create a high-contrast black-and-white image. Here we use Corel Photo-Paint included with your EmbroideryStudio Decorating and Designing software and choose the ‘Image Adjustment Lab.’
2
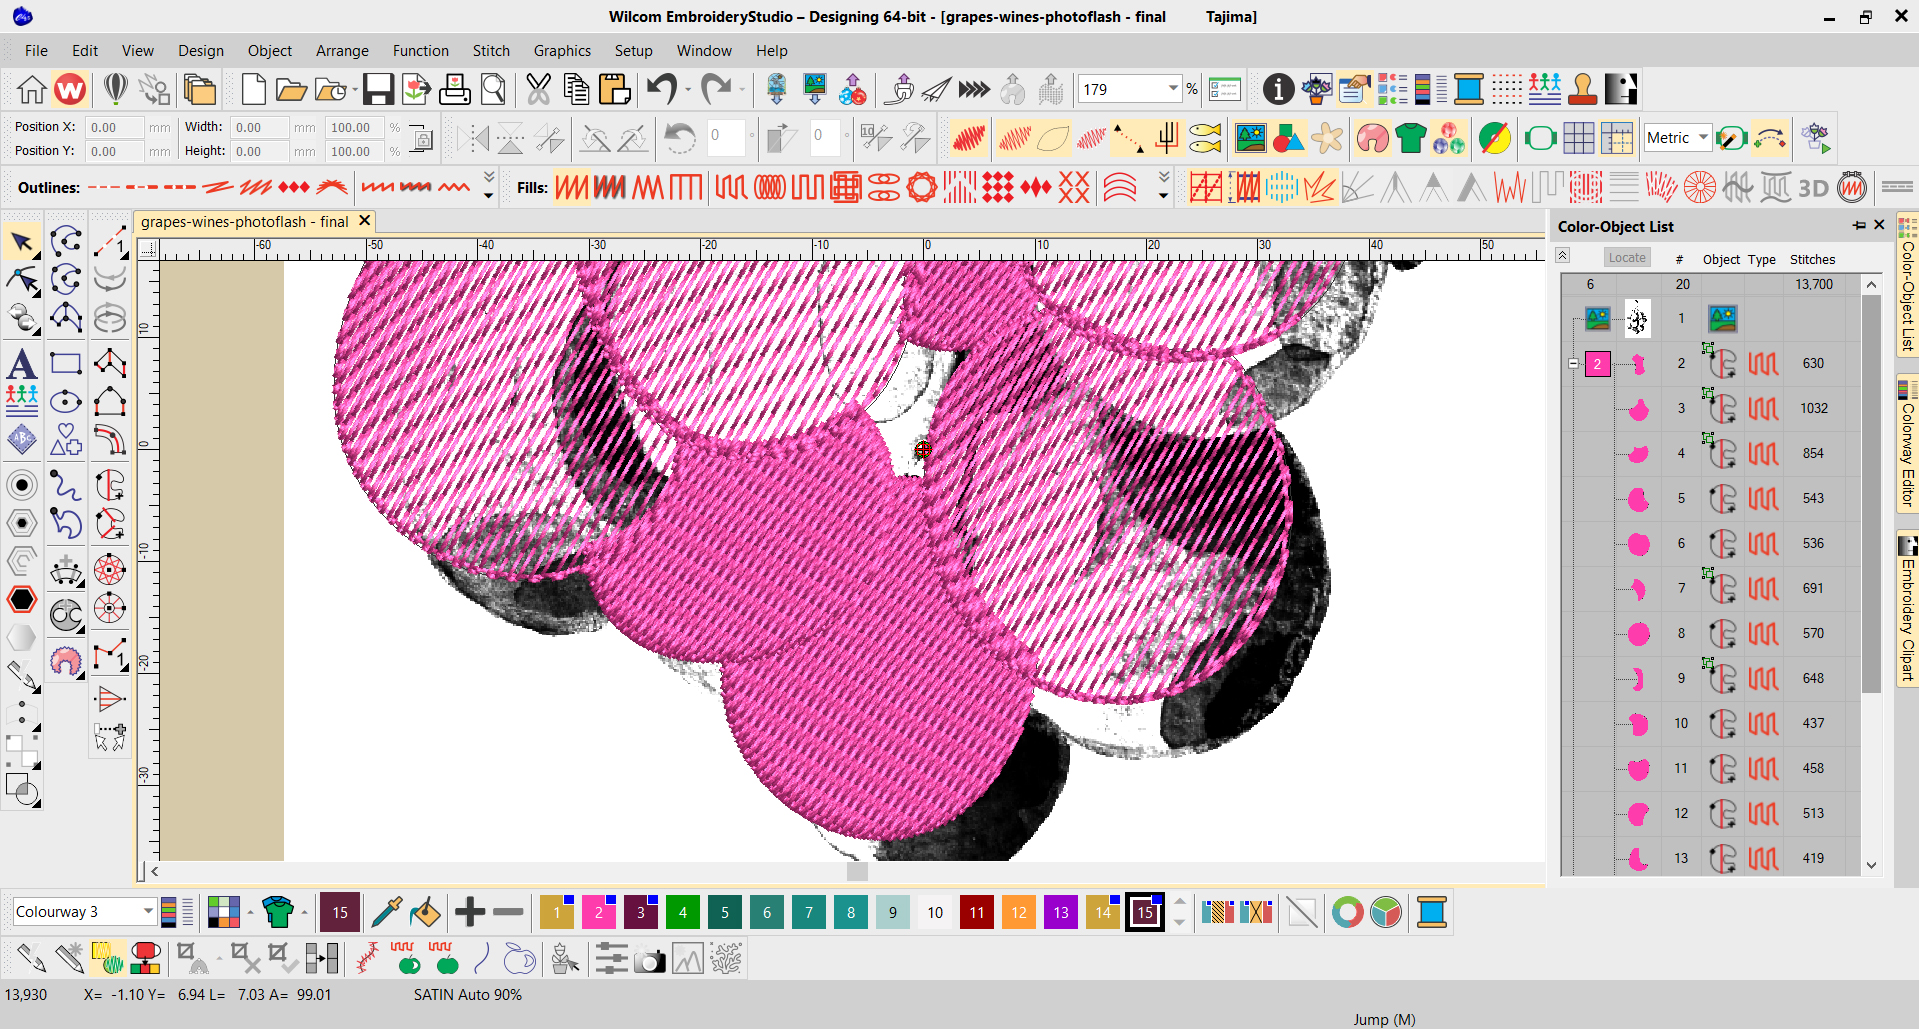
Import the newly created black-and-white bitmap image and start digitizing each individual grape. Add texture by filling some grapes using the Accordion Spacing tool from the Shading and Open Fill add-on Element. Leave the default settings, Spacing Max 2.00mm and Spacing Min. 4.0mm.
3
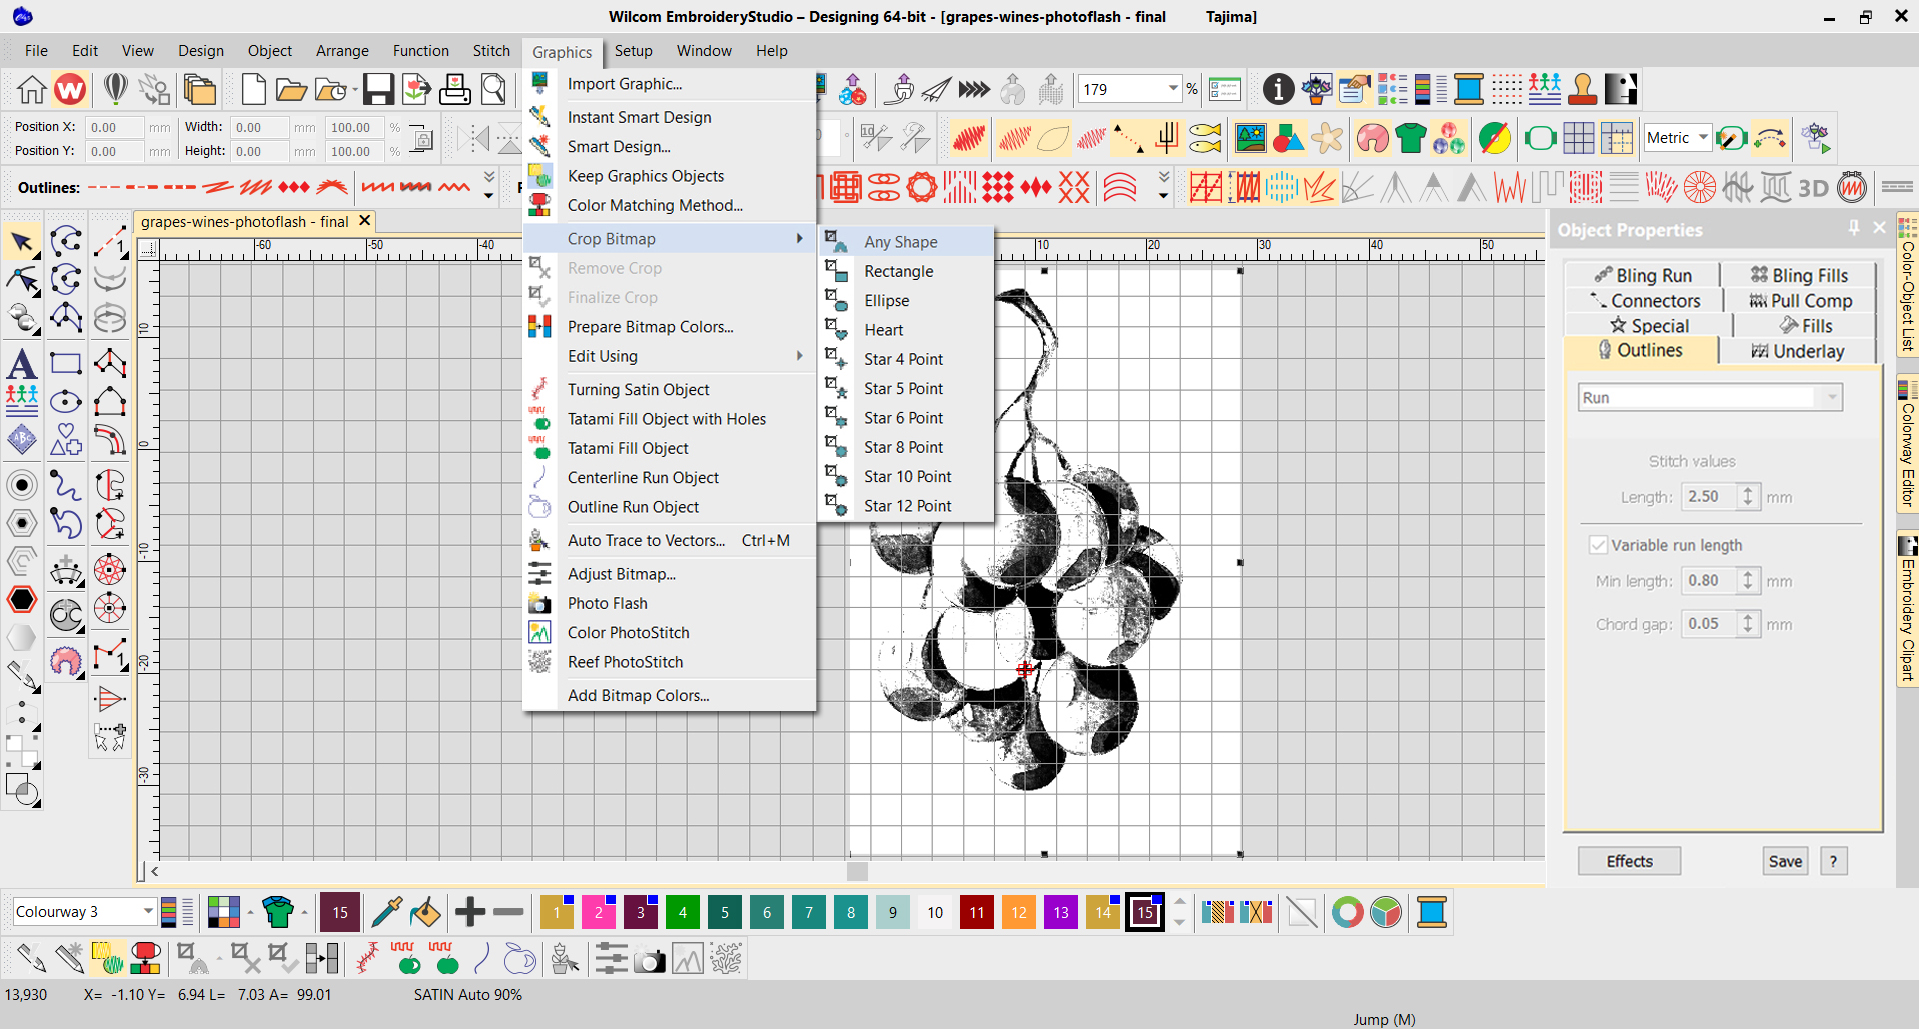
Now we need to crop away the white background. EmbroideryStudio Designing software has a great tool that will crop any irregular shape. ClickGraphics menu tab >> Crop Bitmap >> Any Shape. Create the crop outline using the same left and right mouse clicks used to digitize straight or curved lines.
4
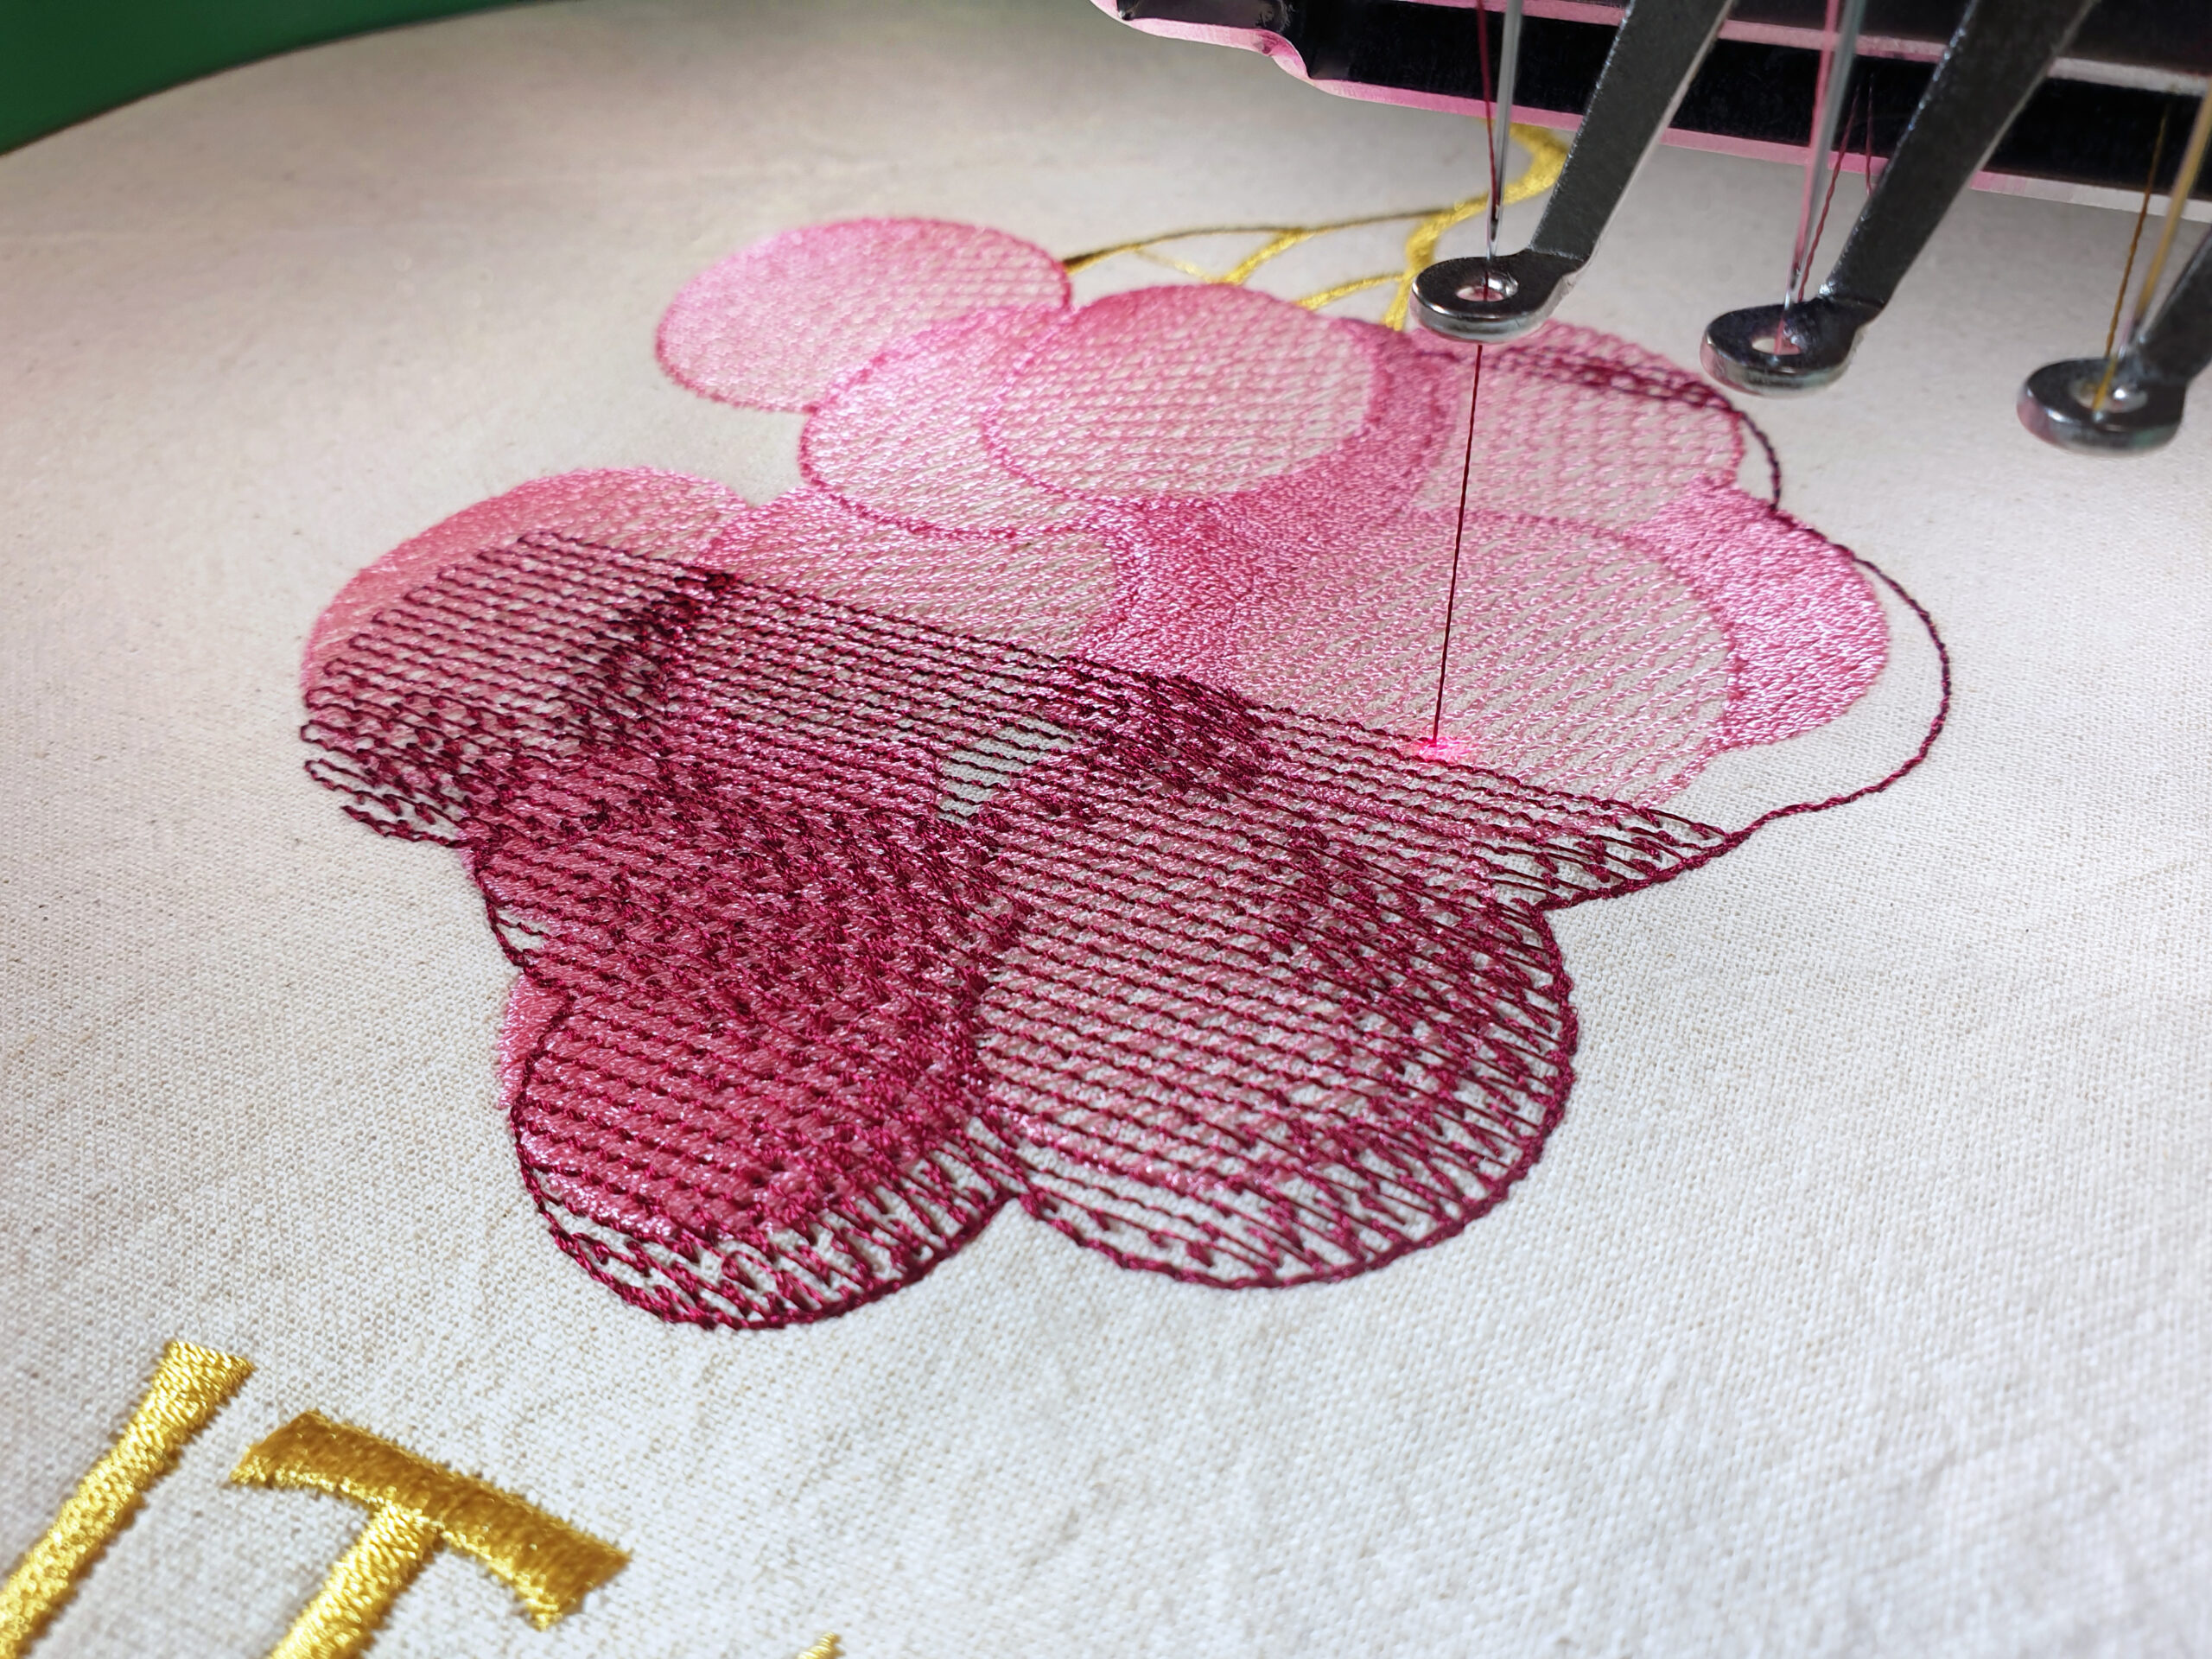
Use EmbroideryStudio’s Photo Flash Element to create an interesting shadow effect over the grapes. Photo Flash uses the entire bitmap shape, so we’ve cropped the image leaving only the parts we want to be embroidered. Select the entire cropped grape image and set the Resolution to Fine and the Background setting to Light.
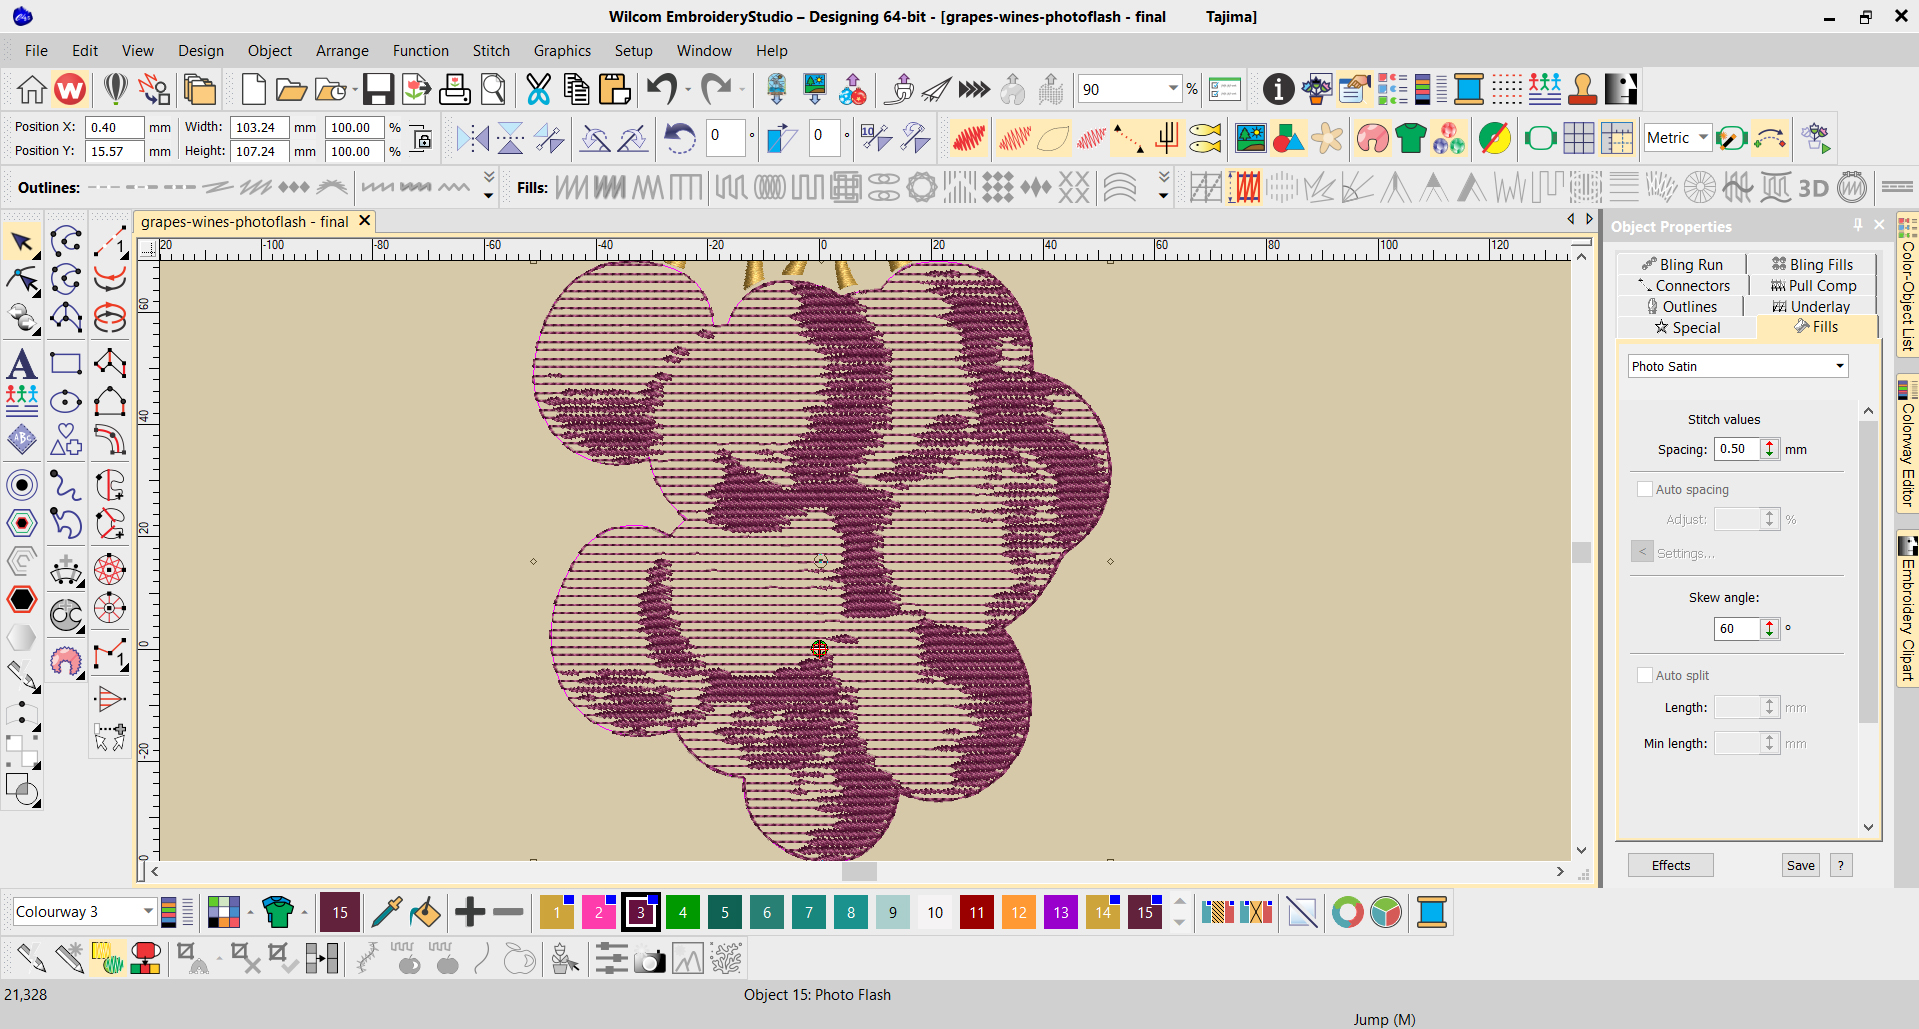
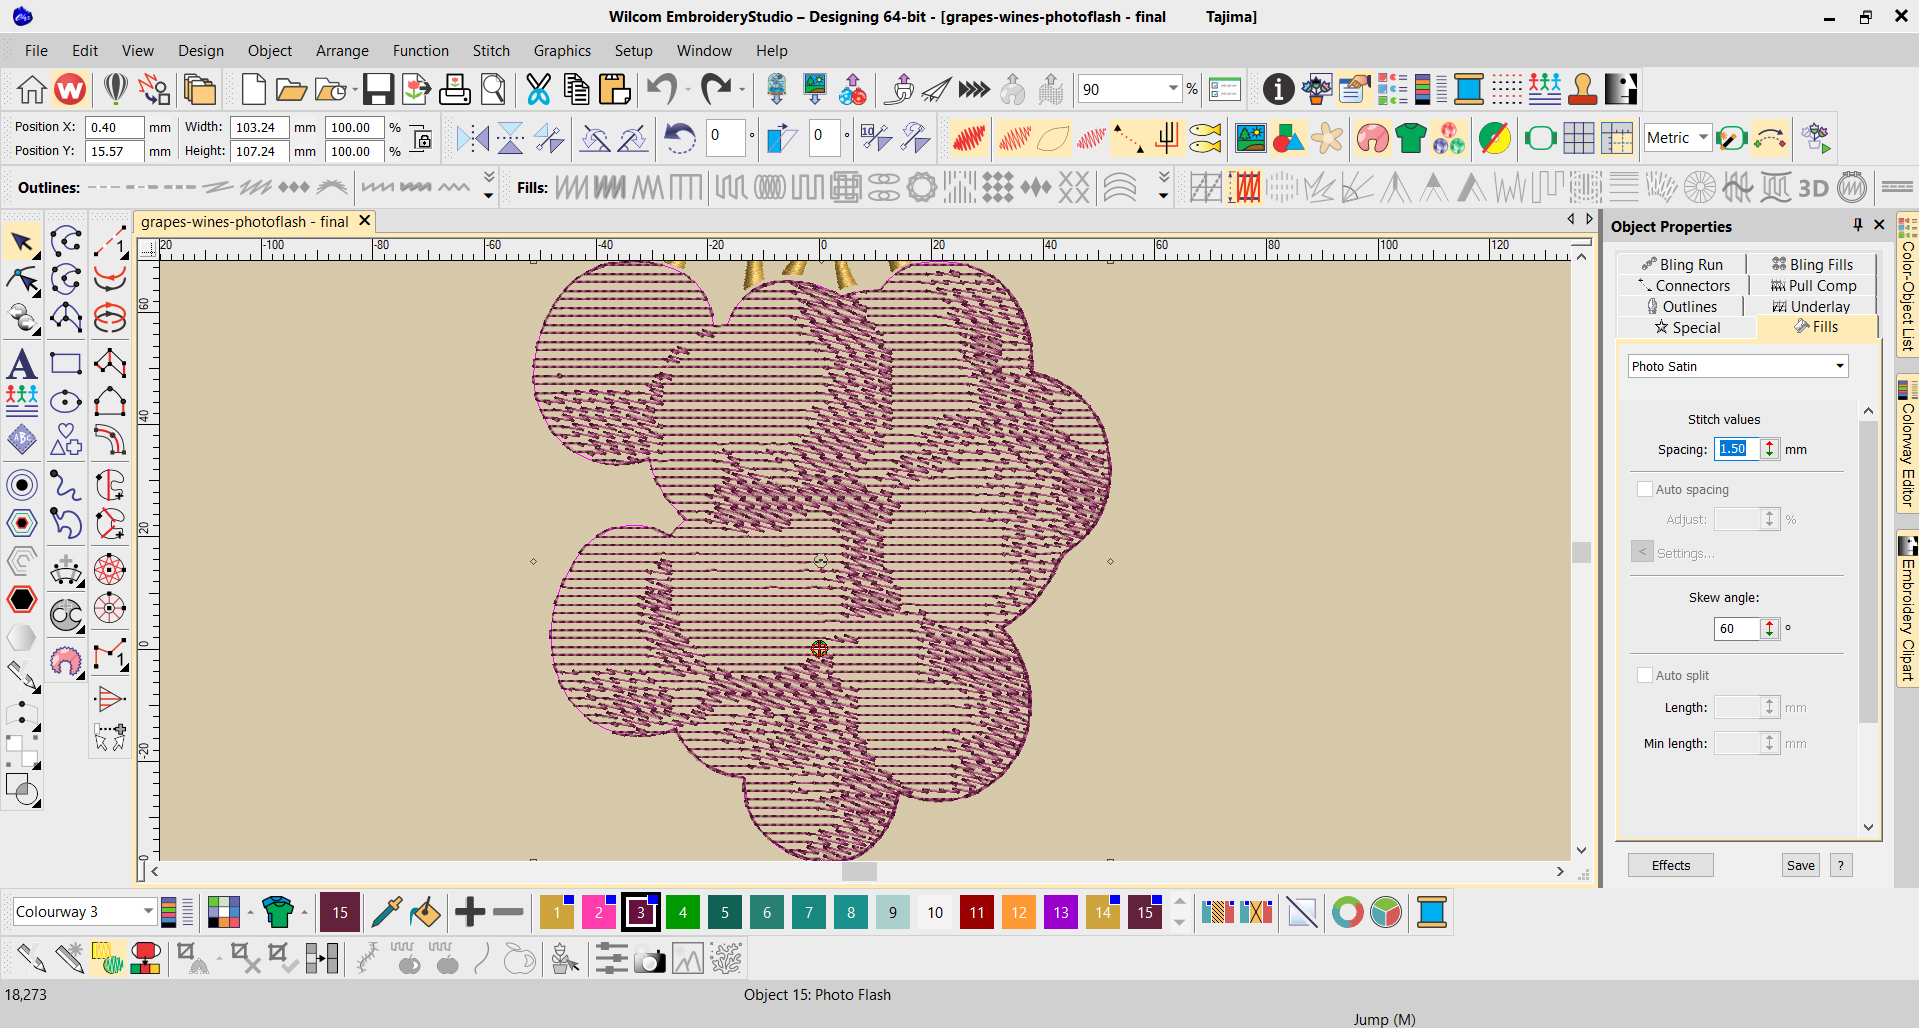
5
Open up the density of the Photo Flash stitch by clicking on the Fills tab and changing the stitch values to 1.5mm while leaving the skew angle at the default 60%.
6
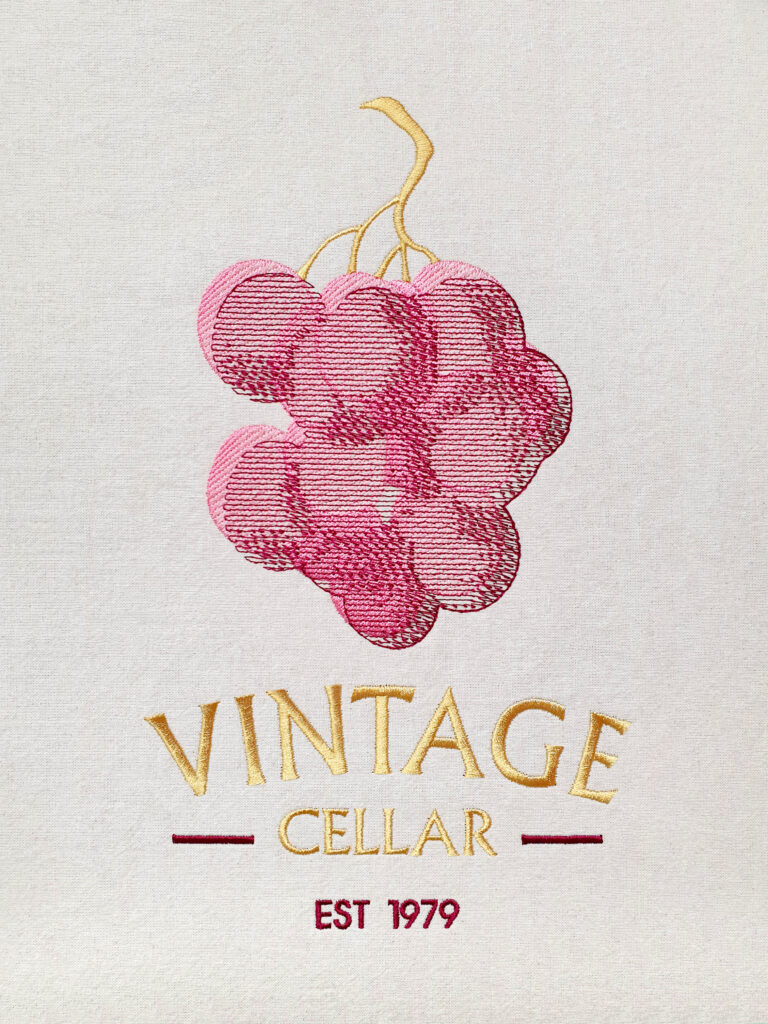
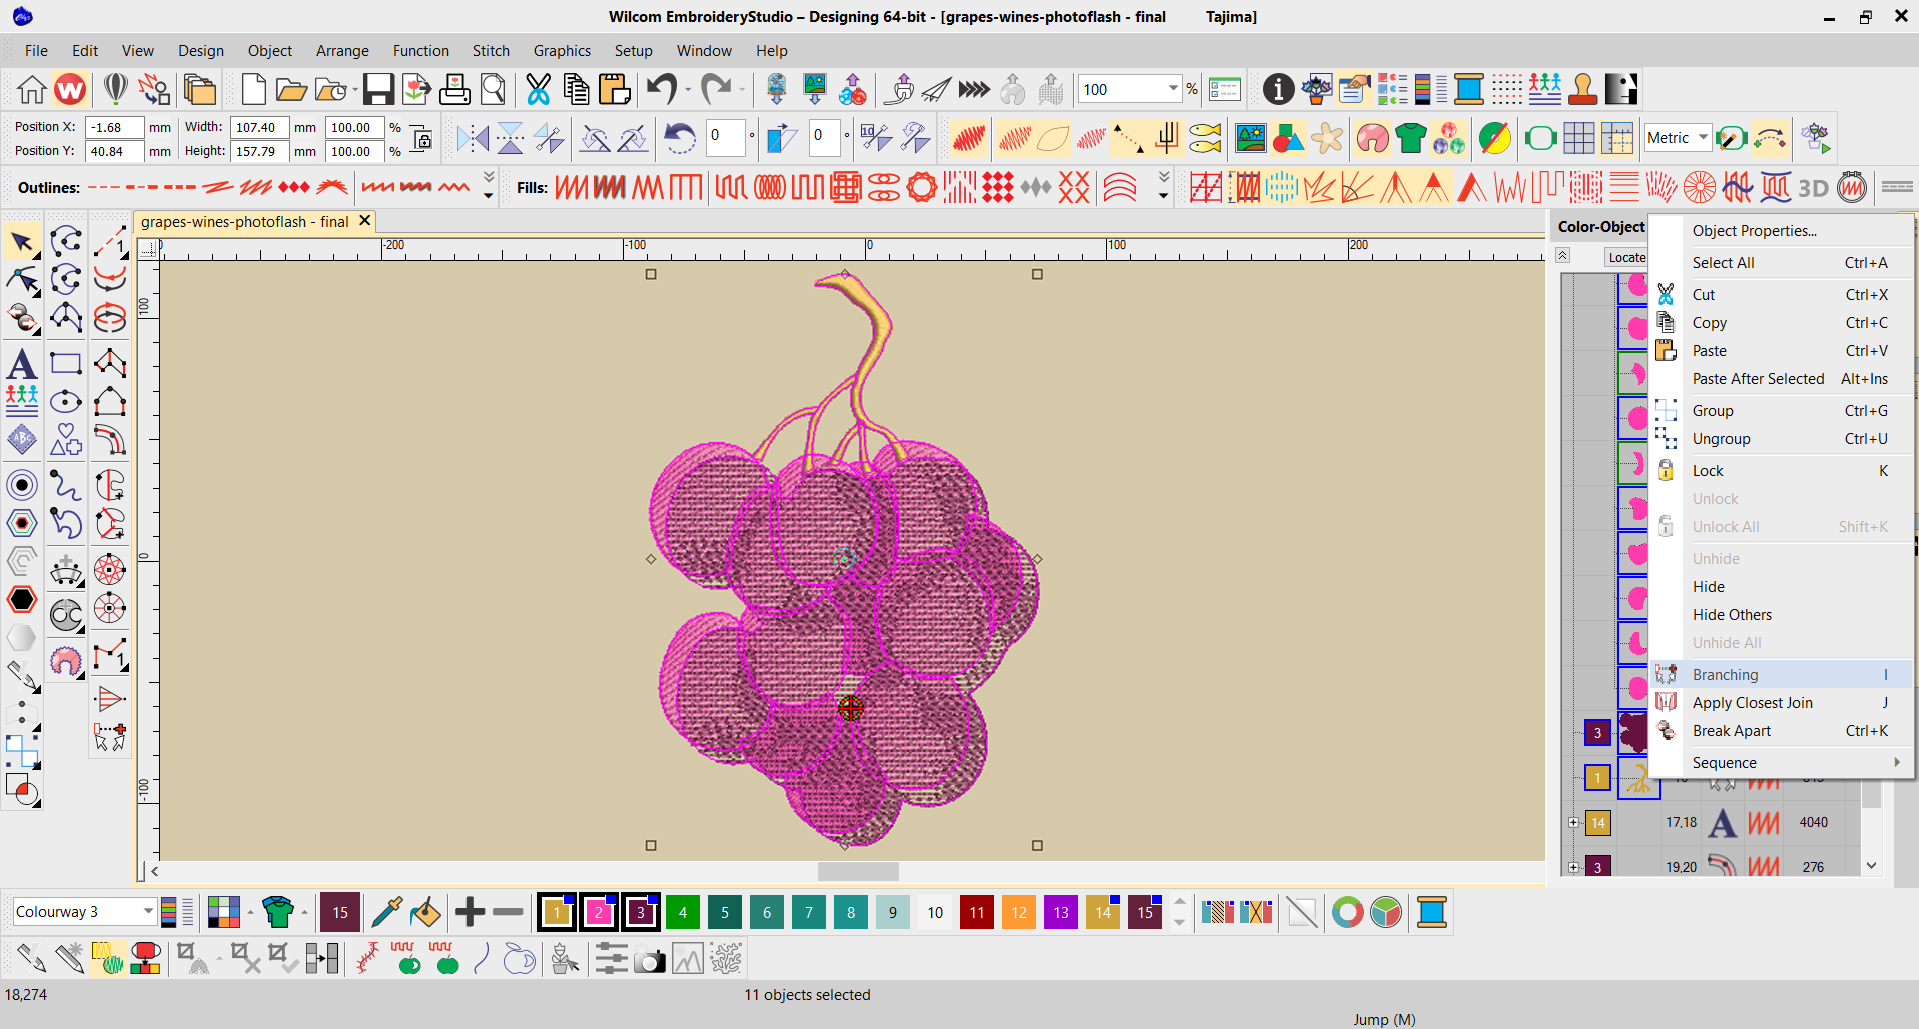
Digitize the stem and use the Branching tool to re-sequence the embroidery design for the best embroidery results.
7
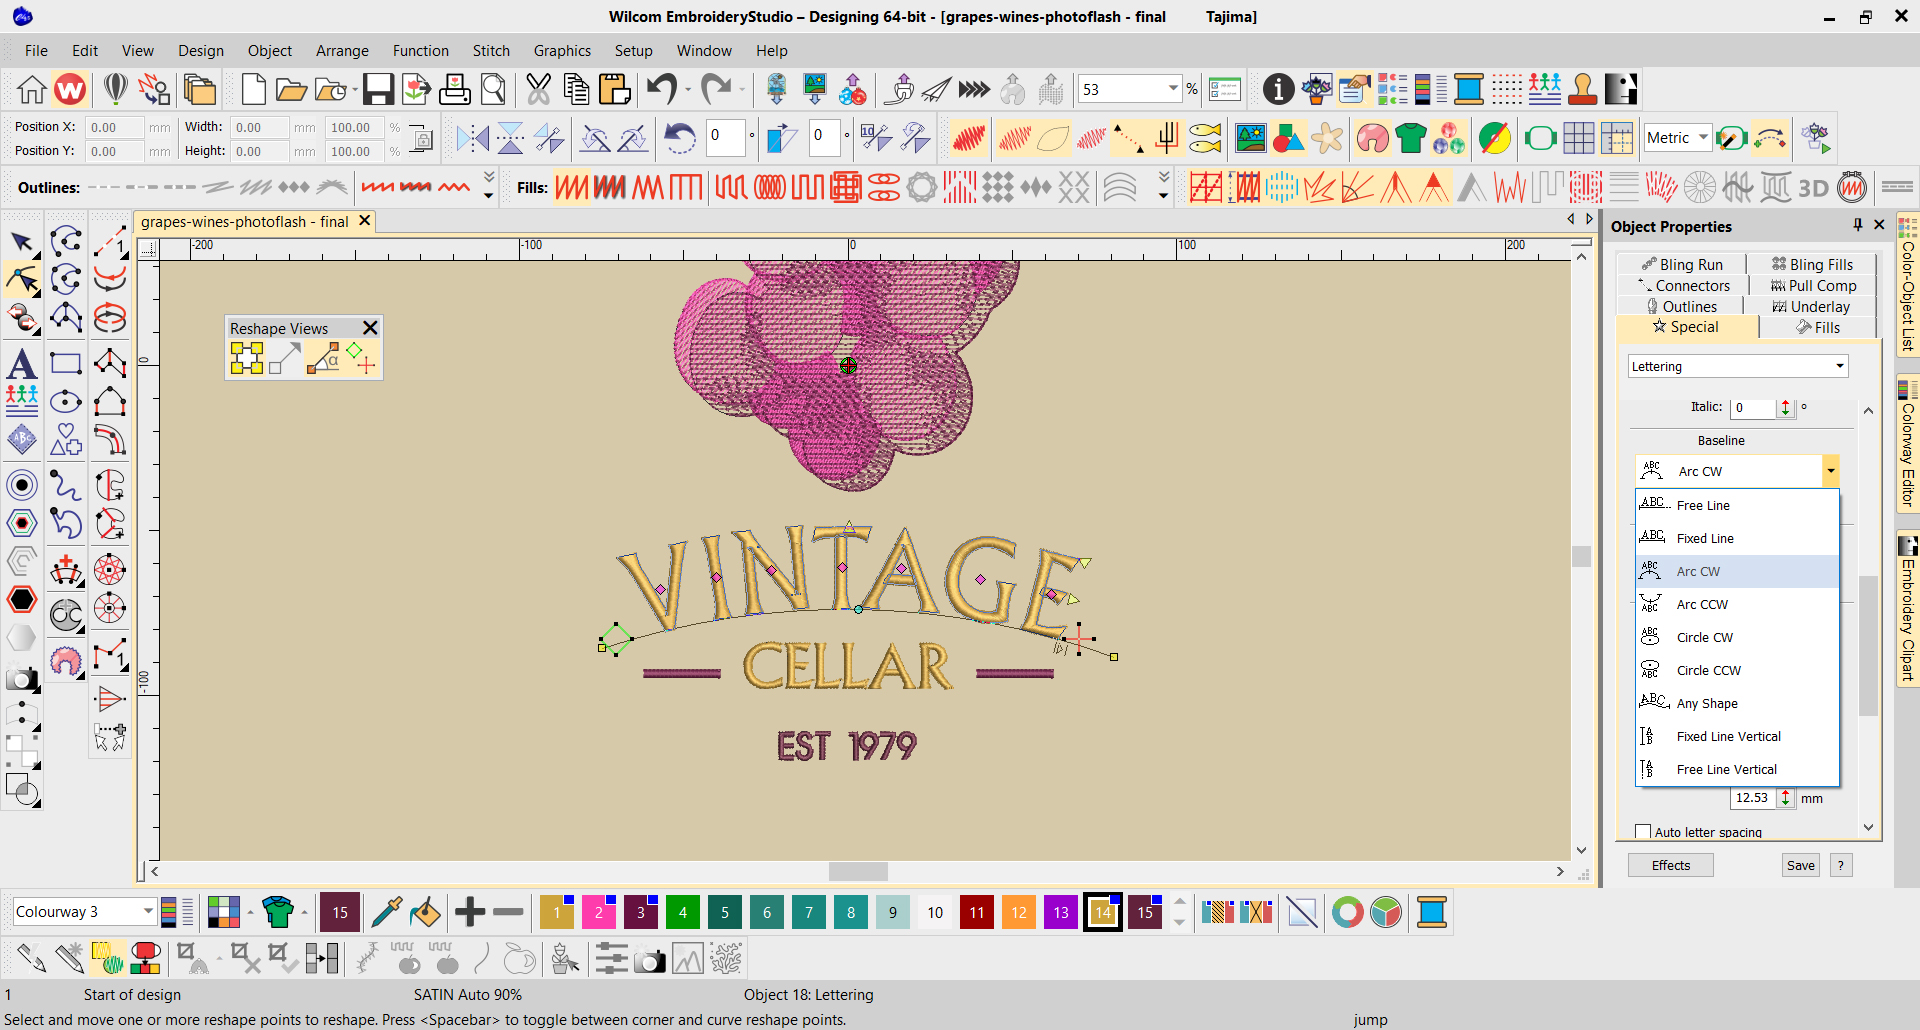
Finish by adding Wilcom’s world-class lettering to the design. Use the lettering Baseline options to create a gentle curve quickly. The Vintage Cellar logo measures 24cm in height and has just over 18,000 stitches.
The Photo Flash add-on Element is compatible with EmbroideryStudio Designing software only.
Ask about Wilcom's EmbroideryStudio Photo Flash Element today!