All of the digitising levels from Decorating up include the basic Outline Tool which is identified as around target icon in the Toolbox.
The Advanced Outline and Offsets is a paid Element identified as the hexagon icon below, I will talk about that shortly.
Simple Offset
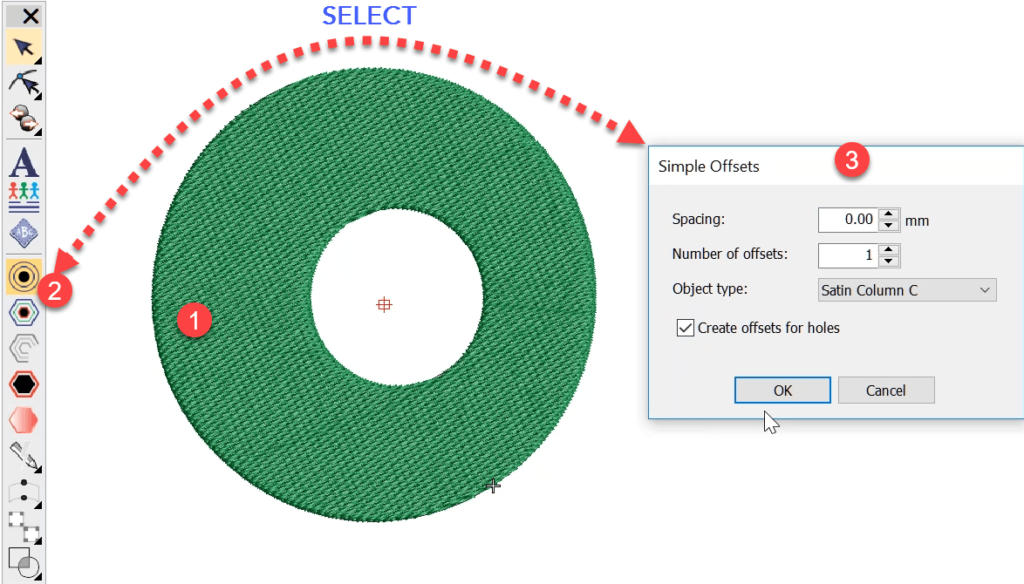
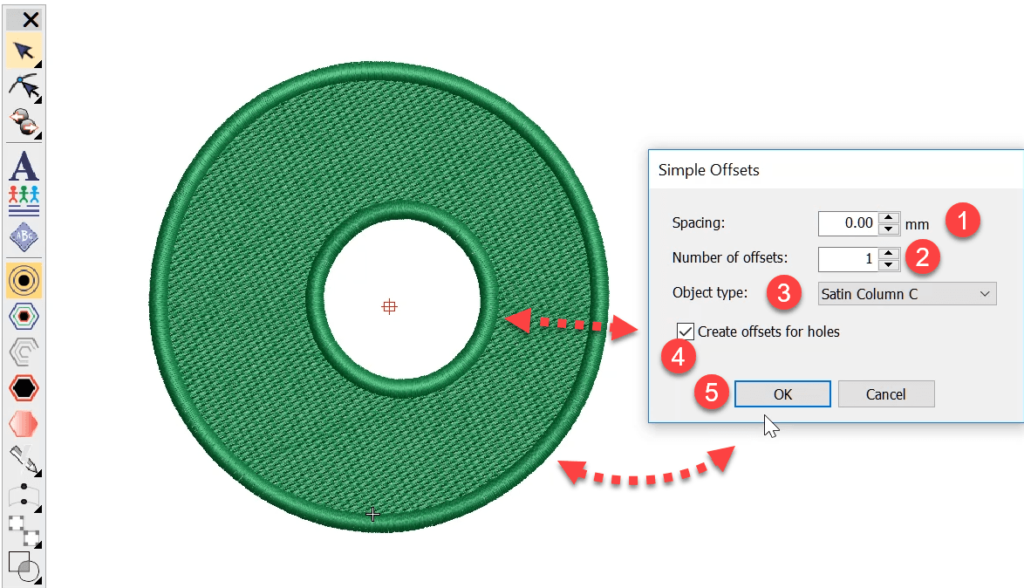
Select the object you wish to place an outline around then the icon. The property box will appear.
Spacing refers to the distance the offset is from the edge of the object, a setting of zero will place the object exactly on the edge, a positive value will offset outside and a negative value will place the offset object inside the edge of the shape. The number of offsets = how many repeats and the new objects will be duplicated on top of each other.
The type refers to the three offset types Run Triple Run or Satin Column.The create for holes is obvious.
The properties of the offset created can be changed after they have been created.
Knock down stitch for a group of objects
One of the best features of the Offsets tool is the ability to to create a knockdown stitch under a group of objects. See the video below for an example
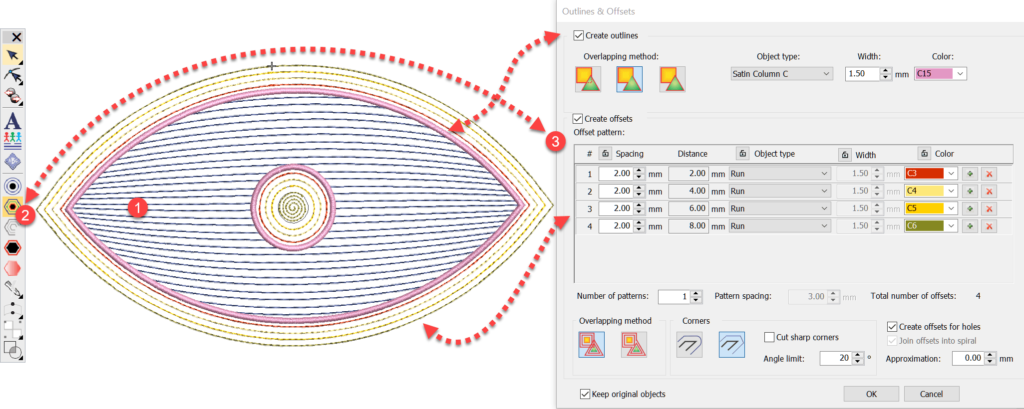
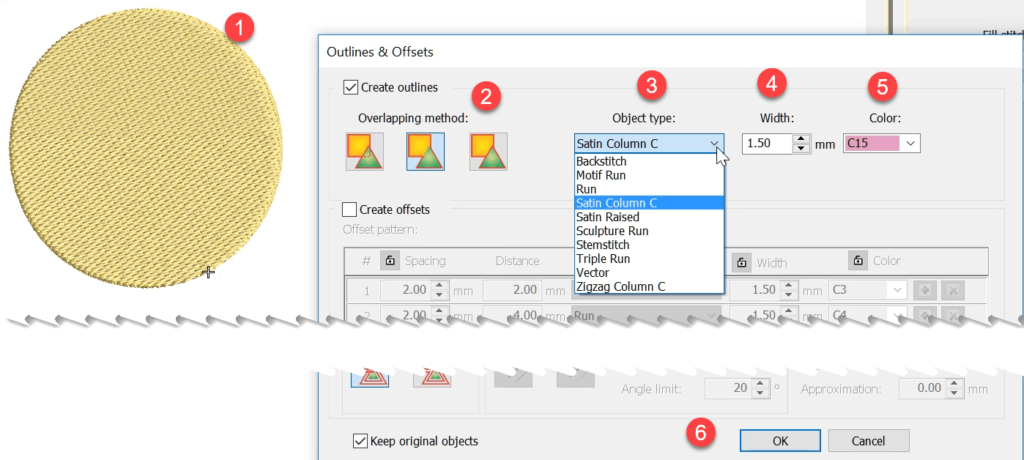
Advanced Offsets Dialog
As you can see from the image above the Advanced Tool has many more options. Selecting he hexagon icon will open the Settings box. the top half deals with the Outlines and the bottom the Offsets, you may have either or both selected, depending on your requirements. Let’s deal with the Outlines first.
Advanced Outline Settings
First, the object must be selected to activate the tool. Step 2 is to select the overlap method, when one object is involved there is no overlap so the setting is not important and any can be selected. (See next section) Step 3 is to choose the outline stitch type from the drop-down. Step 4 if the previous selection requires a width input then choose it now, it can be altered later in the properties if required. Step 5 the color selection drop-down and Step 6 to OK and activate.
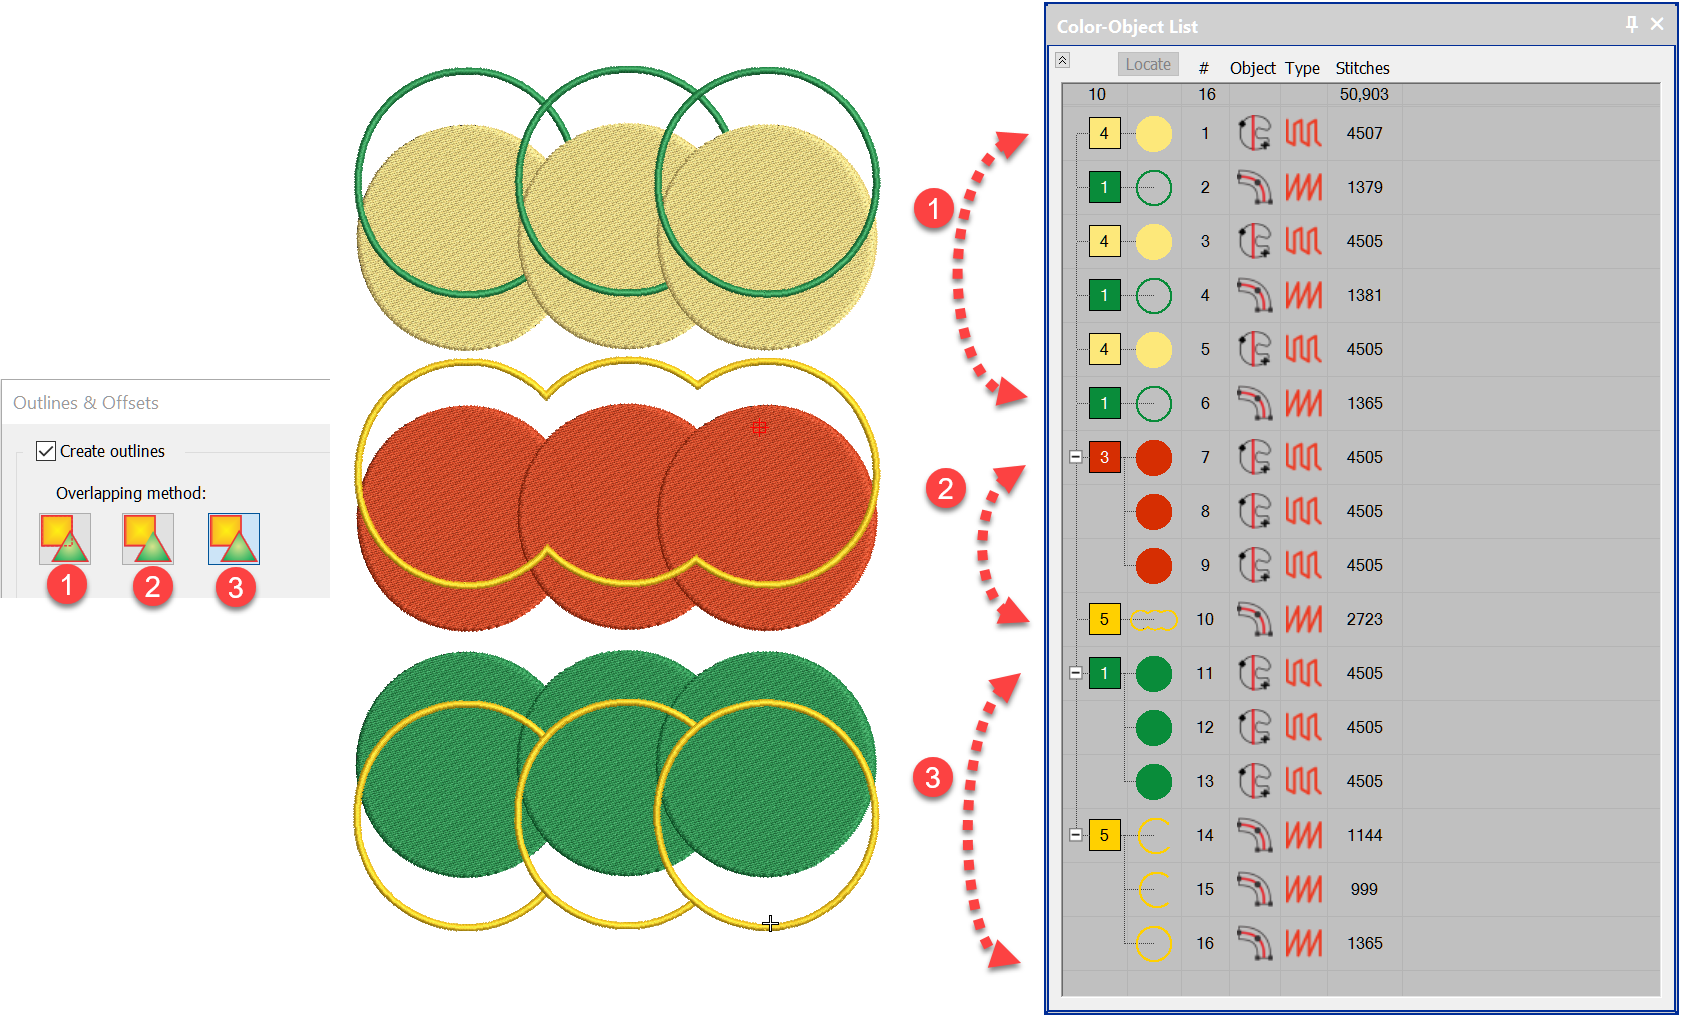
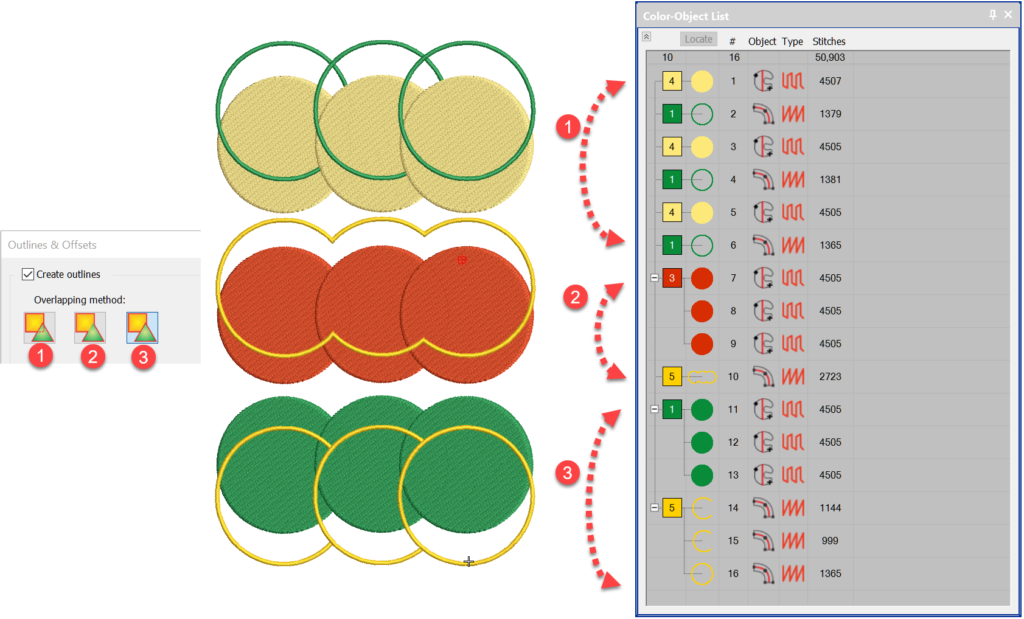
Overlaps
I have offset the outlines in the above image to demonstrate the 3 different overlap settings.
1. Three complete overlapping outlines, the overlaps are stitched but no seen
2. A single outline around the extremity of the three shapes
3. Overlapped outlines removed to save stitches. Closest join is applied so the outlines are stitched as one with no trims
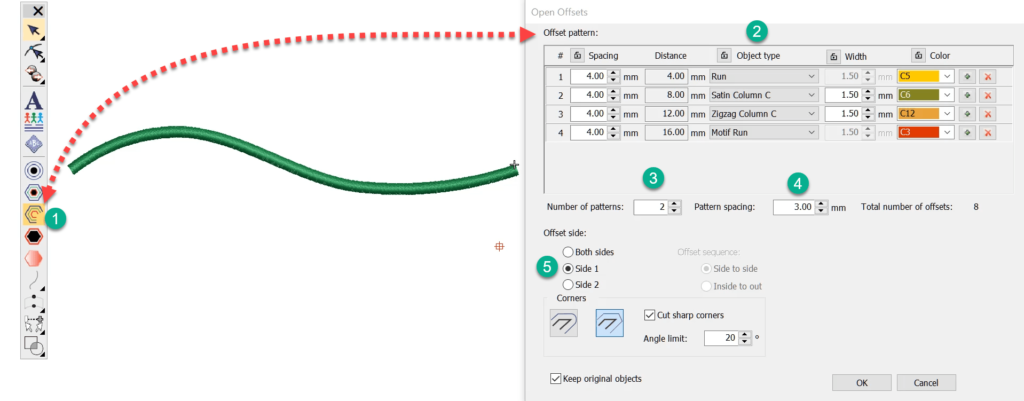
Open Offsets
The Open Offsets tool is the next down the list and looks like a broken hexagon.
To create the offset pattern choose the spacing stitch type, width if applicable and the color, at position 3 in image above select how many times you want the pattern to repeat and the offset distance, position 4.
And at position 5 you can select which side you want the patterns to sit.
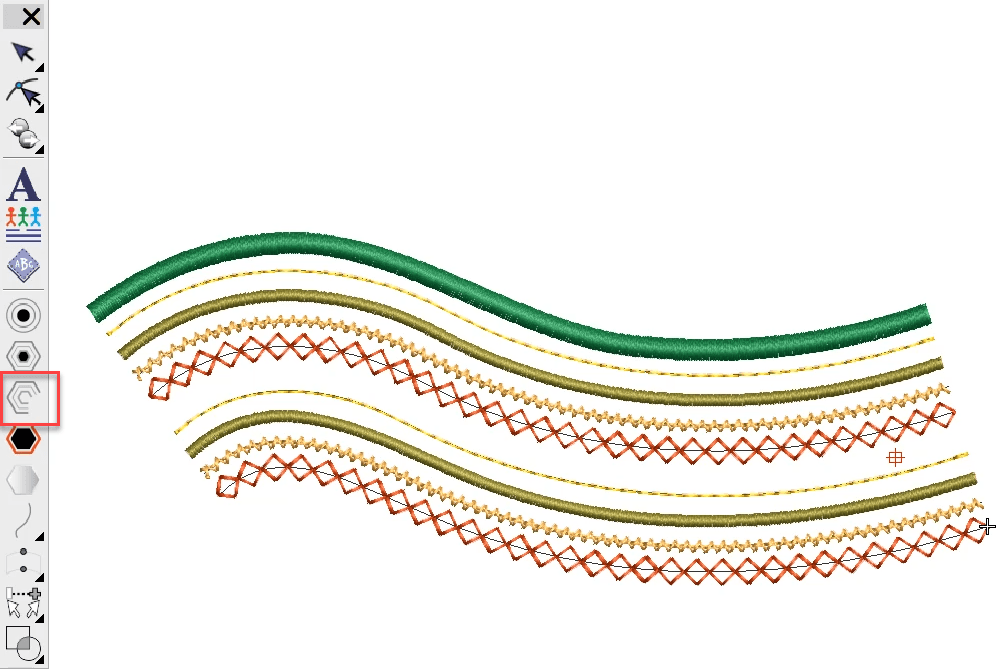
Result
4 objects in the pattern repeated once with a spacing of 3 mm between patterns.

Perfectly GREAT video – thank you!