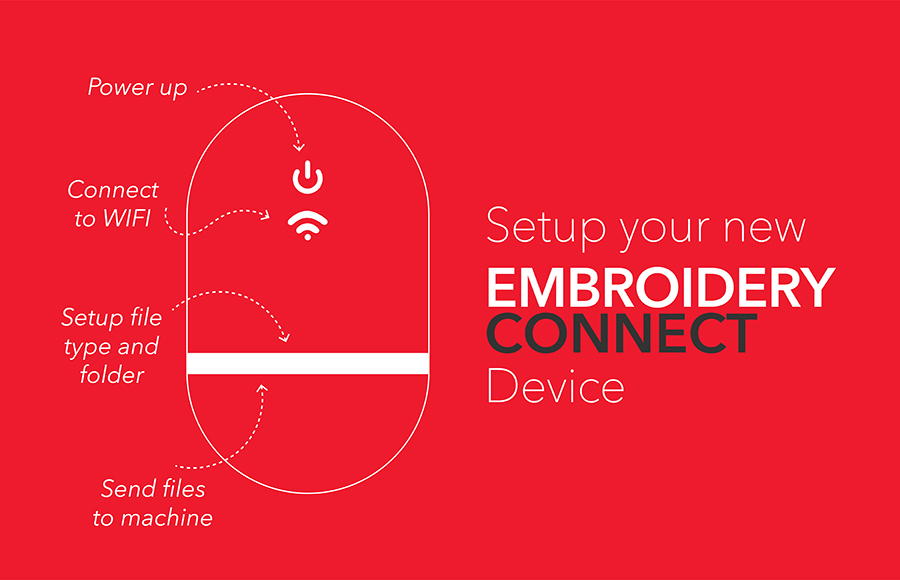
This “MAGIC” device will send your embroidery files from your EmbroideryStudio 4.5 software directly to your embroidery machine via your wireless network.
The setup is simple and relatively quick
Attach device to PC.
Open Hub software.
Join the wireless network.
Provide basic details of machine and file type.
Attach device to your embroidery machine.
Send files.
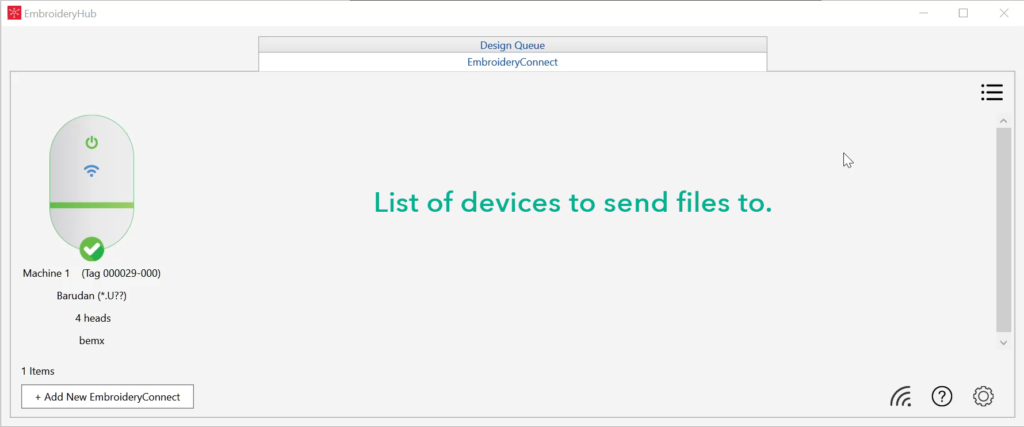
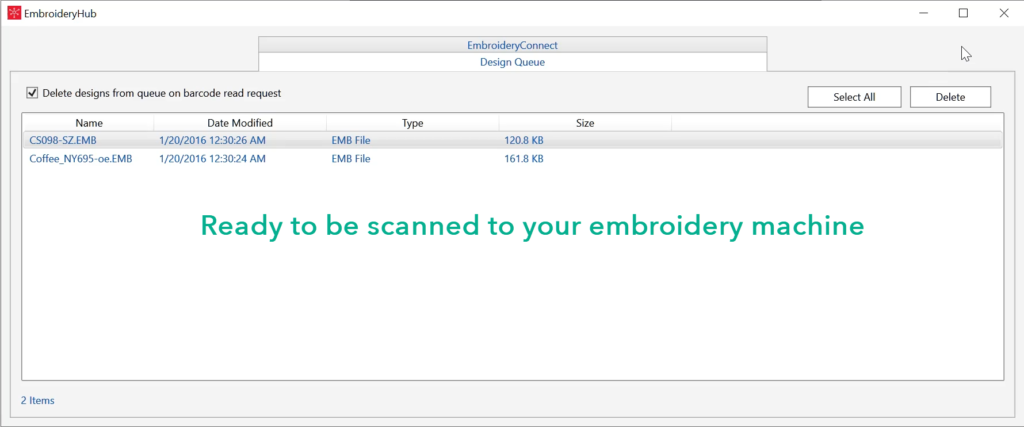
There are two methods to send a file to the machines.
A) Send directly to a designated device.
B) Add designs to a queue and down load from the queue to a particular machine using a barcode scanner (see image below).
It is anticipated the device will work on the majority of embroidery machines.
Below is a link to a list of machines that have been tested and the device works.
If your machine does not appear in the list it does not mean it will not work, only that there has been no opportunity to test. If in doubt please contact your local distributor.
2 thoughts on “Setup your NEW EmbroideryConnect device”
How do I create folders for the embroidery connect?
I have repeat clients that I would like to have individual folders made.
Do I set these up at the automate or on the computer?
thanks,

How do I create folders for the embroidery connect?
I have repeat clients that I would like to have individual folders made.
Do I set these up at the automate or on the computer?
thanks,
Thanks for writing about embroideryconnect setup ..