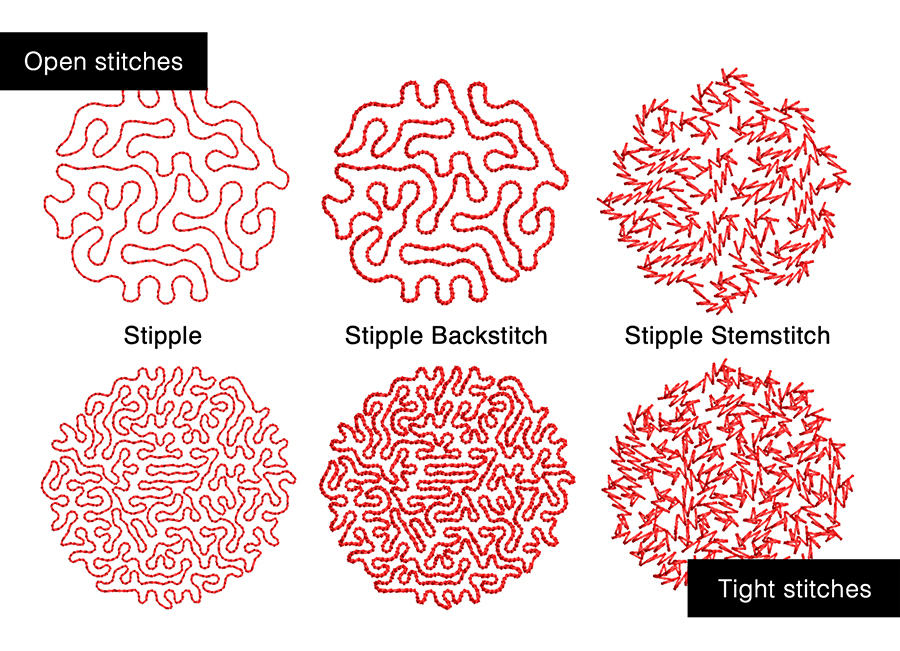
The Chenille Effect
David Sharp, a Wilcom UK customer, has used one of the numerous creative stitches in Wilcom’s EmbroideryStudio e4.5 Designing to create the look and feel of Chenille without the need for expensive specialized attachments. He tells his story to Images Magazine.
We love it when Wilcom customers innovate with our software and find new ways to create an ‘old look.’
David Sharp combines this unique Wilcom stitch type with a thick Madeira thread.
Burmilana is 3x thicker than your standard embroidery thread with a No.12 weight and is perfect for this Chenille effect.
Wilcom’s Shading & Open Fill Element
This Element includes 3 Stippling Effects, a method commonly used to create textured fills.
The Stipple Fills meanders randomly within a closed shape.
Stipple Stemstitch Fill
The Stipple Stemstitch Fill produces a jagged, textured fill and the main setting change required to achieve this faux Chenille look is to decrease the Stipple values or stitch density. Decrease the Loop Spacing to a value of 1. This tightens the meandering lines and along with the thicker thread produces the Chenille effect. Always test for the best results!
Keep in mind that the machine’s upper thread tension will need to be tightened.
Read more >> Tips & Best Practices
Use the Outline and Offset tool to quickly create a satin stitch outline and tidy up the edges of the Stipple Stemstitch. If working with 3D embroidery, this added satin stitch will help perforate the foam.
Chenille has been around for a very long time. The difficulty has always been that it can not be achieved with a standard
embroidery machine, until now!
See what’s possible and read the entire story in Images Magazine
or see it in action >>
https://www.facebook.com/wilcom/posts/6140524629294567
Contact your local Wilcom distributor for more information about owning
Shading and Open Fill Element