The Auto Start End feature is critical to have set correctly to avoid driving the needle into a hoop but it is more useful than this basic function.
It is possible to place the start and finish point at any point in a predefined location around the design.
The icon is found in the View Toolbar
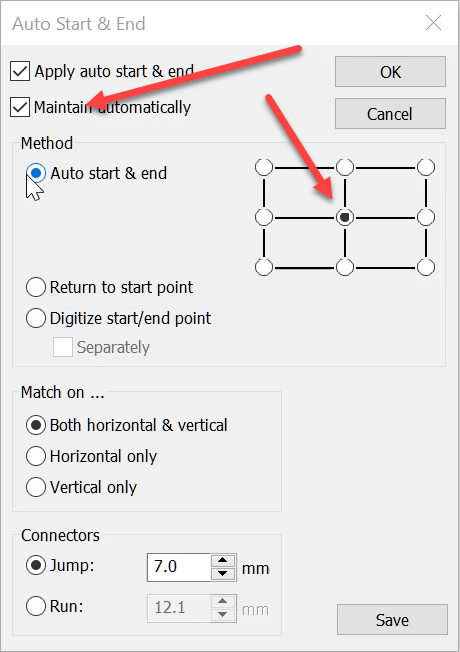
The standard grid position would be in the center.
To maintain the center as you add objects to a design it is important to have the Maintain automatically setting checked.
However for caps I recommend starting at the centre bottom, which will give you some confidence that the needles will not come into contact with the peak of the cap as all stitching occurs above the starting point.
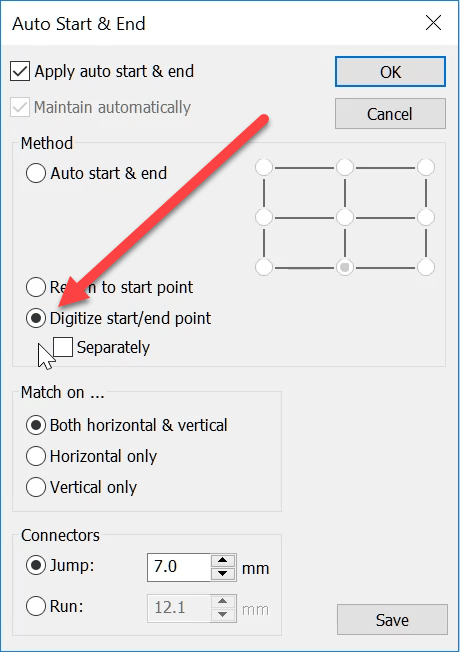
Look to the bottom of the dialog and notice you have the ability to digitize the start and end point.
This can be handy if you are stitching a large design on a single head machine and need to rehoop and begin the next section where the previous hooping ended.
Or when creating coninuous lace on a multi head machine.
View the video below to set the starting point so the design will stitch at a set distance above the start point.
 Consider the possibilities to repair a design that has popped out of a hoop before the design has been completed.
Thank you very informative
Hi Cathy, Thanks I am pleased you got something from the article.
Let me know if you have another topic you would like addressed.
John