Analyzing completed embroidery files is an excellent method to learn from others. Knowing what to look for is key to the learning process and the best places to begin are the Color Object and the Object Properties Lists. Understanding the settings and sequence of objects in a will give you confidence and help you develop…
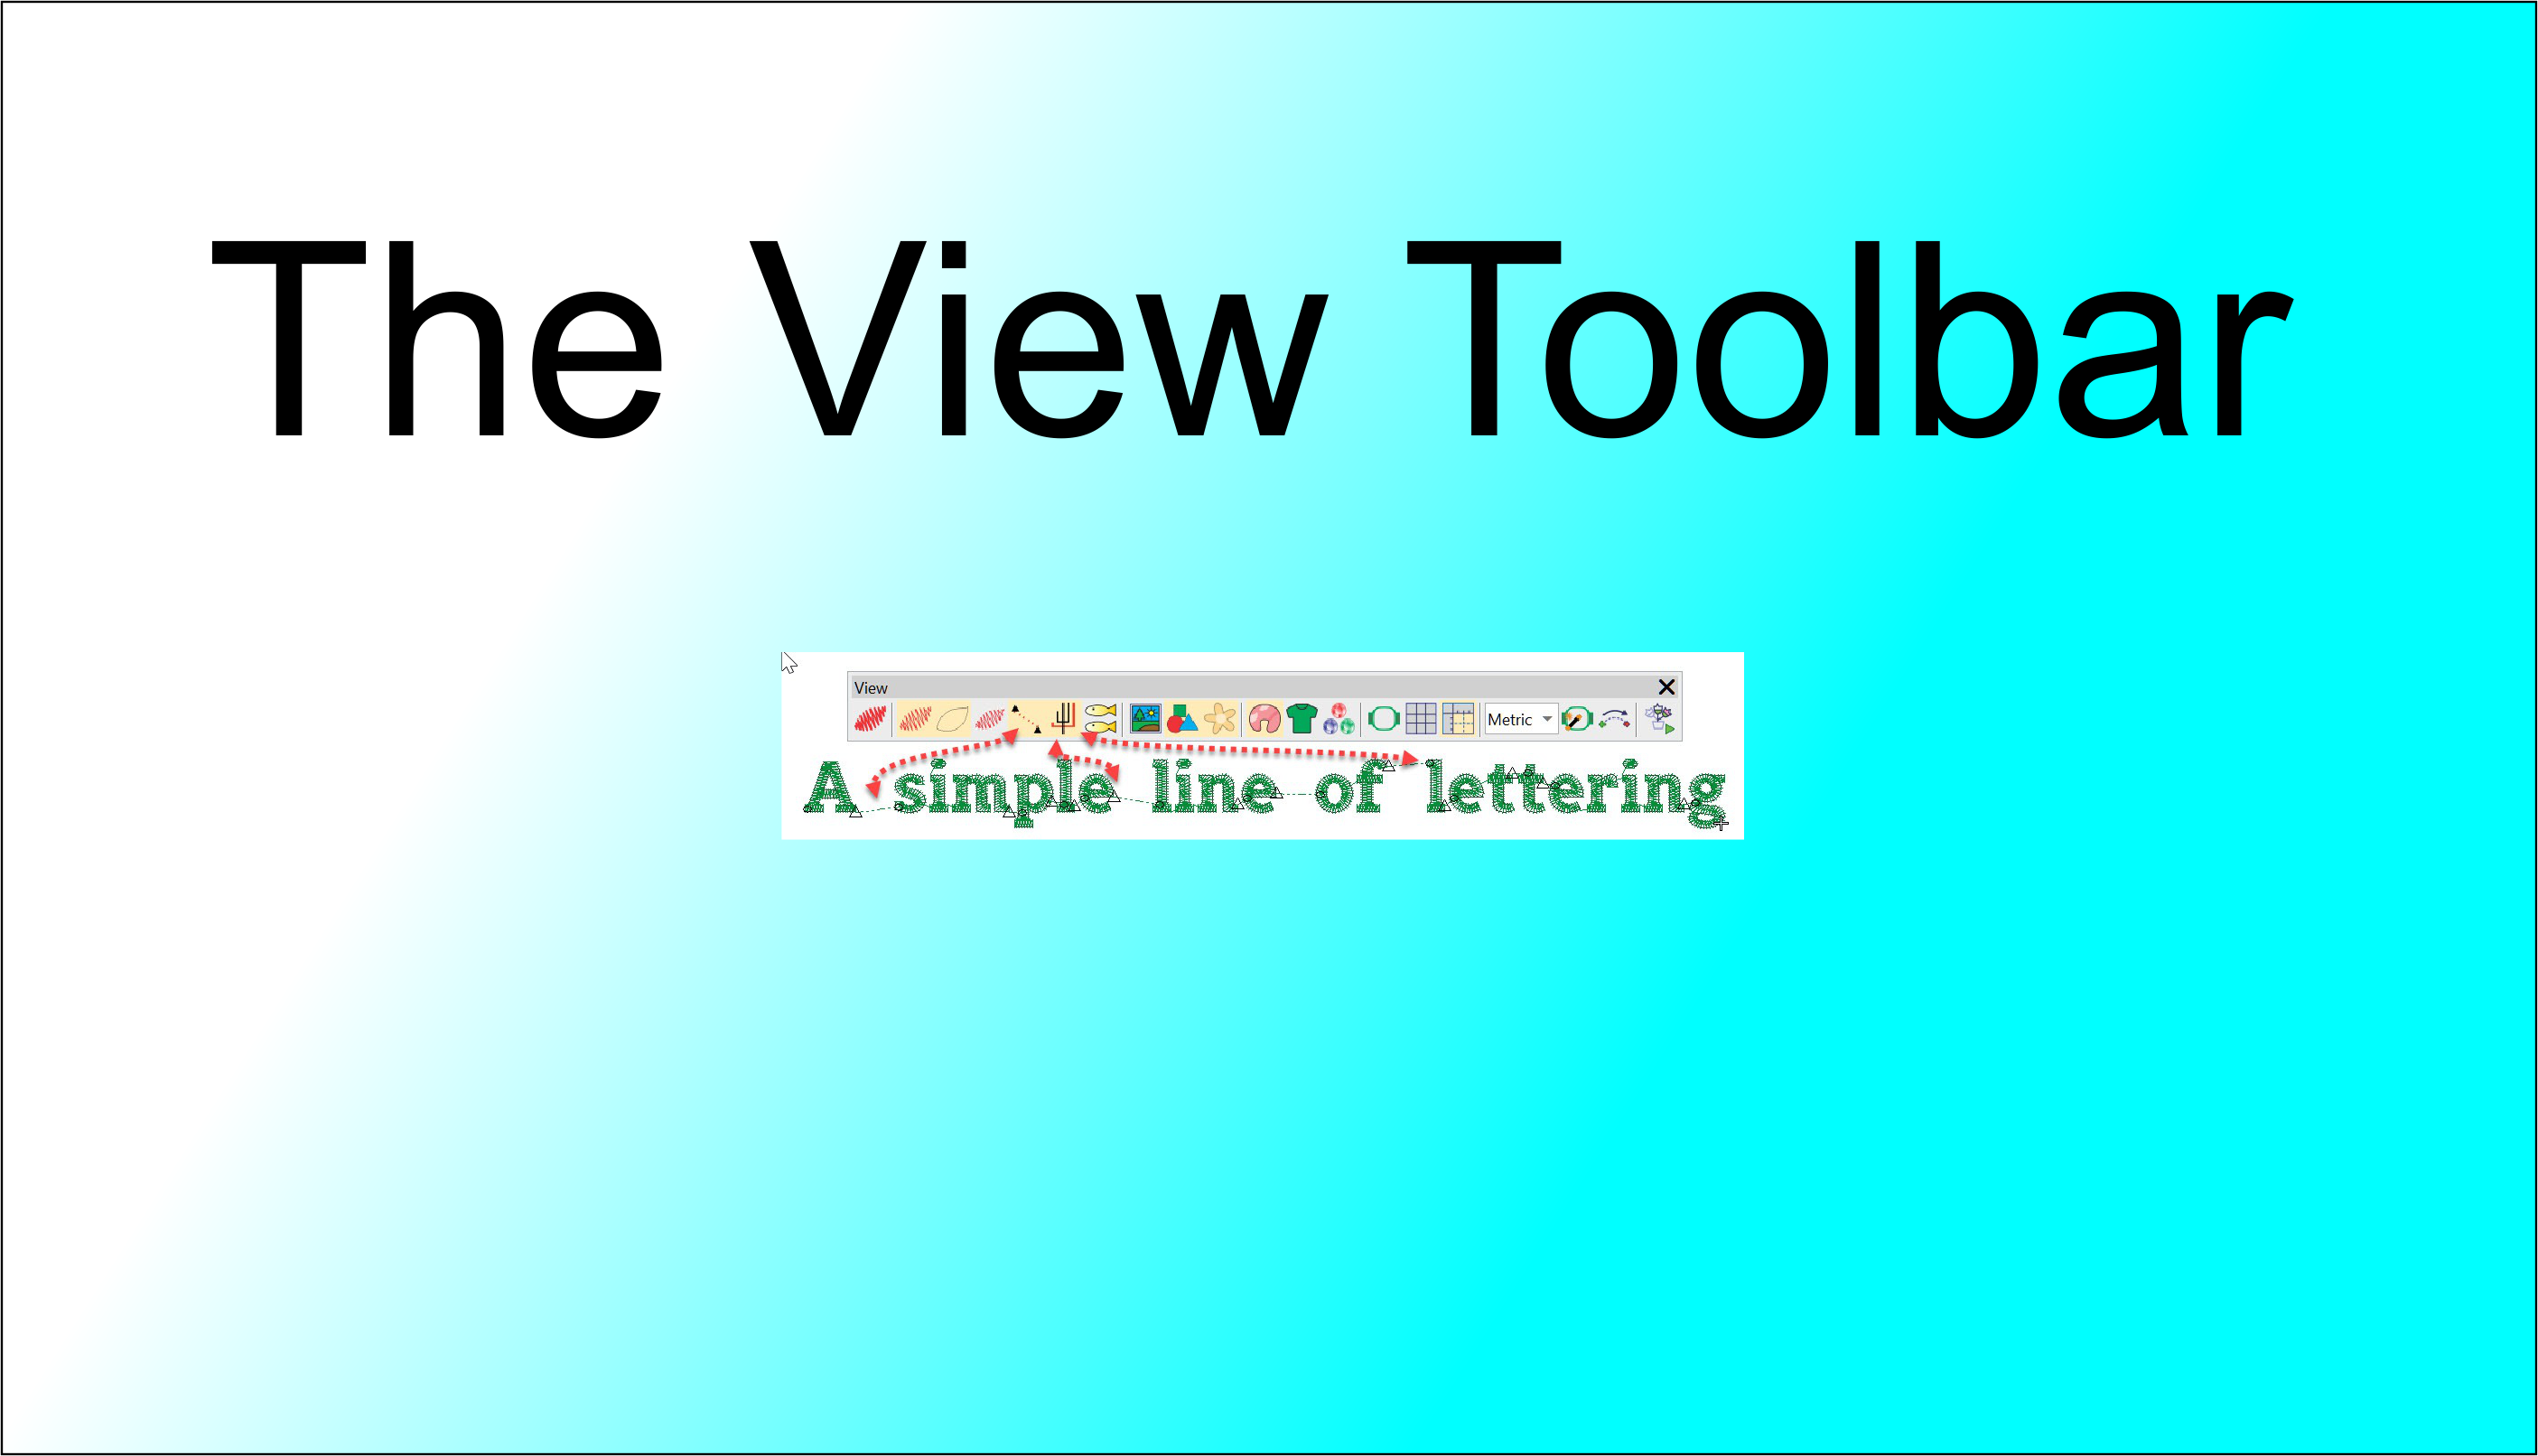
In this article we look at what we can learn about an embroidery file in the different views available in the VIEW TOOLBAR. The First 4 icons determine how you view the design, in turn from left to right: Keyboard shortcut “T” for True View. This view simulates the finished Embroidery Stitch out. Keyboard shortcut…
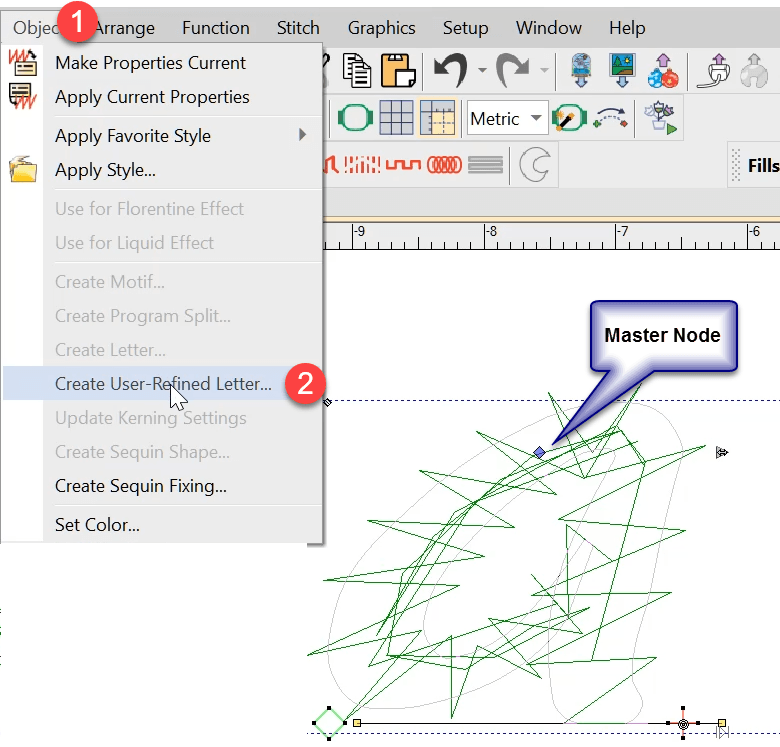
User Refined Letters You may have noticed some letters in some fonts do not perform well when stitched out if the letter size is too small or perhaps too large. Classic examples are the lower case “i”, when the dot on top merges into the vertical column and makes a single shape, and the inside…

Here is a fun exercise creating a Father’s Day design with a minimum of effort.Sometimes you need to get a design out quickly and you know you have suitable and available Clipart to draw from.In this exercise we create a single word – Duplicate – Edit – Modify then add Clipart. Drag and Drop As…
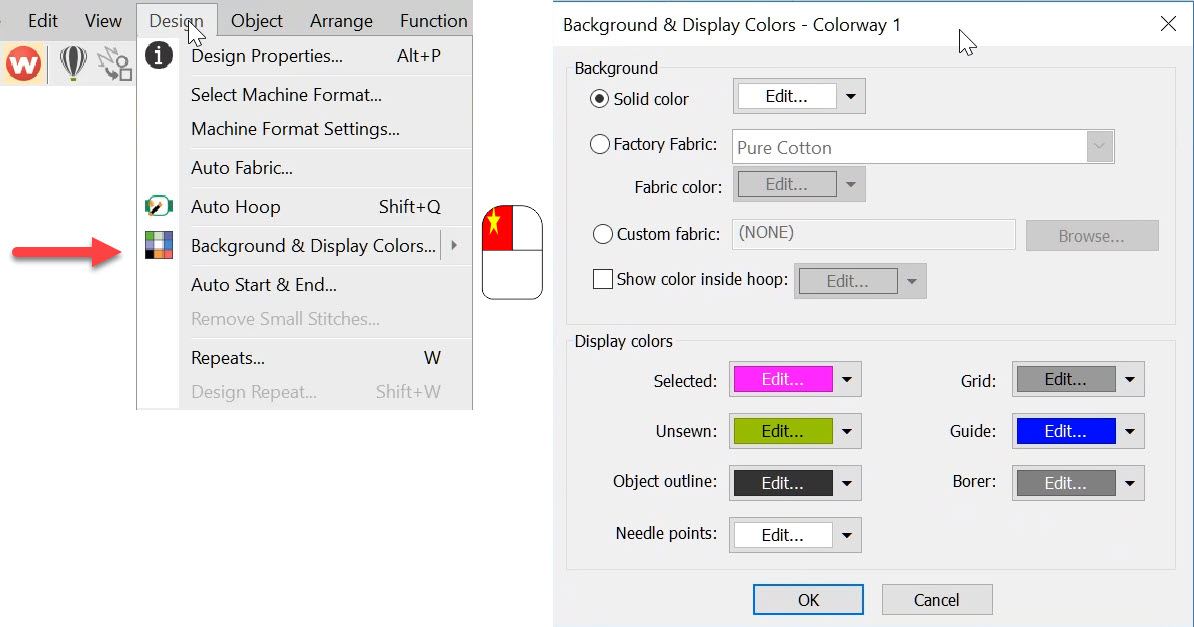
The Background and Display dialog can be accessed from the Design menu. Or the colored cubes and the left end of the color palette. The top half of the dialog box deals with the background on your work area which can be a solid color or a fabric image. It is the bottom of the…
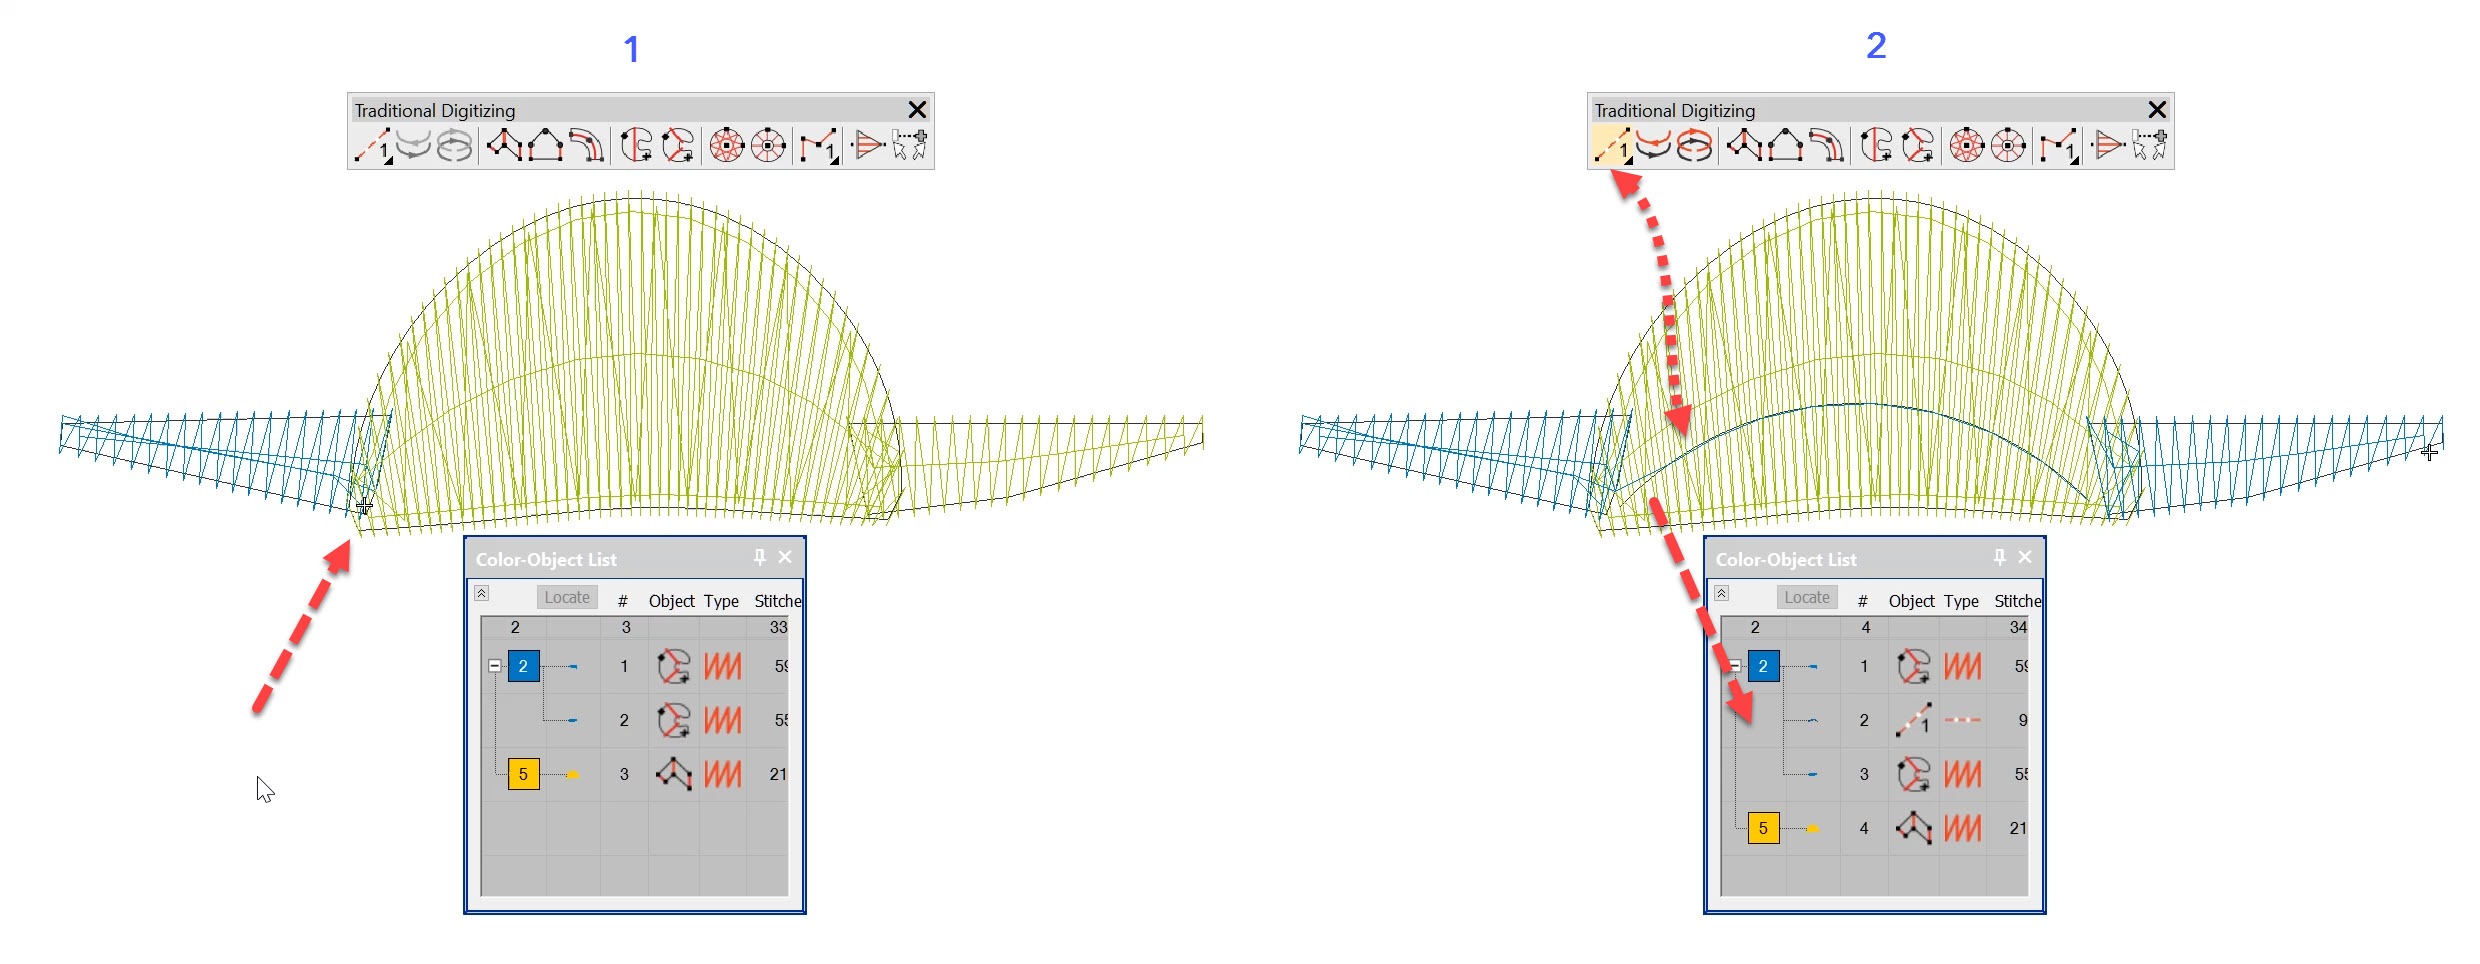
Nesting Objects using the Travel Toolbar Traveling through a design is useful to understand the order of objects in a design but more importantly to identify where thread trims are and if necessary “nest” an object in the sequence. To open the Travel toolbar go the Window Menu>Toolbars and select the Travel Menu from the…
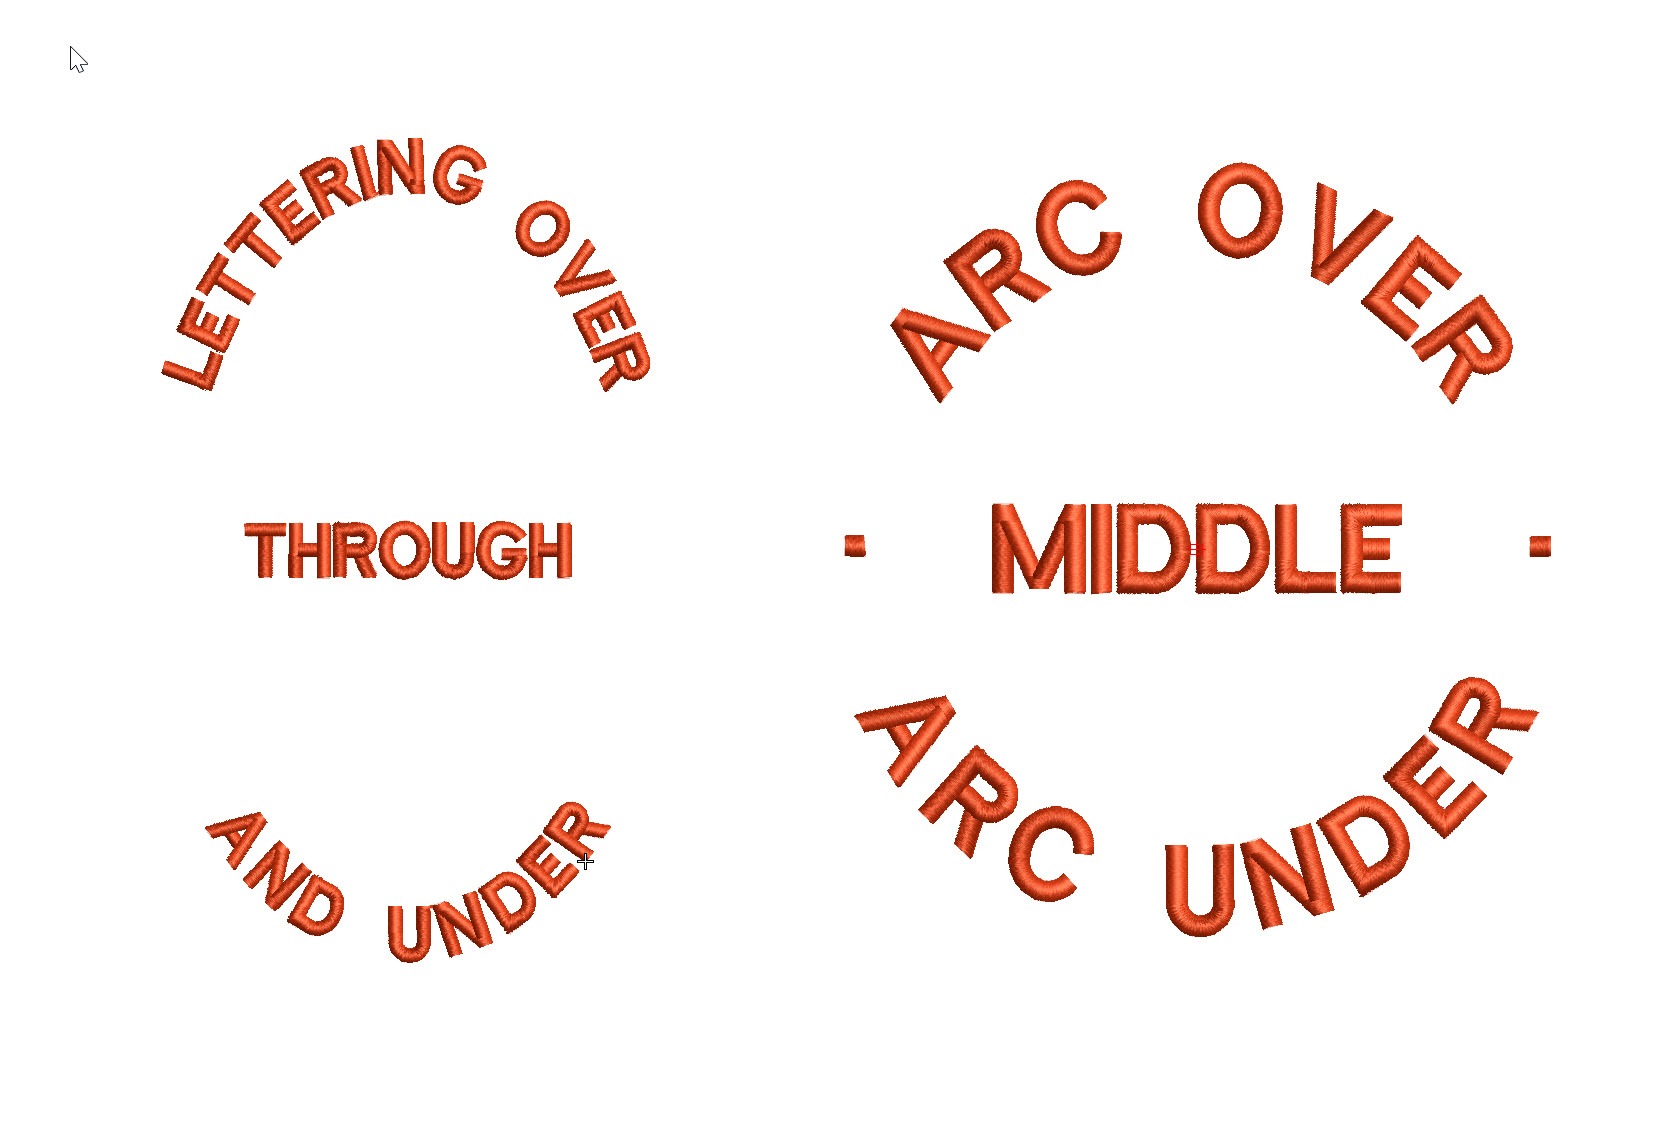
Actually the process of creating a Predefined Baseline creates 3 separate baselines that can be treated individually once they have been created.The feature is particularly useful for circular and elliptical designs that have lettering around the logo and possibly through the middle. The procedure is exactly the same as for a circular baseline but involves…

Keyboard Shortcut “H” is one of my top 10 shortcut keys. Objects need to be reshaped for all sorts of reasons, perhaps to make a slight adjustment to correct a registration issue or improve the shape of a design element. The Reshape icon is found under the Object Select icon in the Toolbox. When the…
With the correct information saved to your embroidery file you could have a paperless system. Nothing will upset a customer more than the wrong colored thread in their logo.Why not keep all the color information in the .emb file? Notice in the image below each element of the design is named and a Madeira thread…
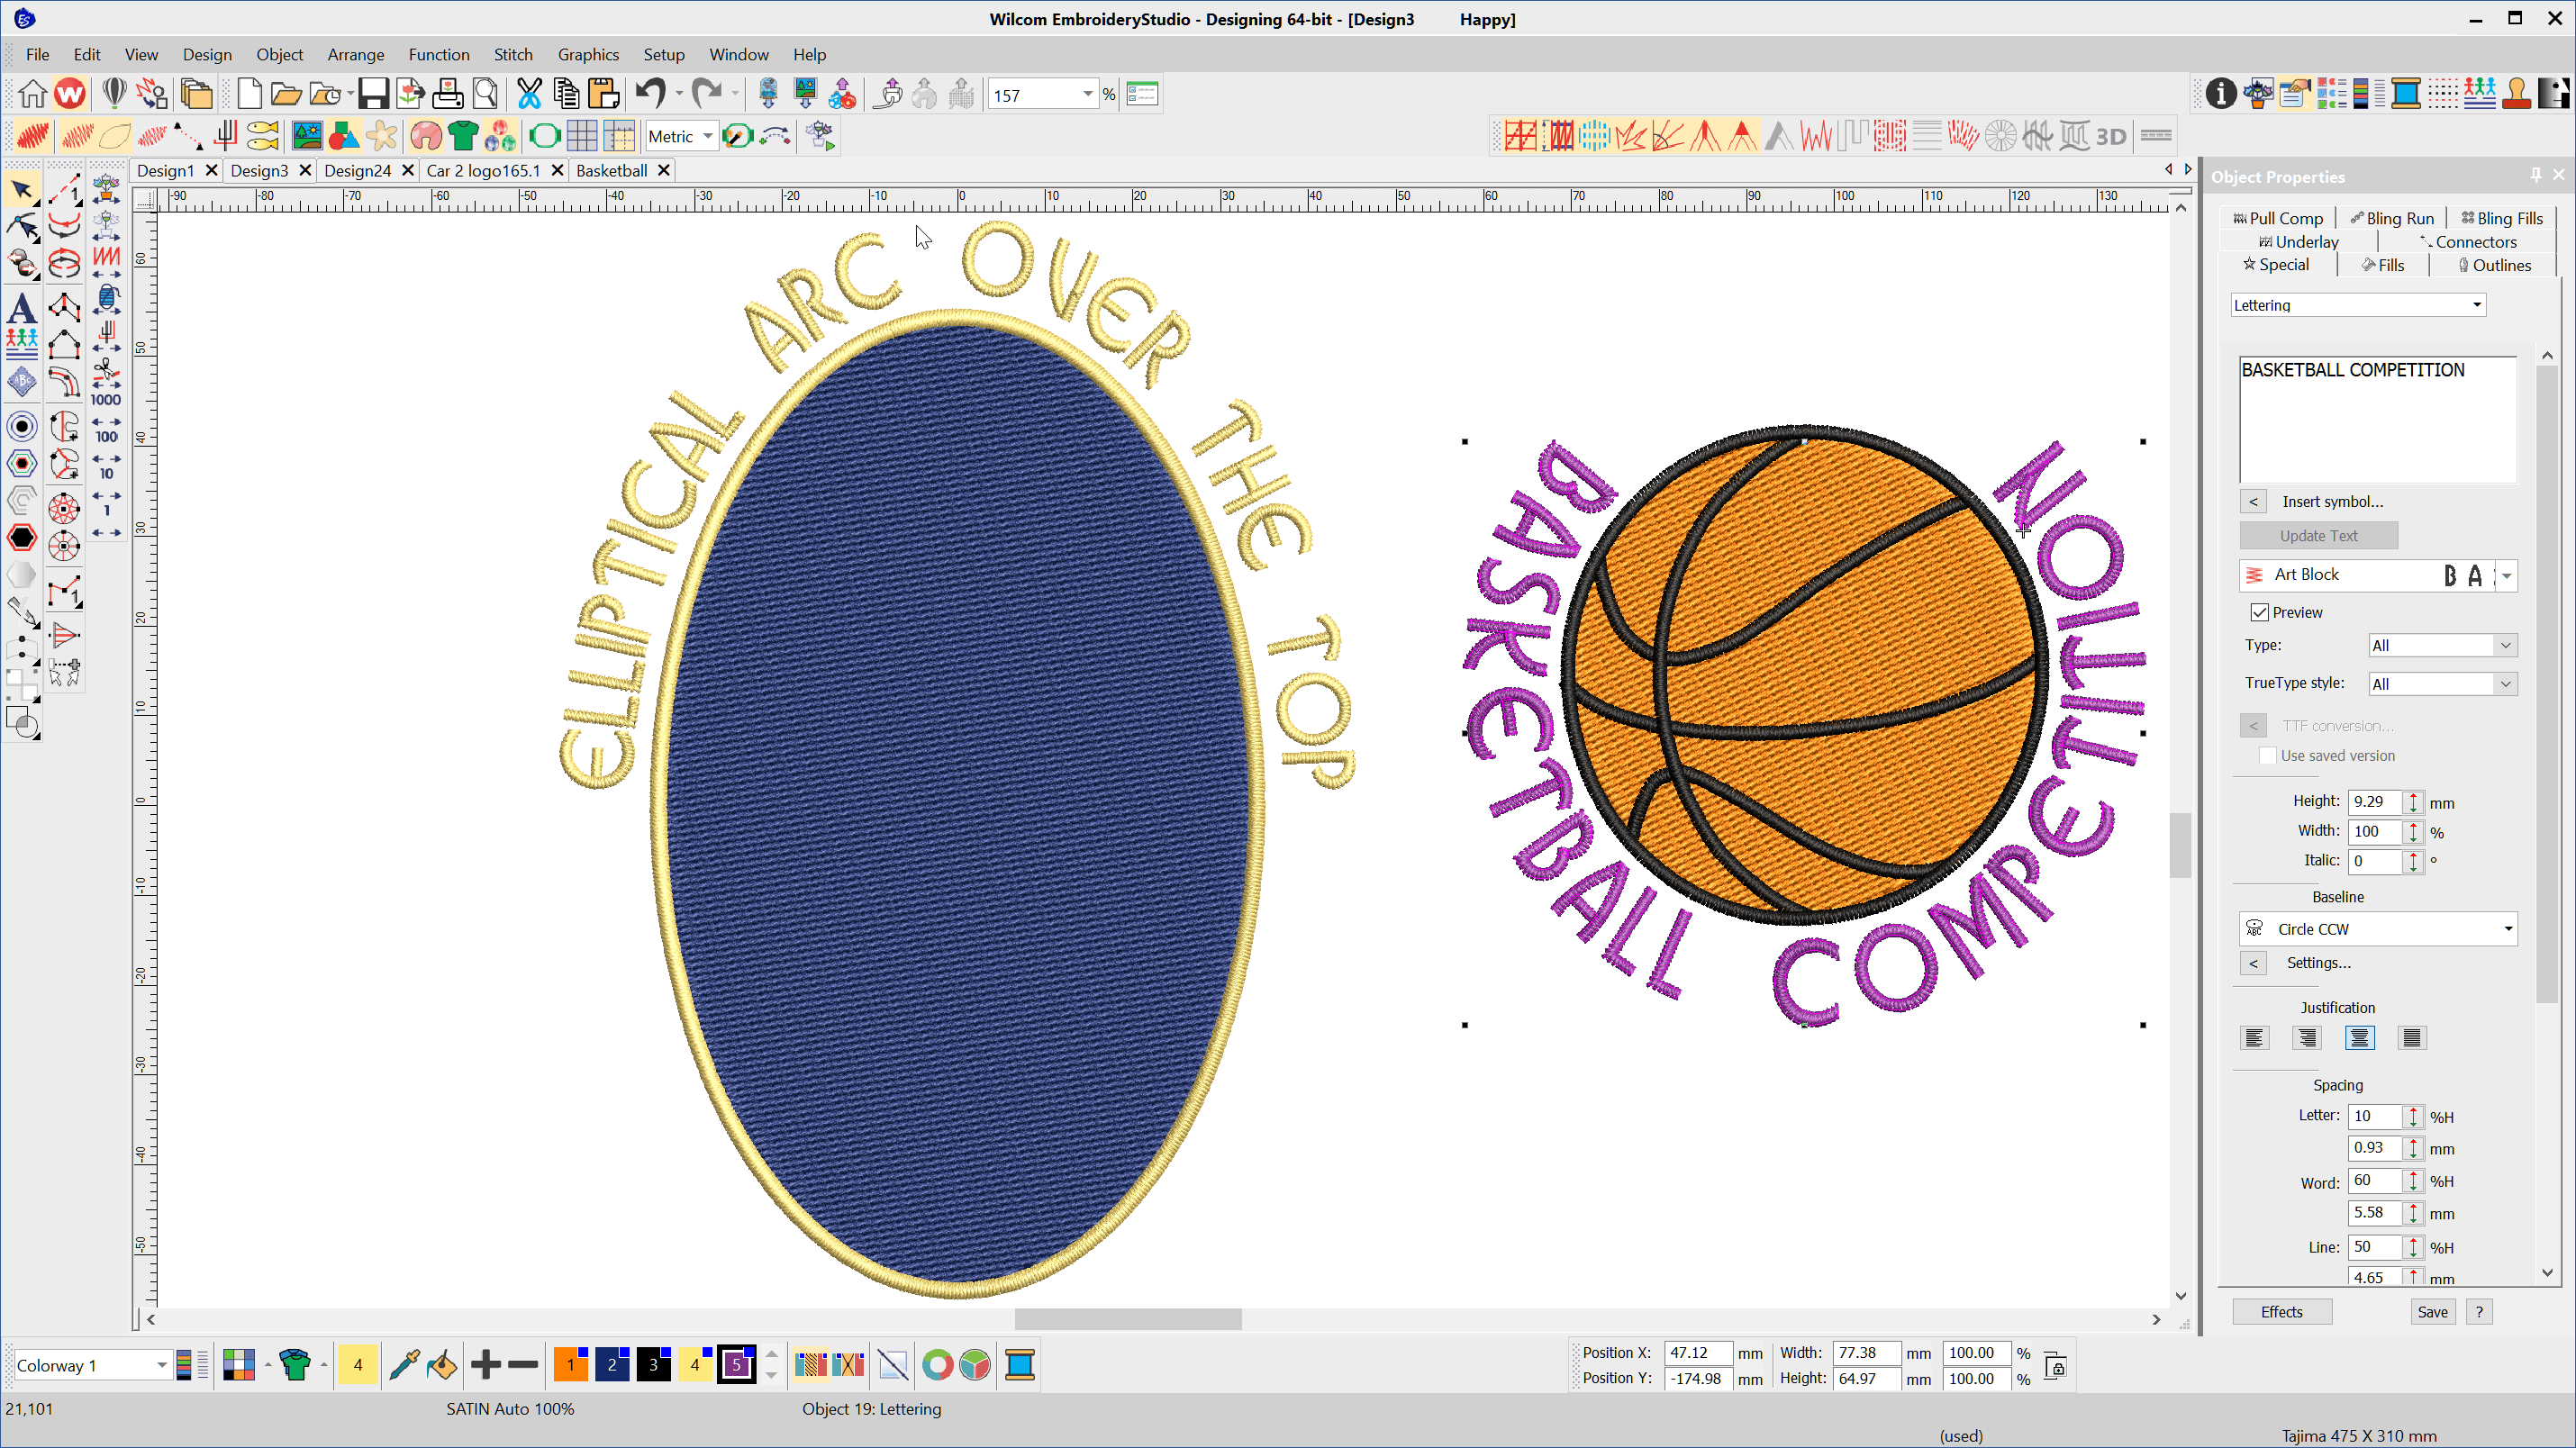
To create lettering on Circular or Elliptical baselines choose the Circle CW or Circle CCW baseline depending on whether you want the line to arc over or under the logo After typing the letters into the lettering property box select the baseline type, select the CREATE TEXT button and left click and release in the…
| Powered by WordPress | Theme by TheBootstrapThemes