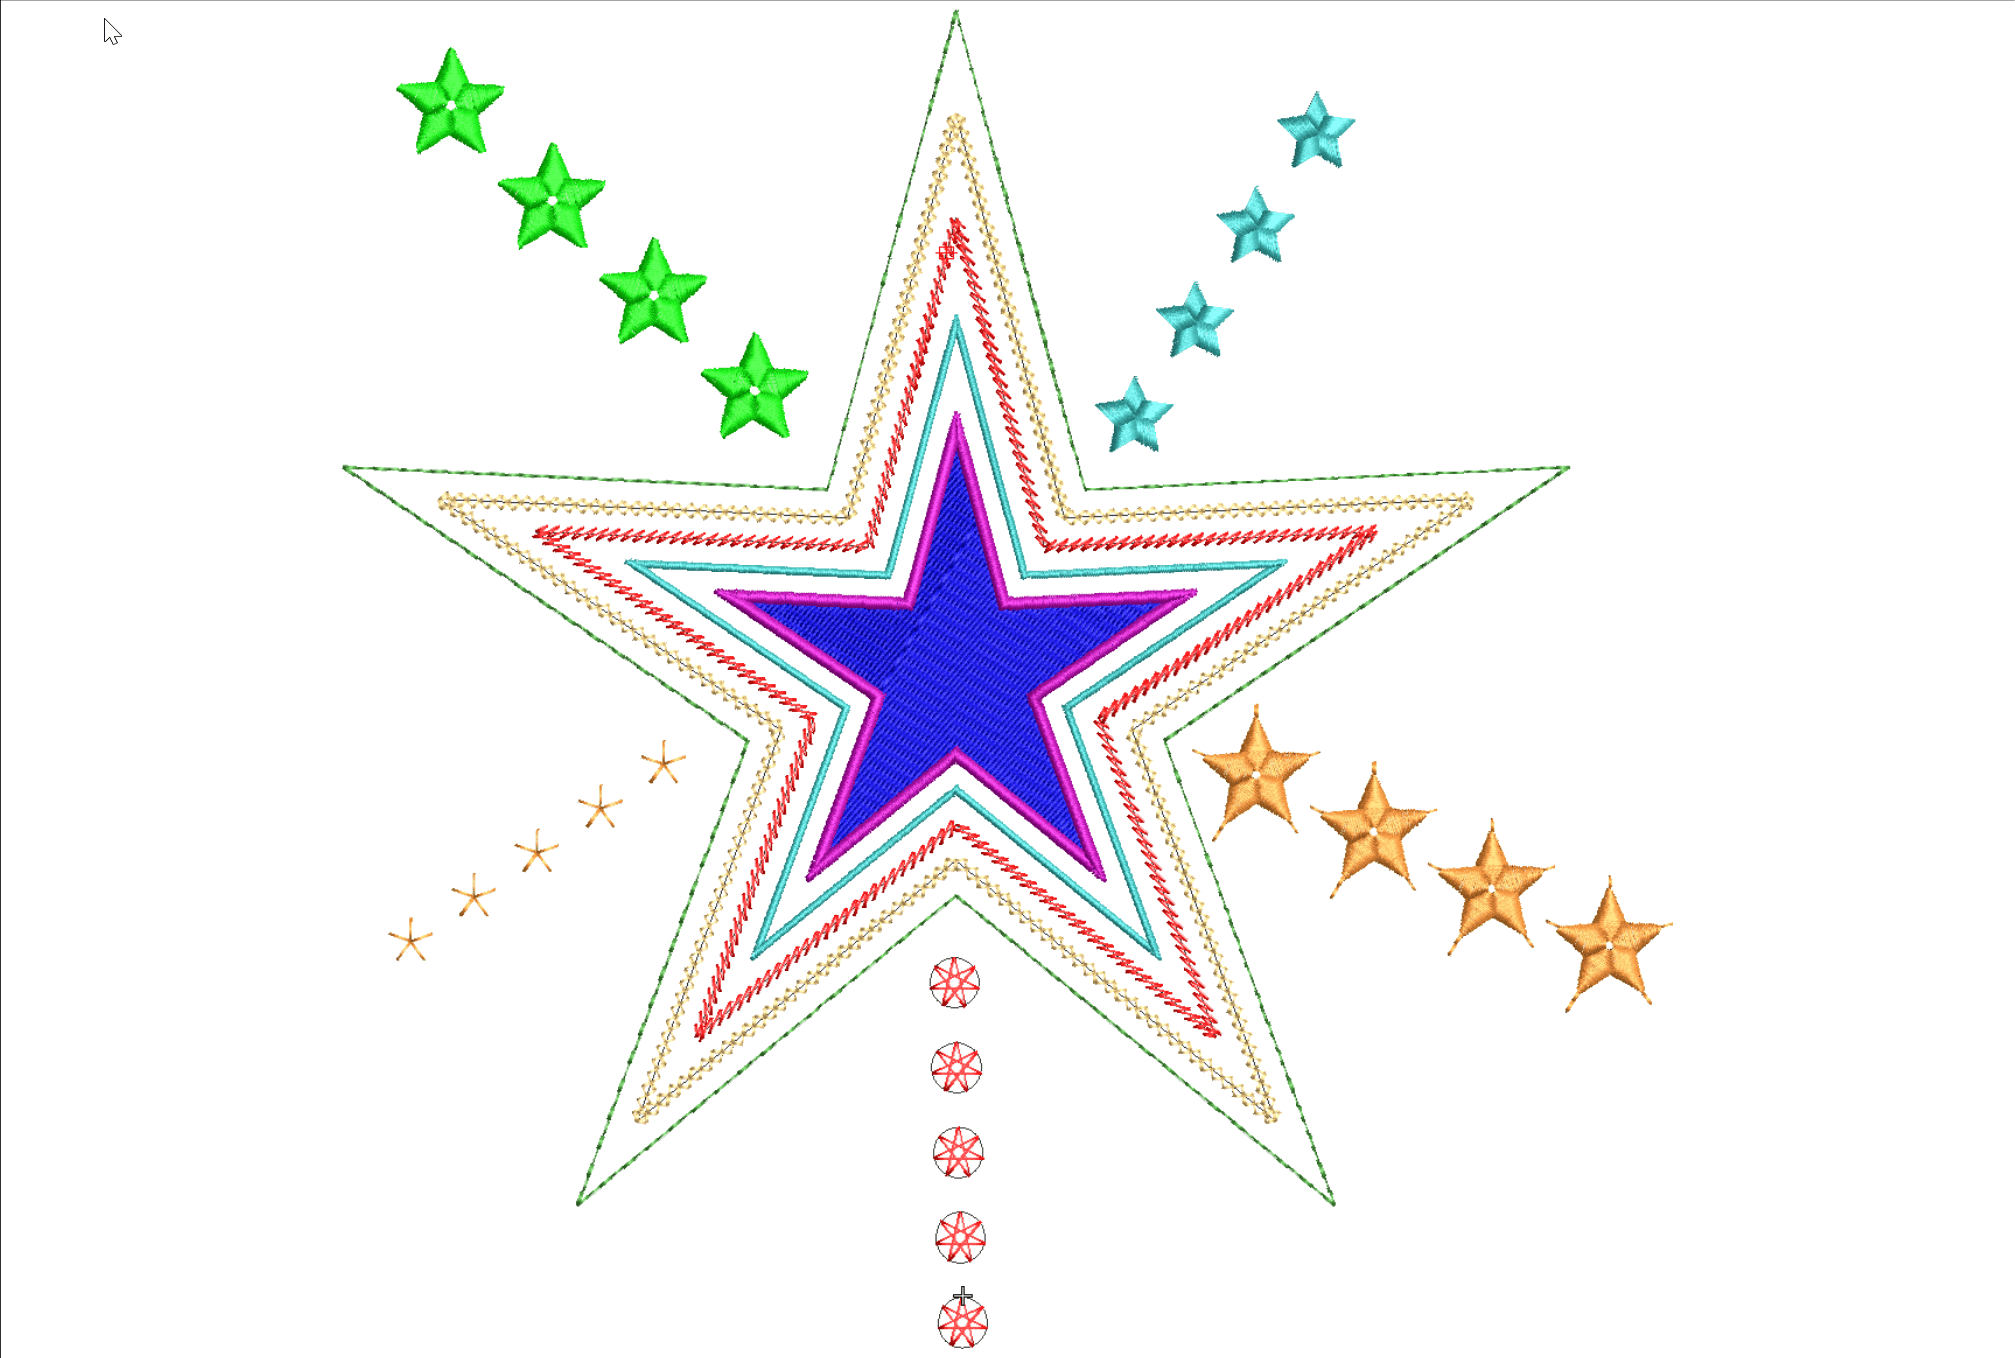
Various Stars Stars and other symmetrical designs occur in lots of embroidered files at many different sizes and a variety of styles, in the following article and video I will explore a few ideas for you to develop and add to your repertoire of embroidery skills and techniques. Tiny stars for badges and flag designs…
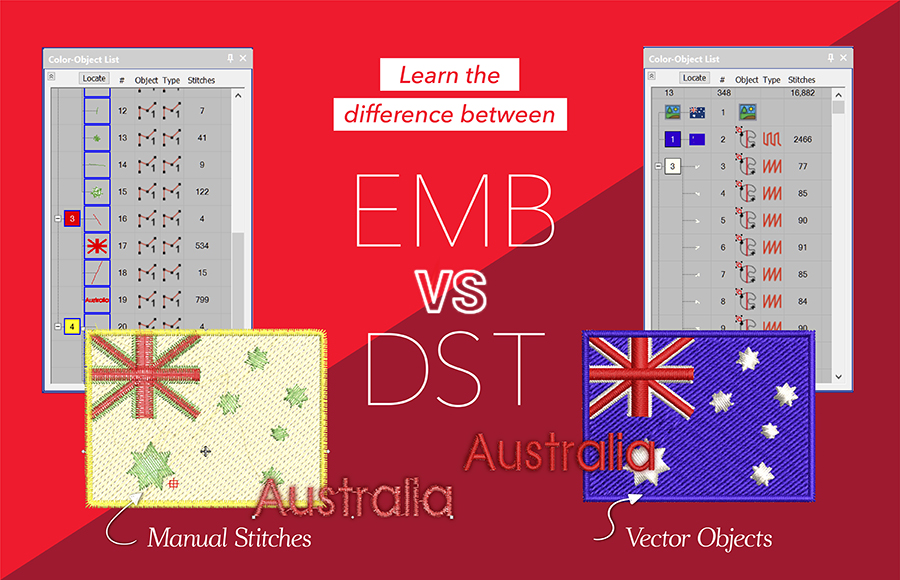
Compare .EMB and .DST files .EMB = Vector The embroidery objects created in EmbroideryStudio are vector based, which simply means if the object is resized then the stitch properties including stitch spacing, stitch length, and underlay are maintained. In fact, all the properties relating to the design are preserved and the stitch count is adjusted…
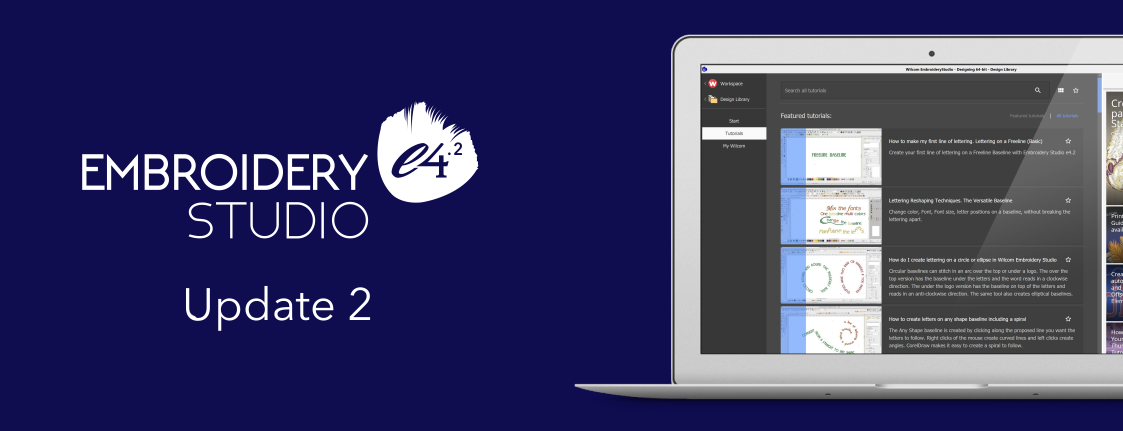
Summary of update: Fixes & improvement: Problems have been reported when adjusting appliqué properties. Specifically, changing the count in the tack settings for Zigzag or Edge Zigzag appears to have no effect. The issue has been resolved with Update 2. Problems have been reported with lost zigzag stitches when applying lap corners with split…
Save a Preset Object Style In e4.2 it is possible to save a style of stitching to an input method.Make your changes in the work area and check the Save button from the bottom of the Color Object list (image top right) Select the Preset Object Radio button and choose the input method from…
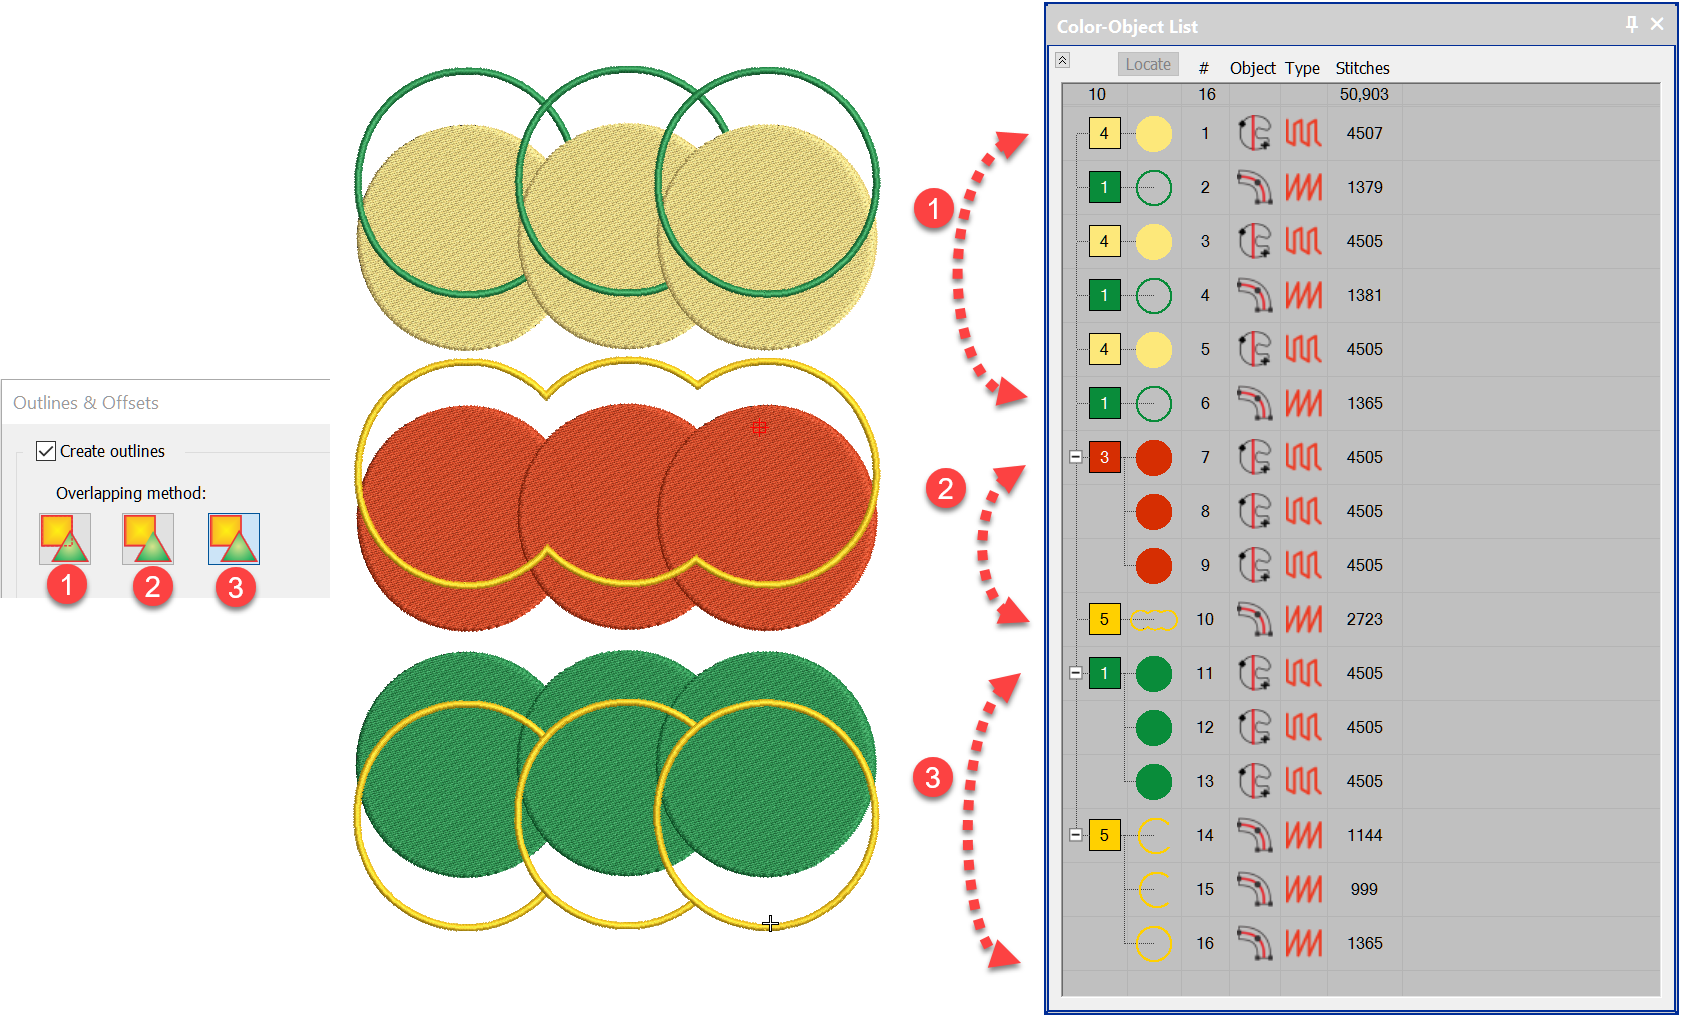
All of the digitising levels from Decorating up include the basic Outline Tool which is identified as around target icon in the Toolbox. The Advanced Outline and Offsets is a paid Element identified as the hexagon icon below, I will talk about that shortly. Simple Offset Select the object you wish to place an outline…
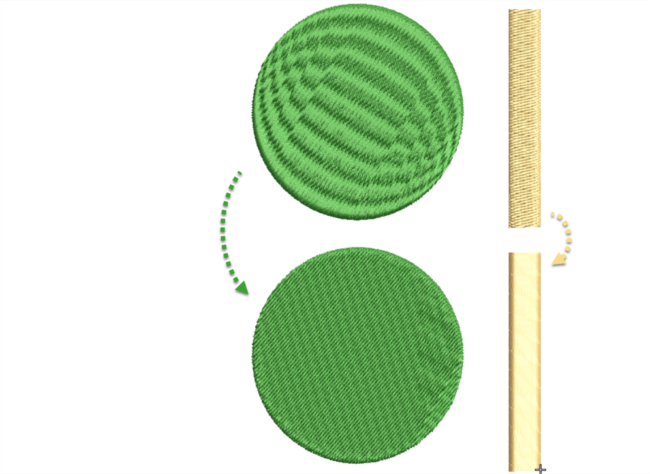
In an earlier article we looked at Curved Fills, Florentine and Liquid Fills, the ideal companion Element to those is Color Blending. Color Blending can only be applied to to Satin and Tatami fills if created withColumn A orColumn B tools but only to Tatami Fill if the shape is created with Complex Fill. The…

Tools and Fills The tools are found in the Stitch Effects Toolbar.Florentine and Liquid fills are stitch angle baselines that can be applied to Tatami or Motif filled objects.Florentine has one angle line while Liquid has two baselines which can oppose each other as in the red image above.Or the lines can have multiple points…
We should all be aware of the closest join feature in Wilcom lettering. Did you know there is an automatic setting to adjust the start and finish points of objects as you digitize. Why is Closest join so important? Without aligning the start and end points of consecutive objects you will be creating possible unnecessary…
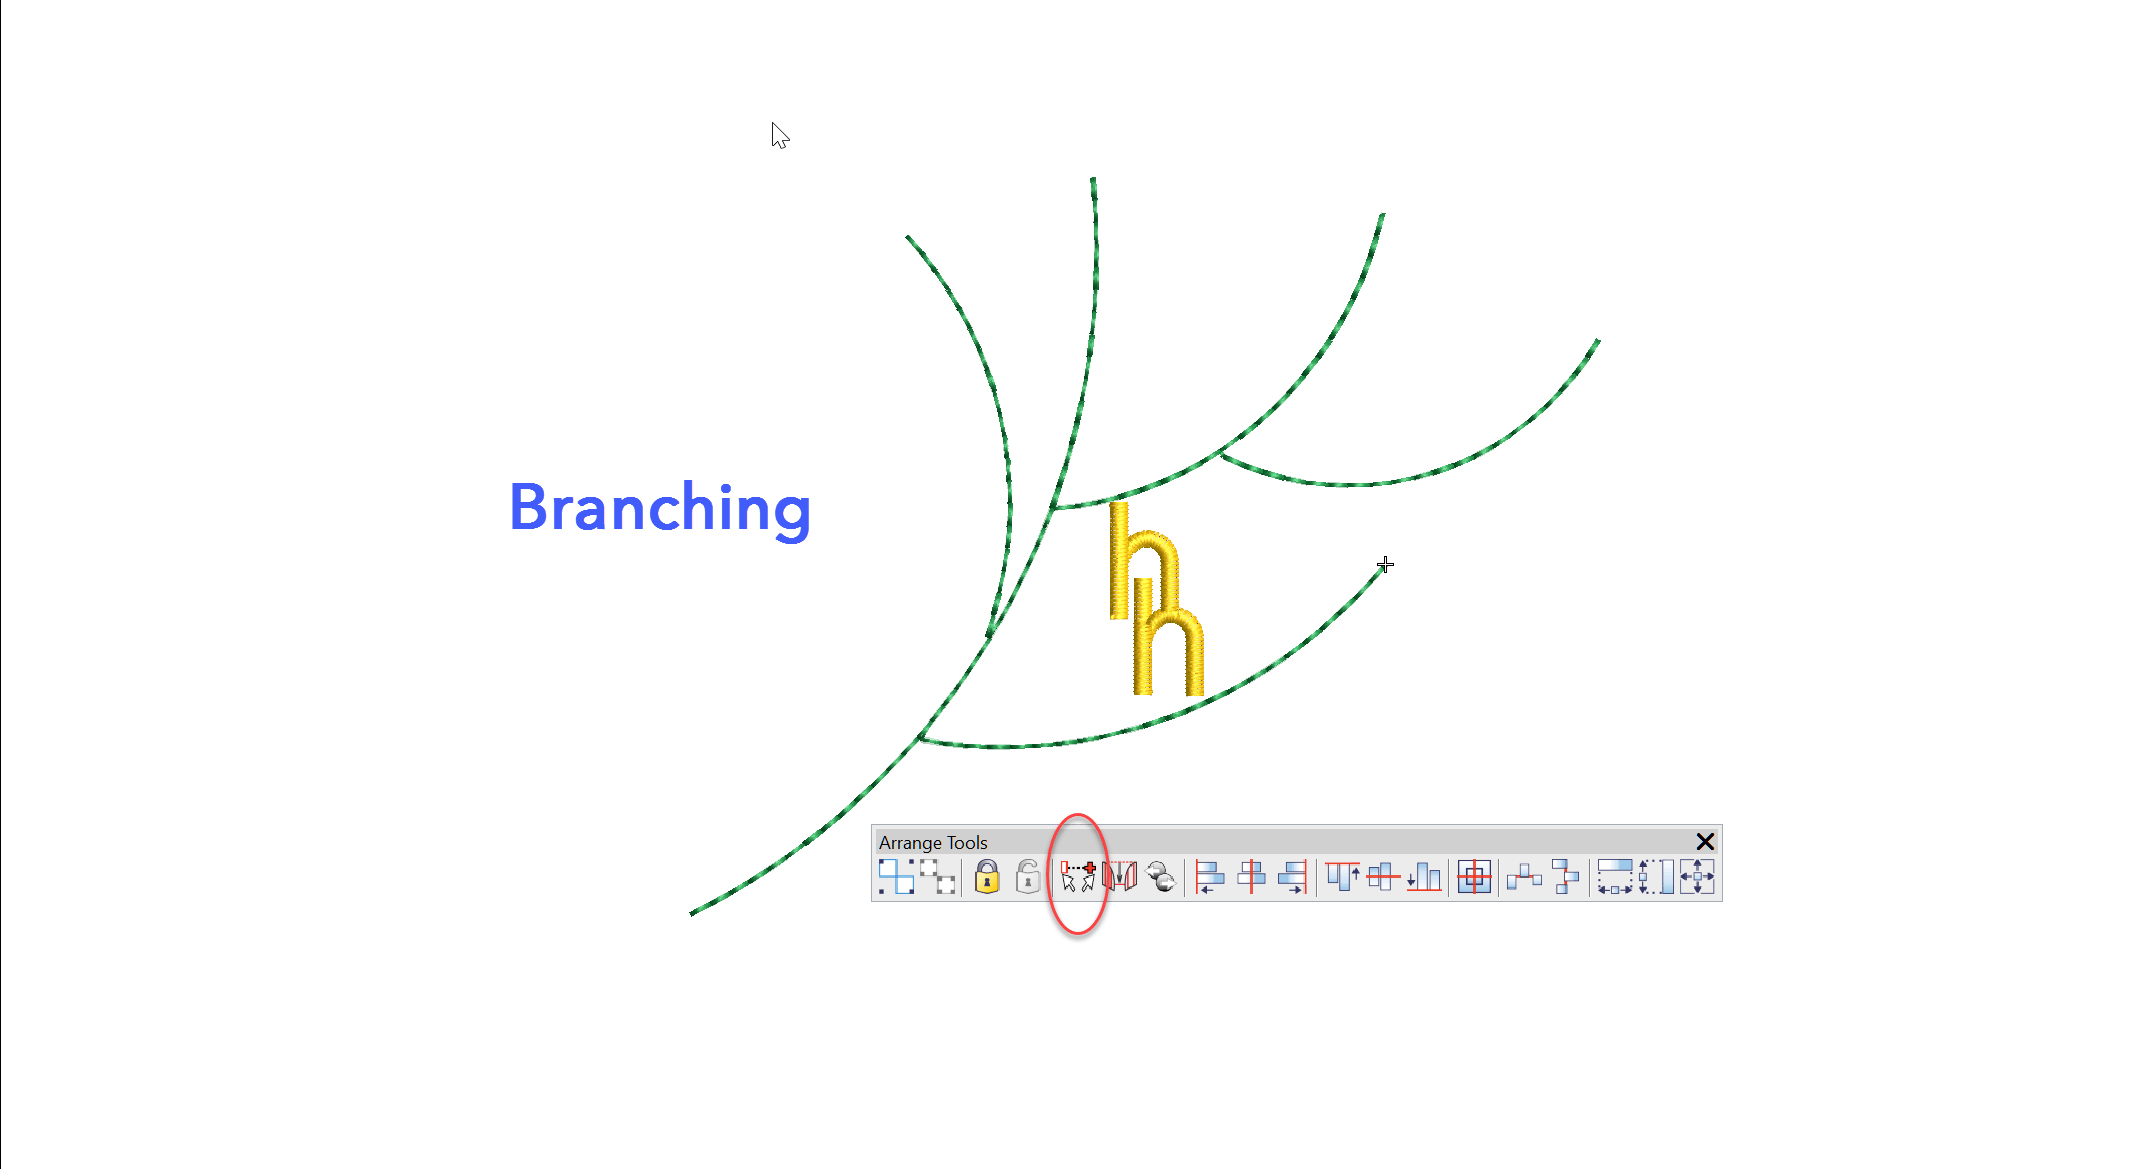
The Branching feature intelligently sequences objects then groups them so a start and finish point can be allocated to the group. Each object must touch or be overlapped by another object in the group that is to be branched.Overlapped segments will be hidden behind objects that are later in the stitch order. The keyboard shortcut…
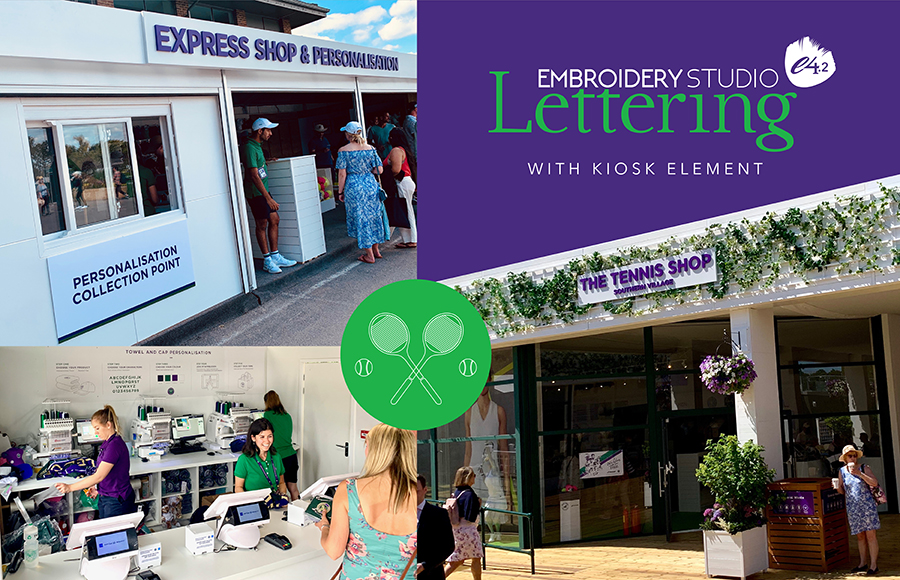
Last year, Embroidery Training Ltd ran an embroidery personalization booth at Wimbledon. After incredible success and a surging demand, they returned in 2019 and have doubled the shop size. Wilcom’s EmbroideryStudio e4 Kiosk makes this simple to setup and manage, and is perfect for a pop-up environment. Read last year’s story Click here Previous Next…
| Powered by WordPress | Theme by TheBootstrapThemes