
EmbroideryStudio
Unnecessary Thread Trims
Why and when does the software create a thread trim? Basically the software creates thread trims at a color change or when the distance between
EmbroideryStudio
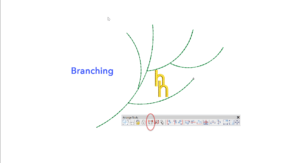
Branching
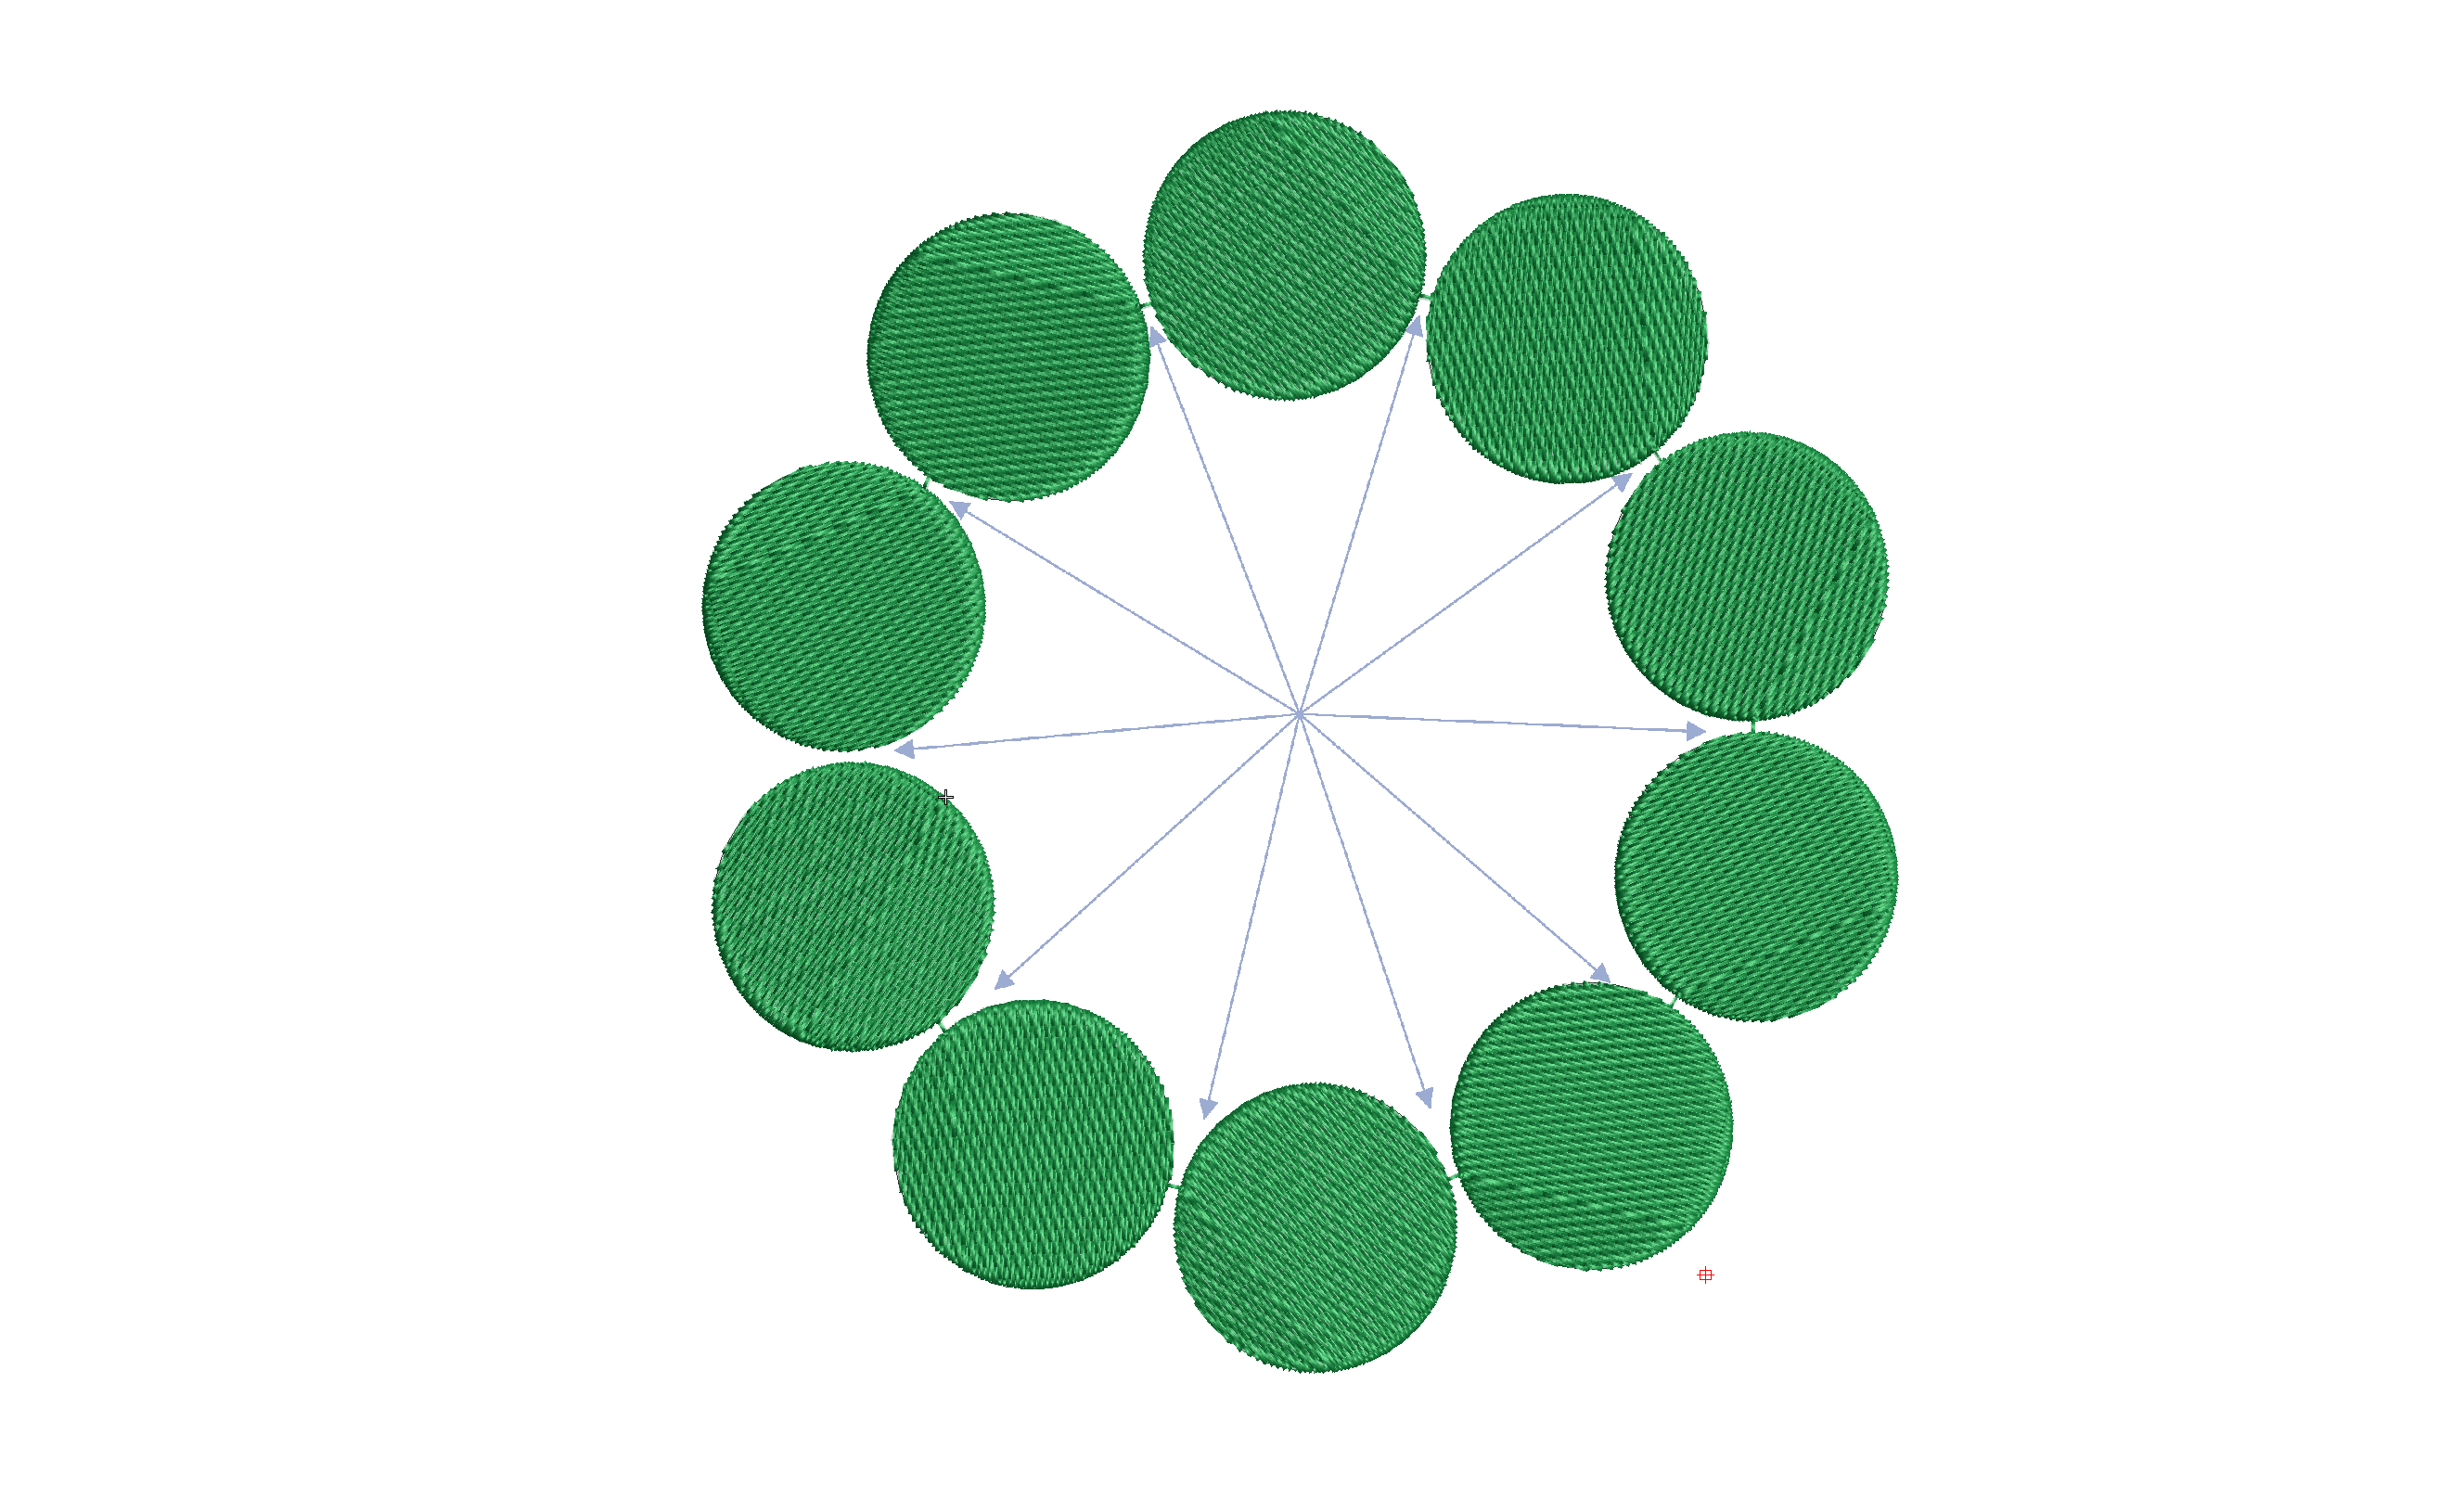
The Branching feature intelligently sequences objects then groups them so a start and finish point can be allocated to the group. Each object must touch
EmbroideryStudio
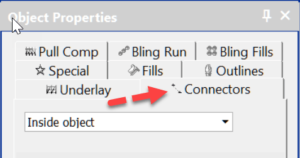
Connectors – the functions between objects
Connectors are the machine functions that occur between objects or in the case of lettering inside the object and between each letter. The functions are:
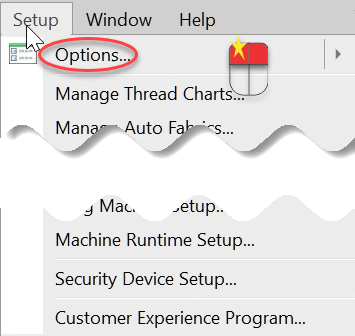
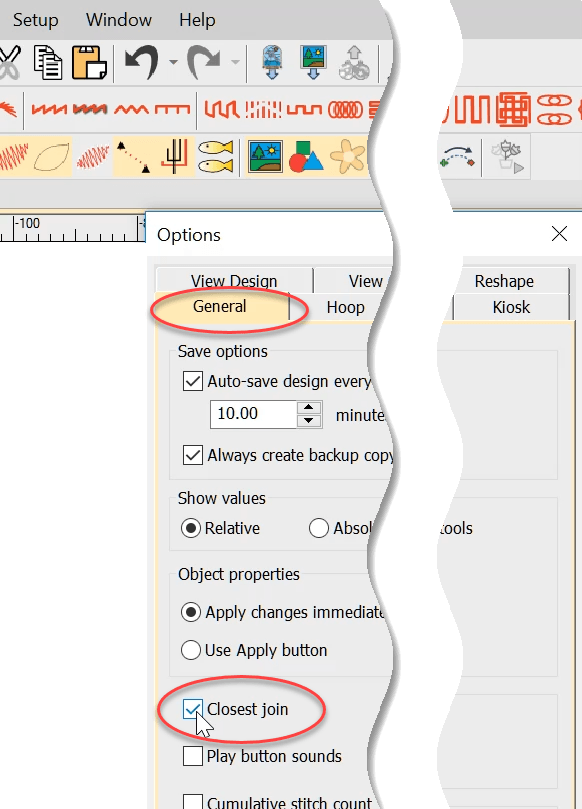
One thought on “Closest Join”