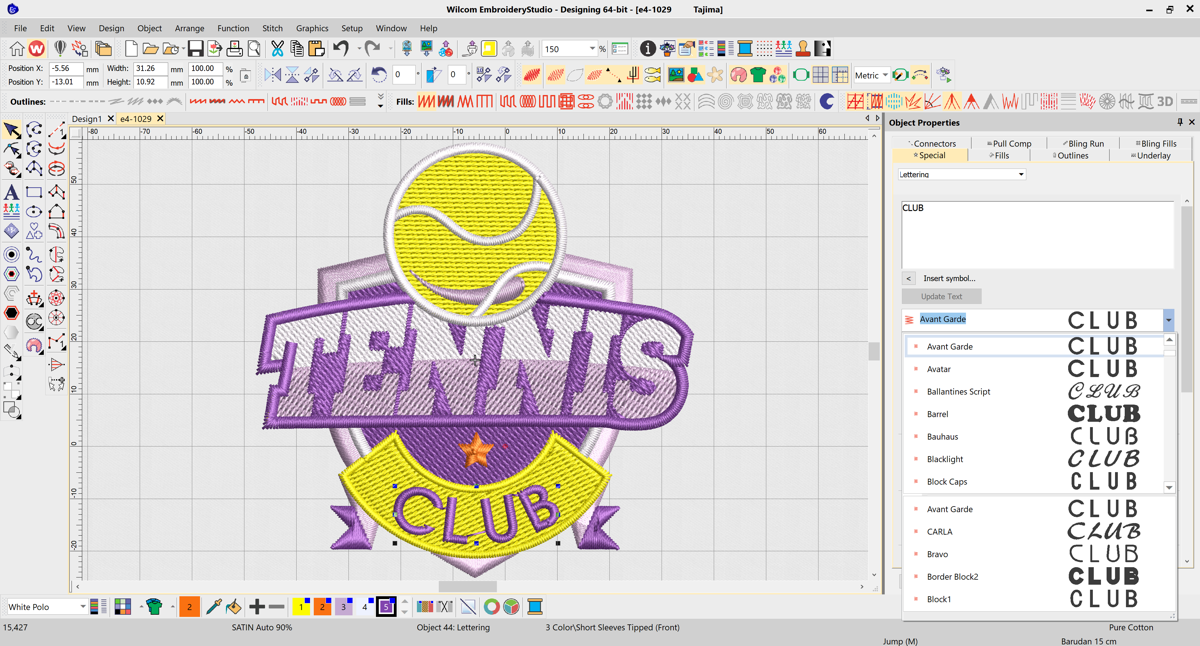
In our most recent major release, EmbroideryStudio e4.2, we introduced a number of improvements to the way you select and use fonts. Solid font previews The font previews in e4.2 are now solid, meaning you can quickly and easily see how the fonts will sew in embroidery. Font preview size You can now control the…
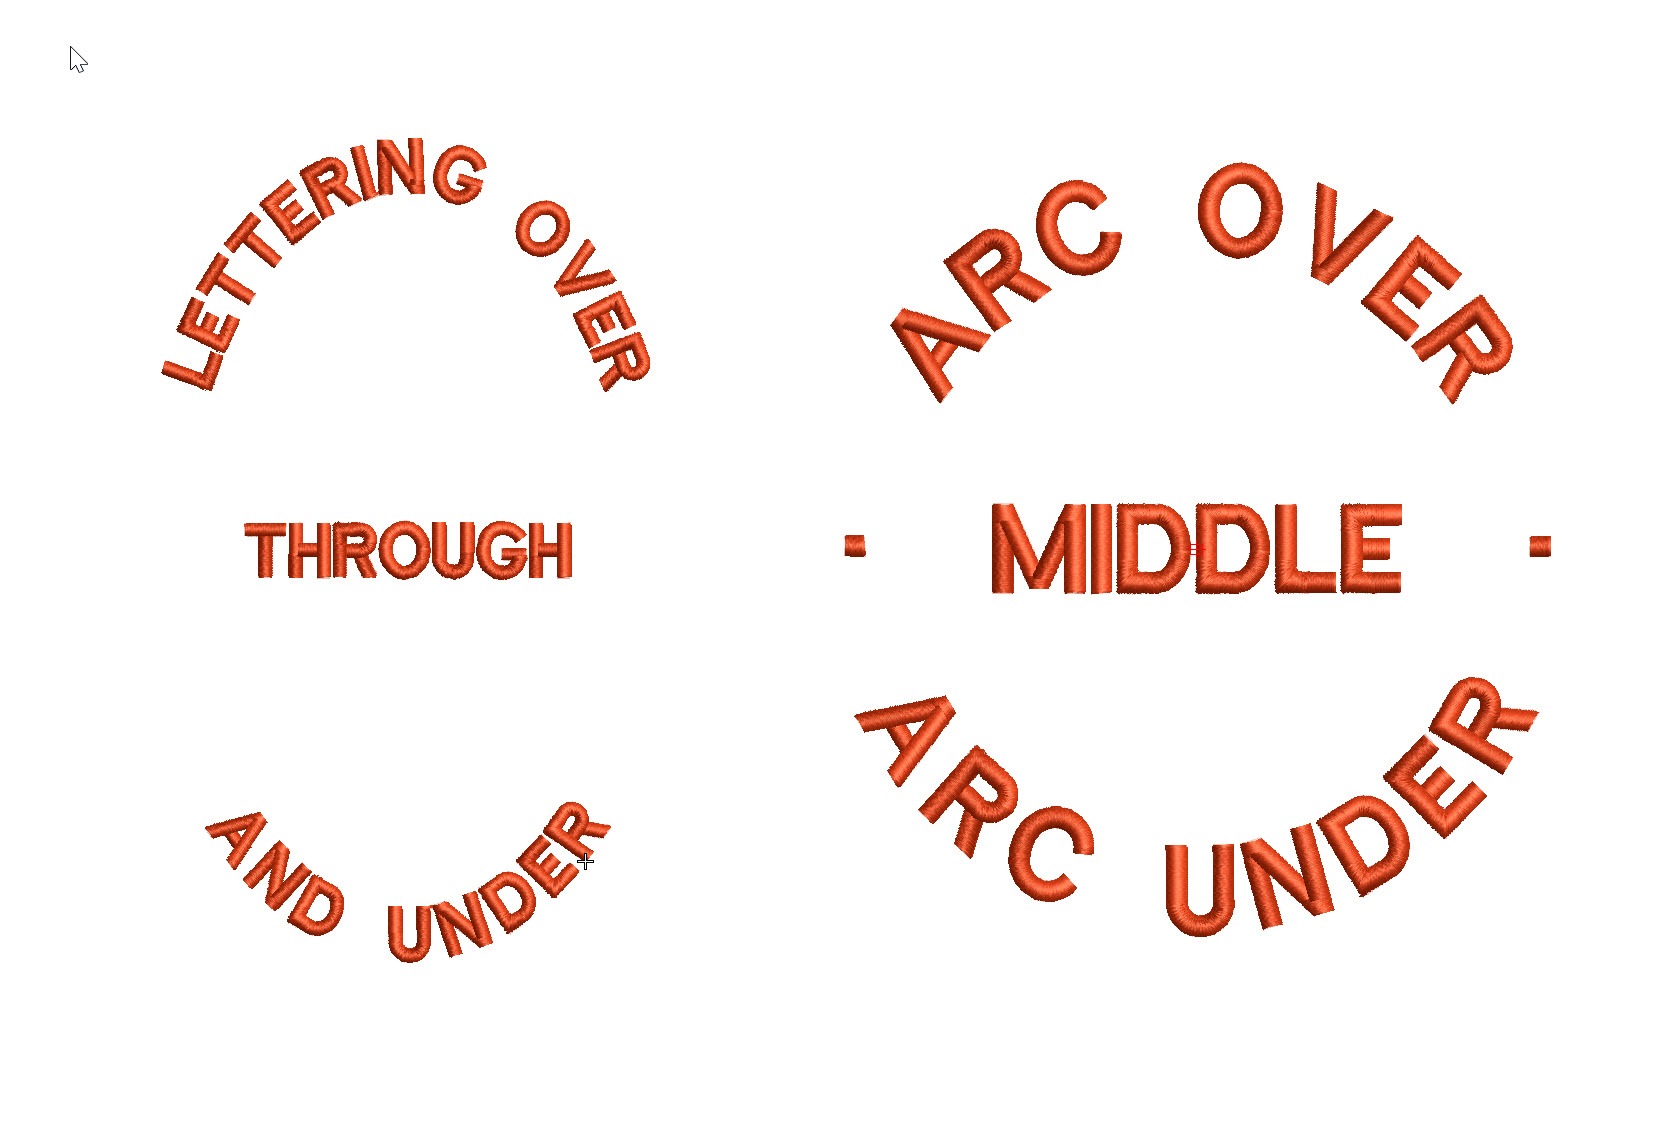
Actually the process of creating a Predefined Baseline creates 3 separate baselines that can be treated individually once they have been created.The feature is particularly useful for circular and elliptical designs that have lettering around the logo and possibly through the middle. The procedure is exactly the same as for a circular baseline but involves…
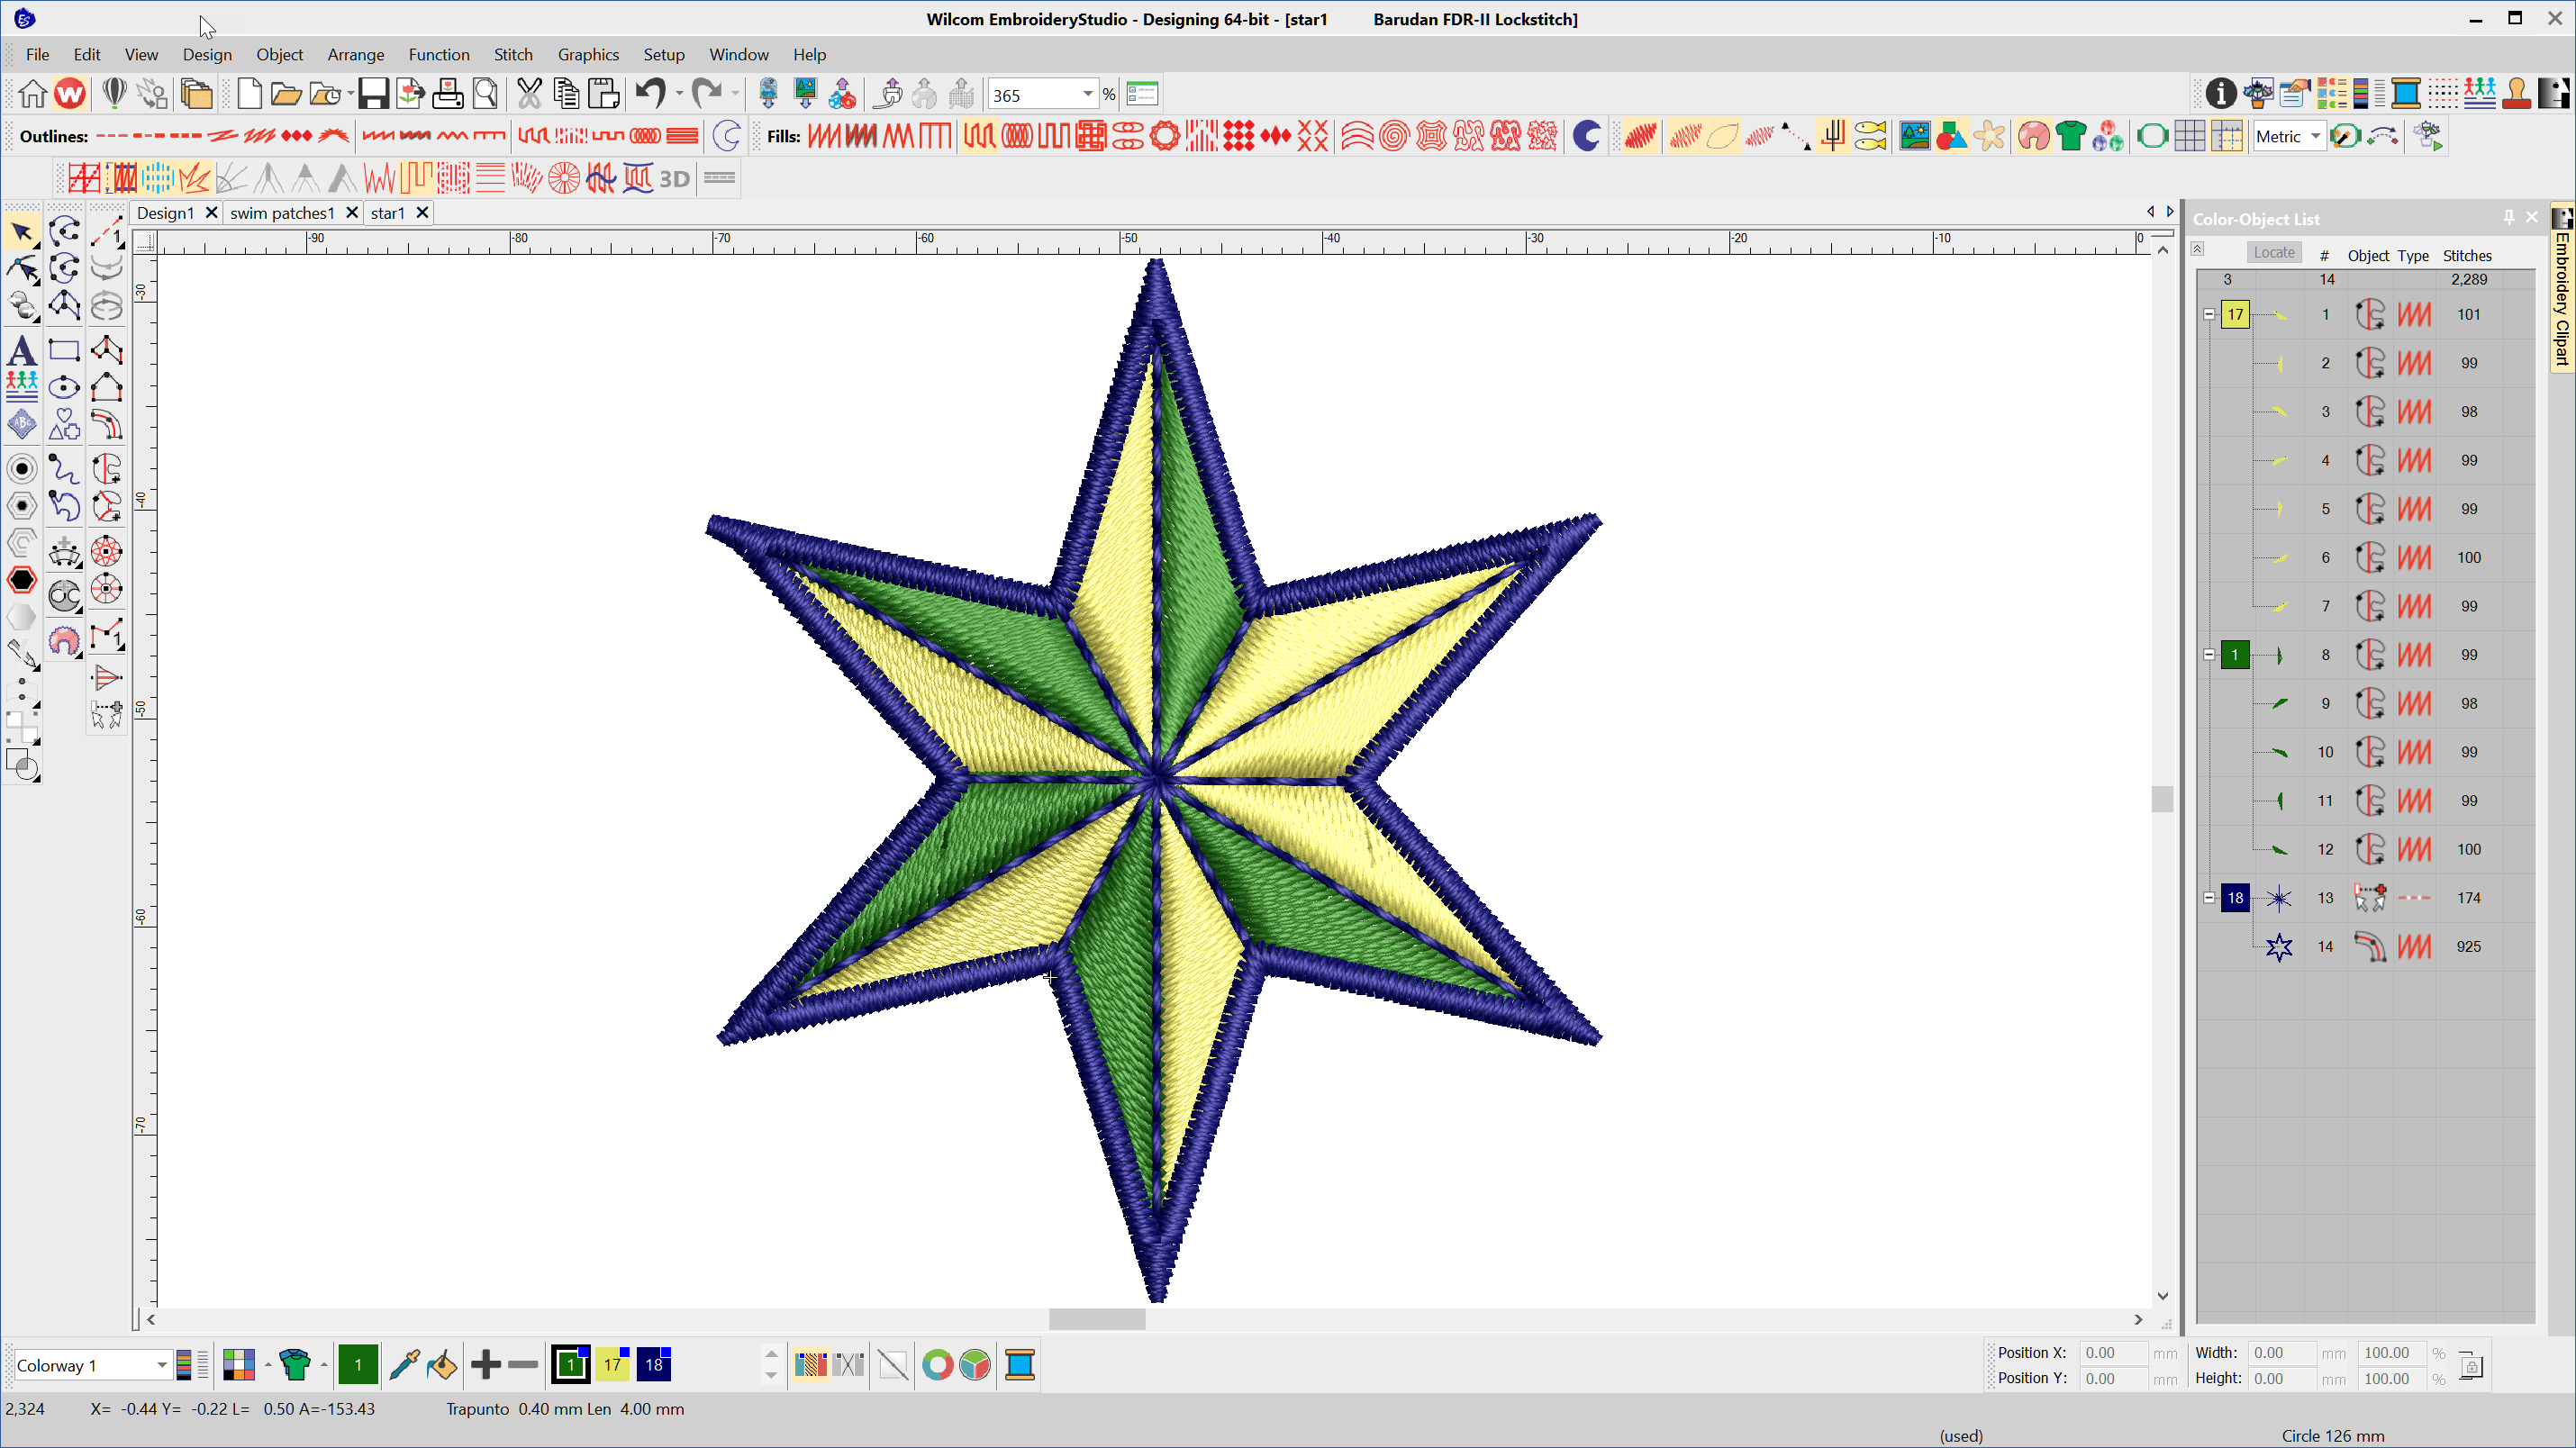
When creating anything it pays to have a plan. Understand the the list of components, the tools required and the construction sequence is imperative to good design. This is particularly so in embroidery where the correct sequence of a design is critical to quality embroidery.The Color Object List shows the color blocks, individual objects, tool…
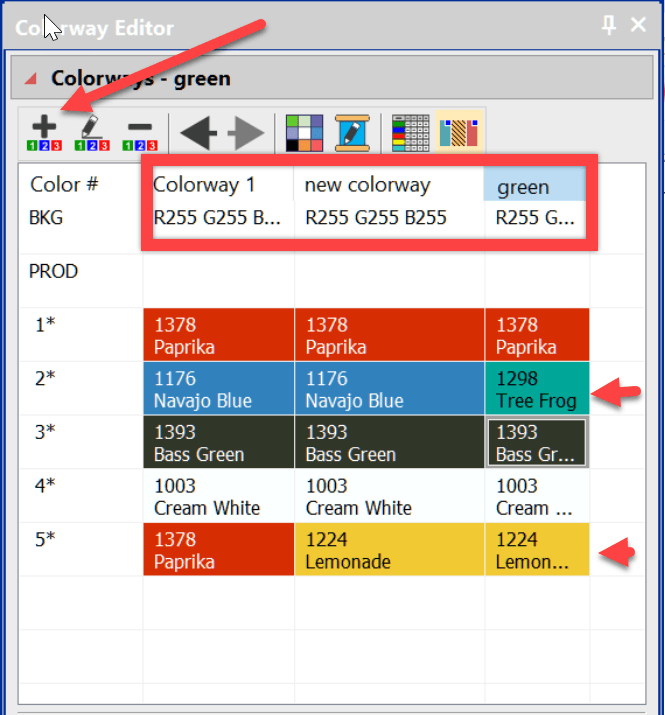
Creating a colorway Saving several versions of the same design simply because of a color change is unnecessary and poor practice. The danger is that you make an edit to one of the color combinations and forget to make it to the others. The best solution is to apply different colorways to the single design….
The Transform Toolbar contains icons (functions) to resize, reflect, rotate and slant images and or embroidery objects in a precise and accurate manner. The Transform by reference line function removes the guesswork from resizing and rotating a design image. Simply select the tool, plot a line with two points and make the setting to rotate…
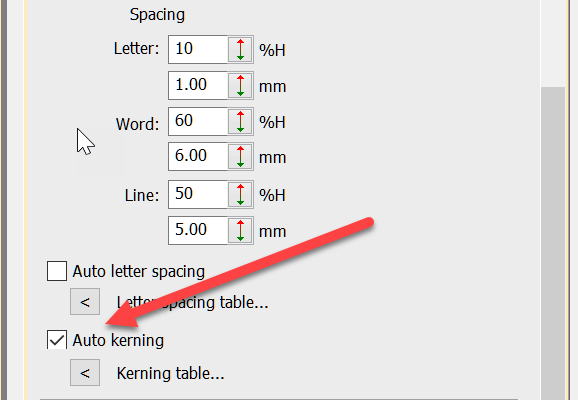
Kerning is the term used to describe the space between letters. Even in print different letters have different kerning values.Two O’s are usually spaced closer together than two I’s. This is particularly important in embroidery. Two I’s, if too close together will look like a single very wide letter while two O’s can be closer…
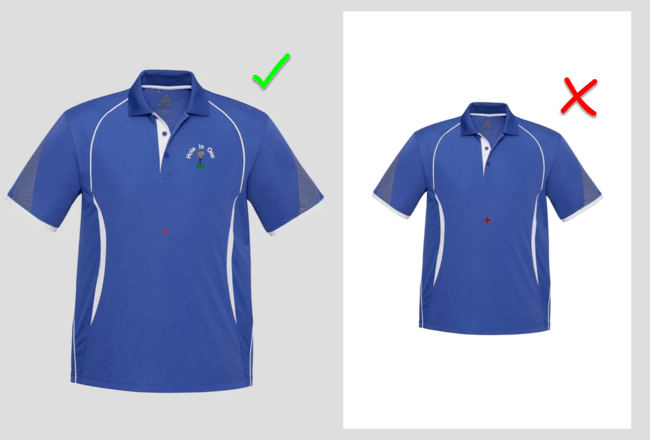
Product Visualizer When displaying an image in the product visualizer an image with a transparent background in more professional than showing a white background. Corel PhotoPaint is included in the CorelDRAW suite of software that comes with Embroidery Studio Designing and Decorating In the video below I…
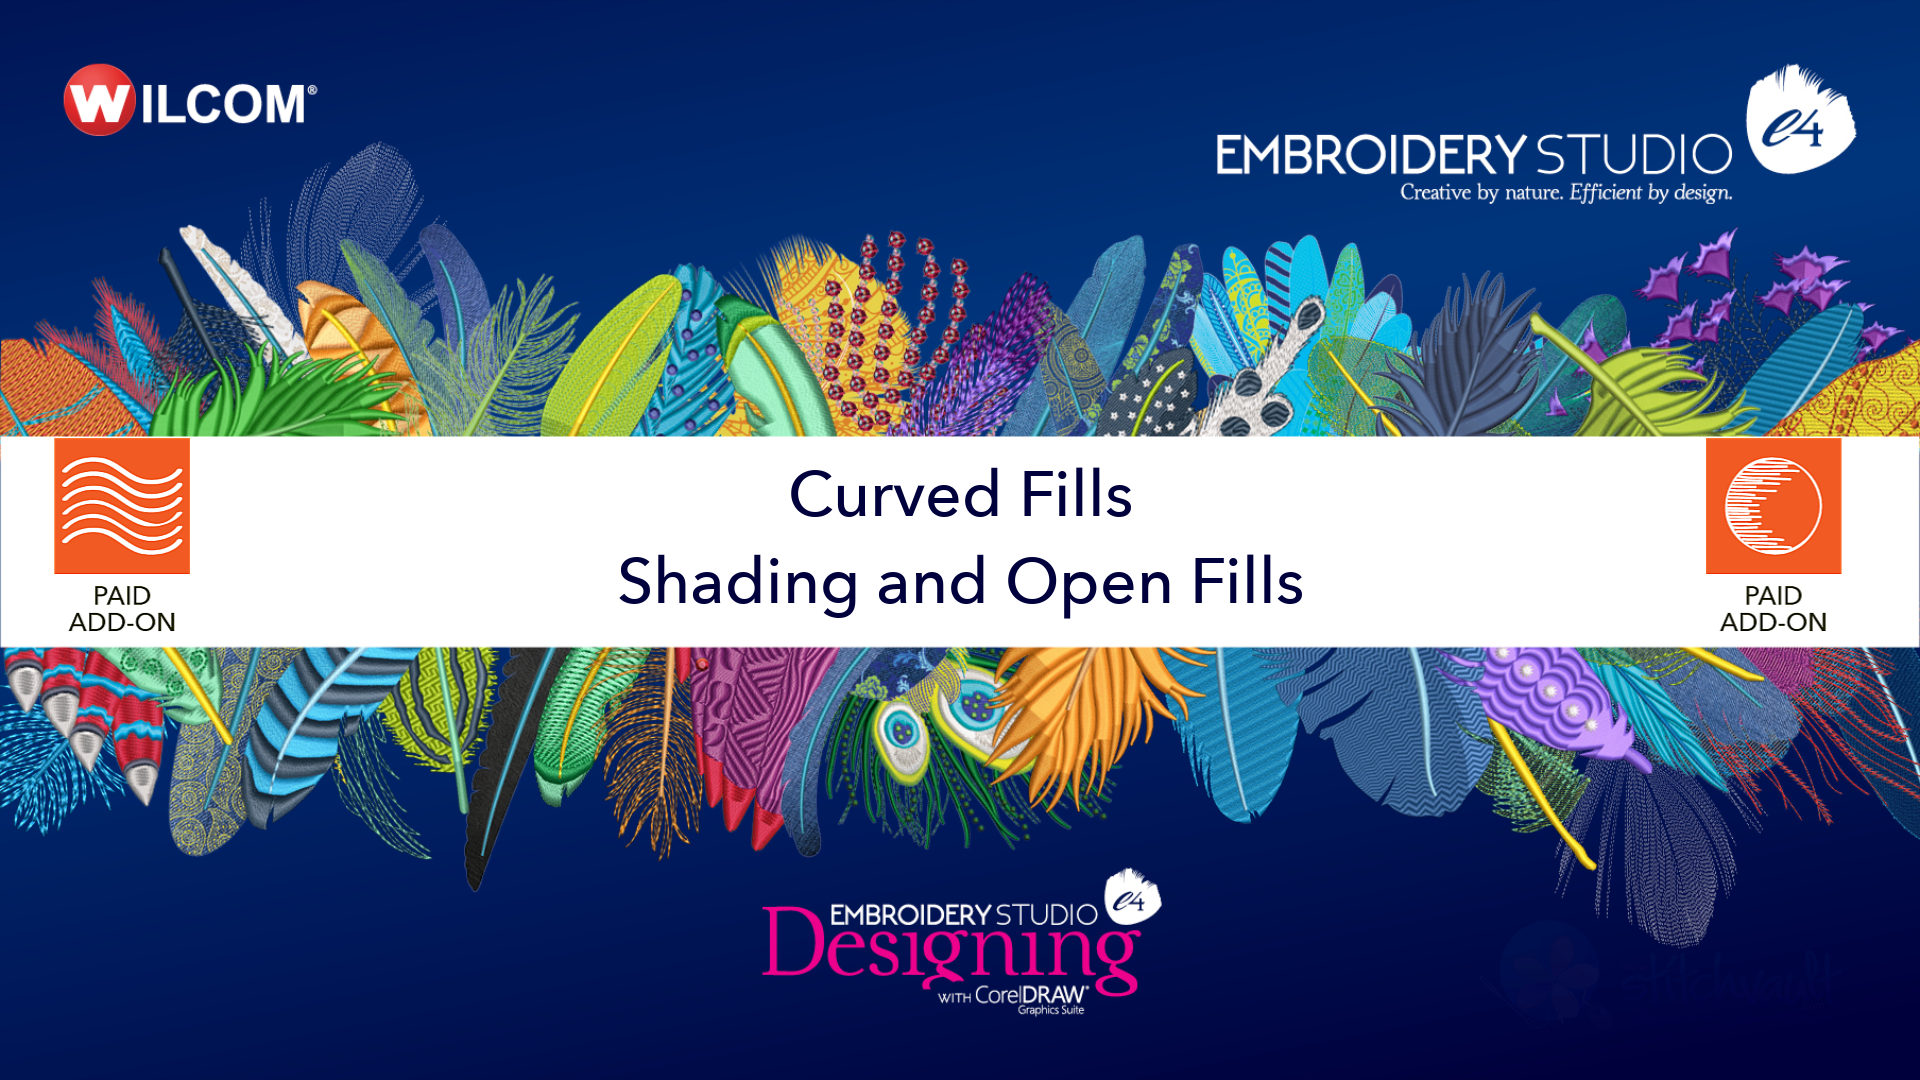
Adding curved fills and shading to tatami objects to a design adds depth and vitality to a design. Both features are add on elements to the designing software. They work together or independently to add the beautiful curves and waves and add color shading to objects in a design . Once you add these elements…

Creating a border or outline is something you probably do every day as an embroidery digitizer. But did you know there is a quicker way to create borders and outlines with the Offsets Advanced Element in EmbroideryStudio? In this short video, I outline what the Offsets Advanced Element is, and give a quick overview of…
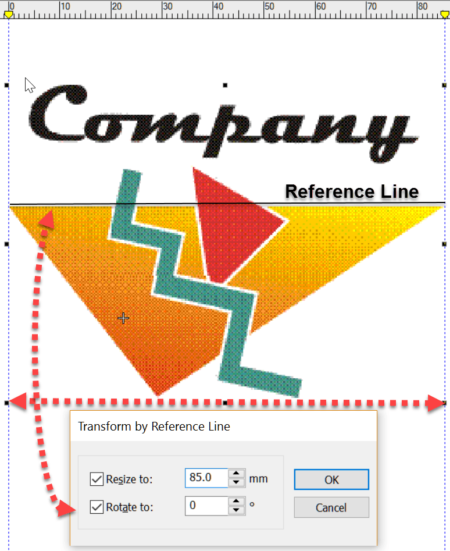
Image Handling Importing an image to the work area is the first step in creating a design. DecoStudio relies on CorelDRAW to import and edit images, while this is adequate, the process is time consuming and has limitations that are not present in Decorating e4 which handles the import, resize, orientation, cropping and other editing…
| Powered by WordPress | Theme by TheBootstrapThemes