Connectors are the machine functions that occur between objects or in the case of lettering inside the object and between each letter.
The functions are:- tie off
- trim
- jump/run (the method of moving from one object to another)
- tie in

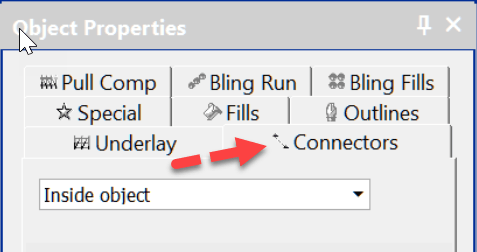
Connectors TAB AFTER OBJECT
My preference is the use the Connectors tab to insert “conditional” functions, i.e. if the logo is resized which will alter the distance between objects in the design, then the functions will react to the change in distance between objects.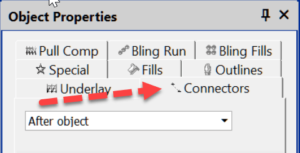
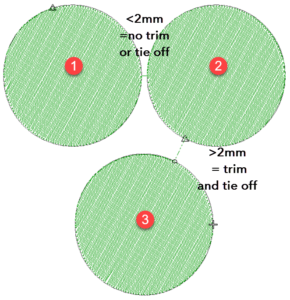
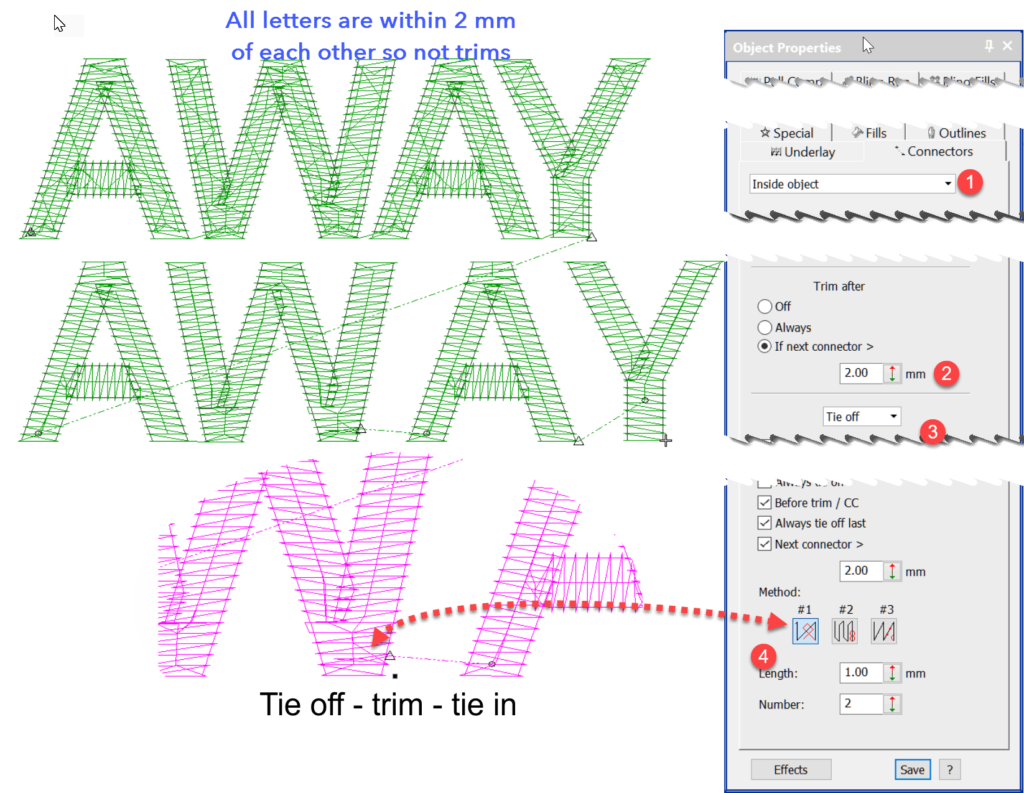
If two objects are less than 2 mm apart then you may not want a trim, however if the design is made larger and the gap between object increases to more than 2mm then you do want a trim and tie off to occur.
It is important to get these settings correct, the last thing you want is for your embroidery to fray or unravel therefore be sure to set your tie off value at the same or lesser length as the Trim value

These settings are conditional on the distance the panto-graph moves when stitching the design. In other words you set the machine to tie off, trim and tie in if the next object is more than a set distance away.
The settings can be turned to off or set to always perform the mentioned tasks.
Lets have a look at the Properties and where to adjust them.
- The machine function is to occur after the object is completed. The drop down offers the option “Inside Object”, this is used almost exclusively for lettering.
- A choice of Jumping or Running to the next object.
- The minimum distance between the two objects when the Trim is triggered.
- The drop down offers a selection of Tie Off or Tie In. In this case we are dealing with the Tie off.
- The minimum distance between the two objects when the Tie Off is triggered.
- The type of Tie Off
- The number of stitches and length of stitches in the Tie Off.
Lettering and INSIDE OBJECT.
When you create lettering with the lettering tool you create a single object as displayed in the Color Object List.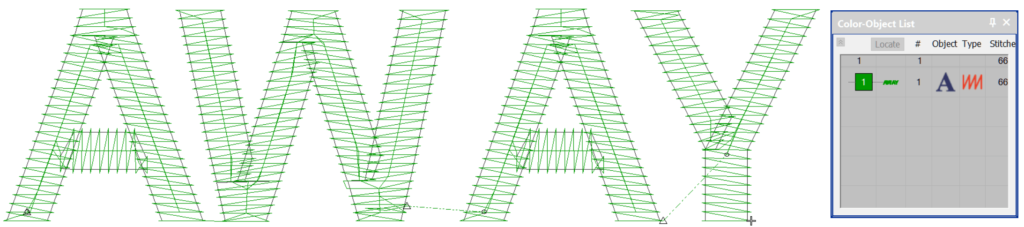
So the logic is to select inside object when you need to deal with the connectors between each letter.
Most importantly remember to save your preferred connector settings to your template once you have decided on the settings your prefer.
EmbroideryStudio
Closest Join
We should all be aware of the closest join feature in Wilcom lettering. Did you know there is an automatic setting to adjust the start
EmbroideryStudio
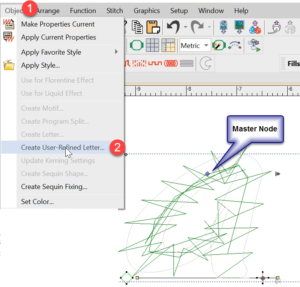
User Refined Letters
User Refined Letters You may have noticed some letters in some fonts do not perform well when stitched out if the letter size is too
3 thoughts on “Connectors – the functions between objects”