User Refined Letters
You may have noticed some letters in some fonts do not perform well when stitched out if the letter size is too small or perhaps too large.
Classic examples are the lower case “i”, when the dot on top merges into the vertical column and makes a single shape, and the inside of a lower case “a” when it closes so the letter looks like a blob of stitching.
It is possible to refine the shape of a letter and save it to the font set so that the new shape will be activated when a trigger point is reached.
Note this can only be done with .esa files and not TTF’s.
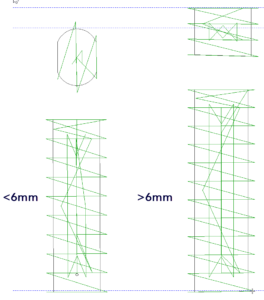
The letter “i” to the right is standard as it comes with the software. The letter on the left has been refined to make the stitches in the dot run vertically, to give some extra definition and prevent the stitches merging with the column below. When sewn out the vertical stitches will pull in creating a larger gap than is seen here.
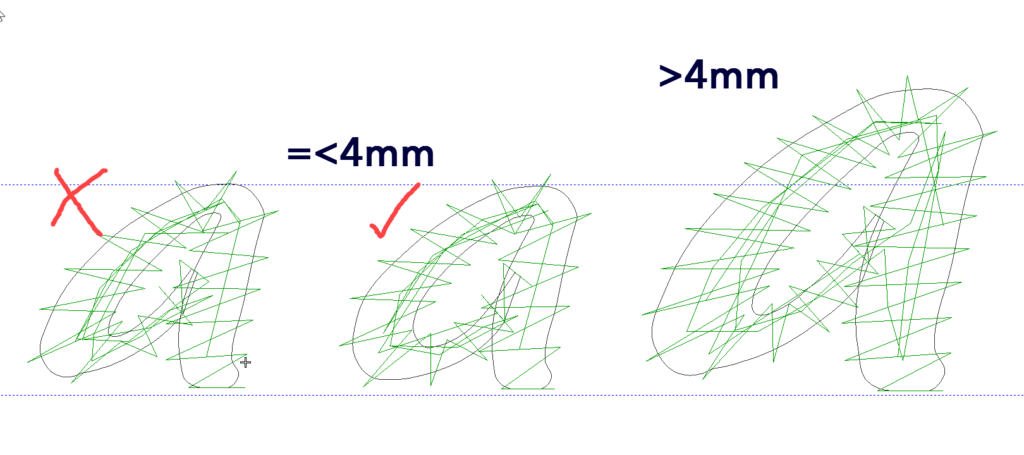
Below 4 mm the letter “a” closes in, some minor adjustment to the shape will allow the letter to work below the recommended size, if the letter is increased in size then it will take on its original shape.
The procedure is to carefully reshape the letter at the size that the shape needs to change.
Use the reshaping tool, shortcut “H” on the keyboard.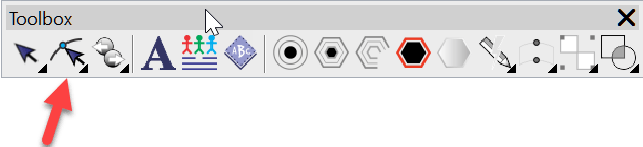
Try to keep the shape as near as possible to the original but remember the shape will be different, but the customer is going to be happy to see a clean “a” or “i” rather than a blob of stitching or a letter “l”.
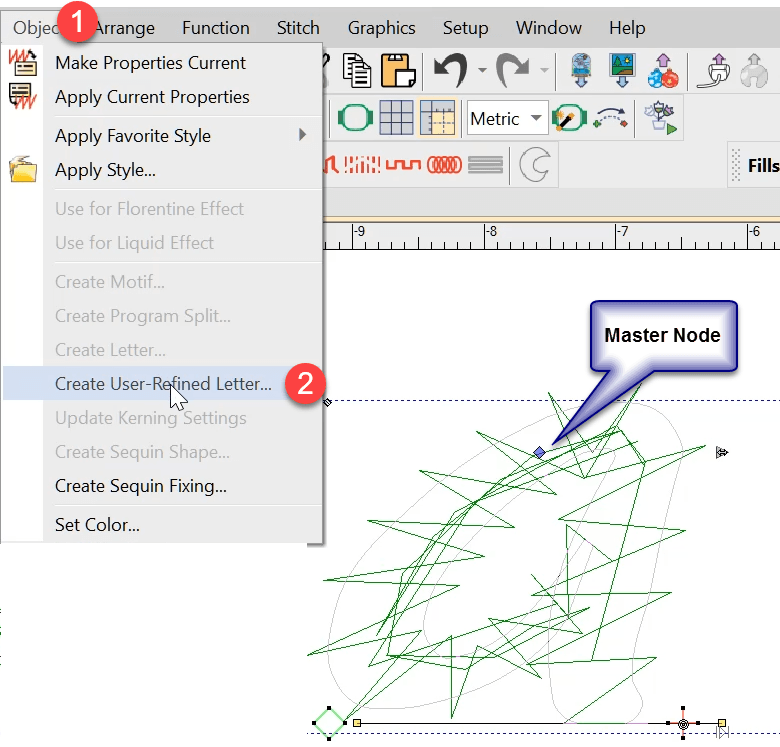
Once you have shaped the letter to your satisfaction select the master node of the letter. Then from the Object menu select Create a User Refined Letter.
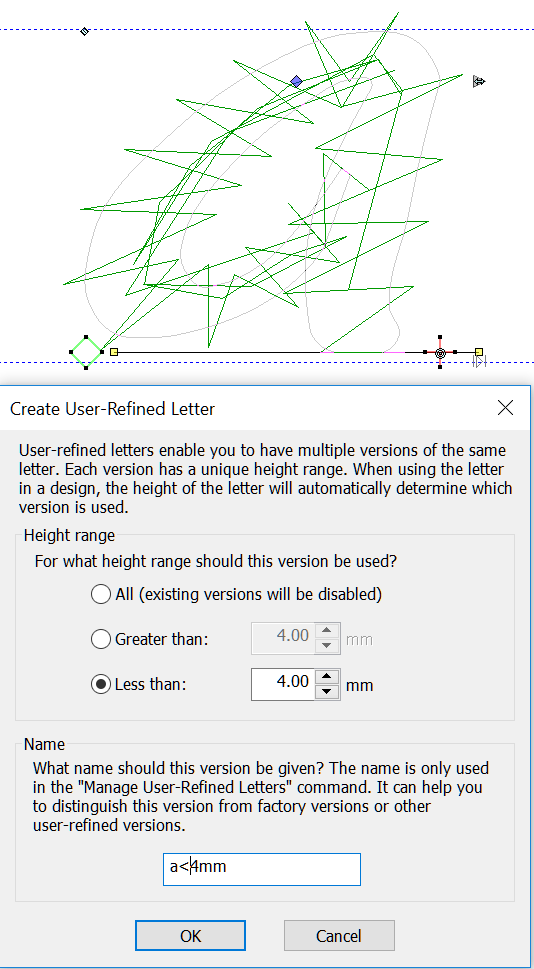
This is where you choose the “trigger” height that will change the letter shape, give it a name and OK to save to the system.
Now you have created your user refined letter test by increasing and reducing the size of the letter and notice the effect.
You can choose to use or not use your new shaped letter by checking the box in the Object properties dialog.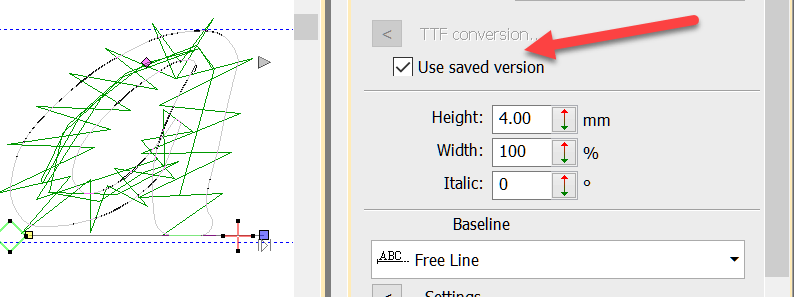
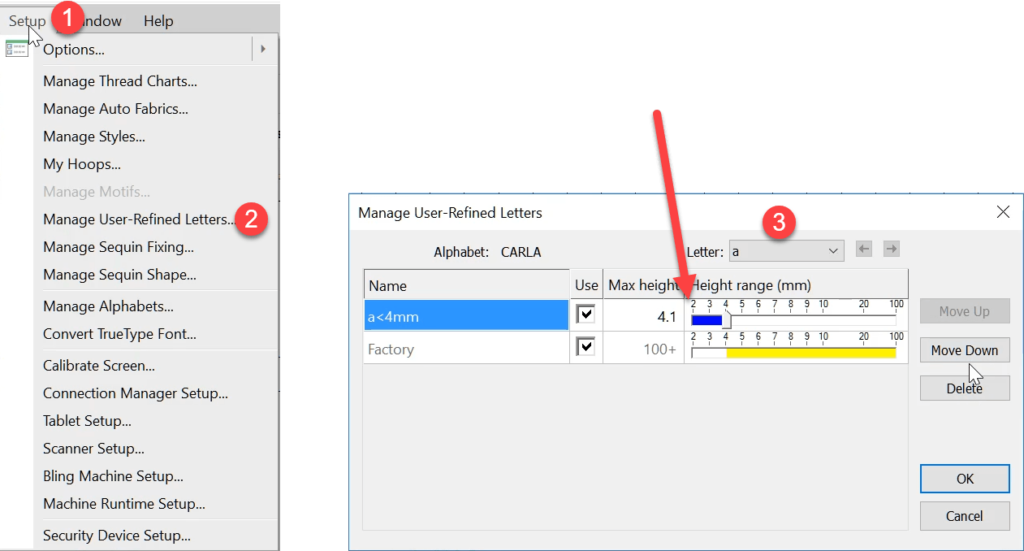
If after the letter has been saved if you decide to change the trigger point at which the change takes place go to the SETUP Menu and choose MANAGE USER REFINED
In the event that you have refined more than one letter choose the one you wish to modify in the top drop-down at positioin3.
Use the slider or type in the new trigger value and OK to make the change to the file.
One last thing, you will have put time and effort into this, so make sure you protect these valuable letter refinements, in case you have to reload the software or move to another computer.
These files are stored here
in pre version 4.2 
In versions 4.2 onwards 
Copy both of these folders and store them in a safe place, if you are in the habit of refining letters or updating kerning values I suggest it is a good idea to back these files up regularly.

Auto Start End
The Auto Start End feature is critical to have set correctly to avoid driving the needle into a hoop but it is more useful than this basic function.It is possible to
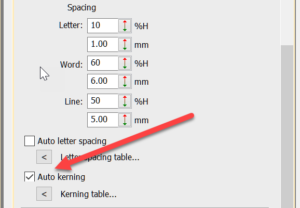
Auto Kerning
Kerning is the term used to describe the space between letters. Even in print different letters have different kerning values.Two O’s are usually spaced closer together than two I’s. This is
Thanks John. I am really impressed how the letters can be ‘refined’. I have battled with this for some time. I was intrigued how the dot on the letter I could be changed to look more like a circle. I have a long way to go with my digitising but am finding it a pleasure with your videos and articles.
Thank you.
Thank you Carolyn,
I am pleased to hear these videos and articles are helpful.
Cheers
John