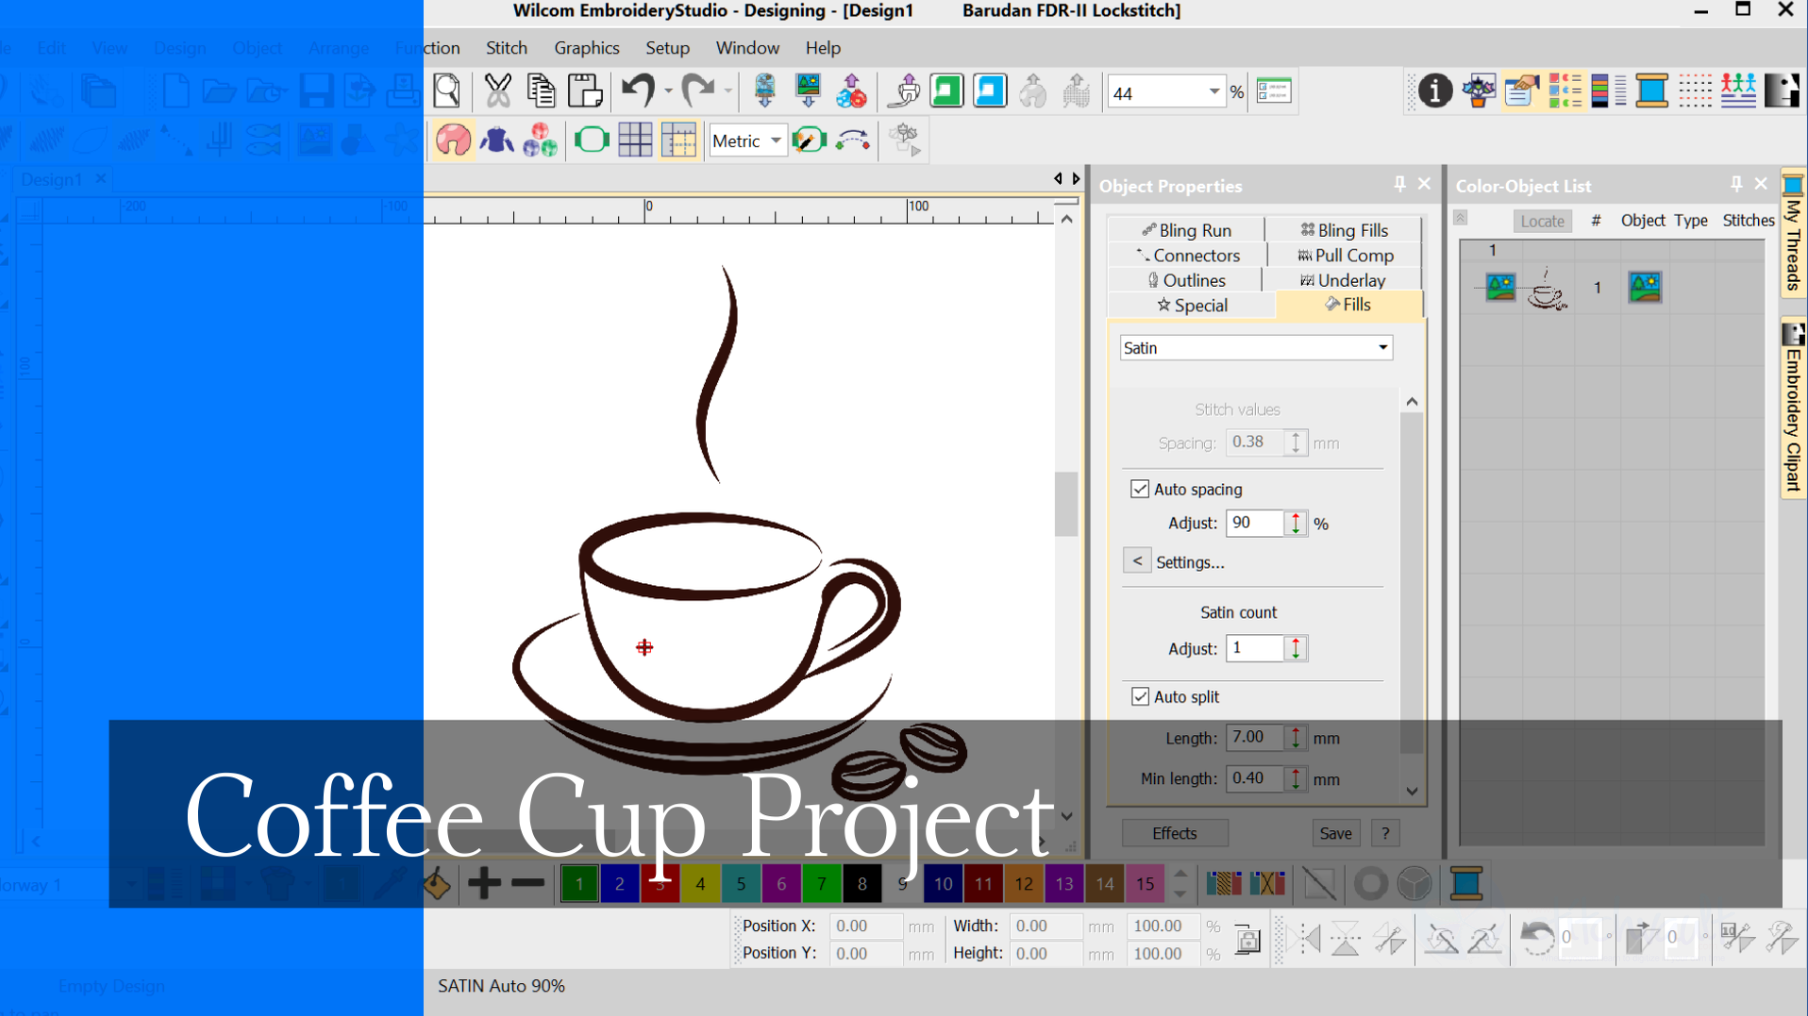
When learning to digitize I think it is important to begin with simple designs, after all even the most complicated embroidery design is created with a few simple tools and a few stitch types.Understanding the basics while creating a manageable design will make your learning more enjoyable and at the end of the day you…
The Transform Toolbar contains icons (functions) to resize, reflect, rotate and slant images and or embroidery objects in a precise and accurate manner. The Transform by reference line function removes the guesswork from resizing and rotating a design image. Simply select the tool, plot a line with two points and make the setting to rotate…
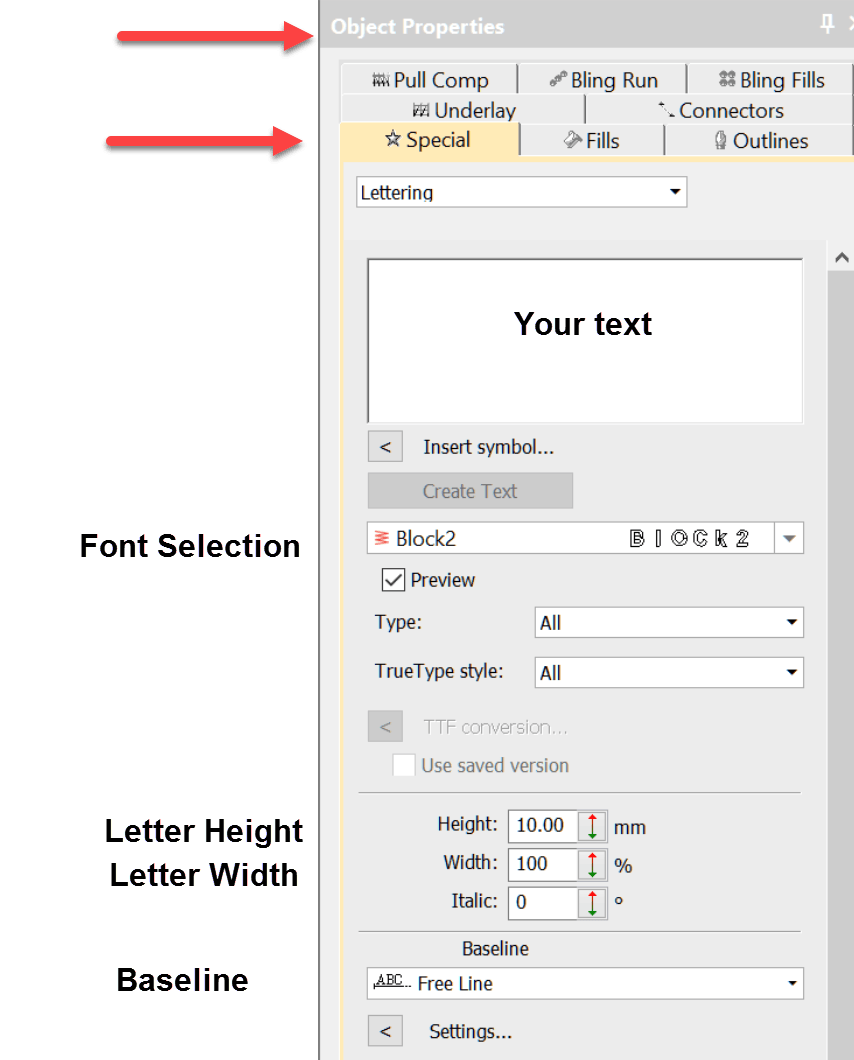
Whether you are using a lettering package or a high end digitizing system the same standard procedure to create lettering applies.When you are talking about Wilcom’s lettering it is difficult to use the word “basic” as there are so many options available.However in this video I demonstrate the basic freeline, which in all likelihood, will…

The complex fill tool is used to create larger shapes where a single stitch angle is required, the tool is generally associated with tatami stitching, of course the size of the object will also help determine the stitch type as well. Best described as a perimeter tool, shapes are made by clicking around the outline…
In Decorating the tool is called “Digitize Column” and in Designing “Column A”The two variants are found in the Traditional digitizing toolbar in Designing and the Graphic toolbar in Decorating. The input method is clicking on either side of a column, beginning on one side, and clicking the other side to determine the width of…
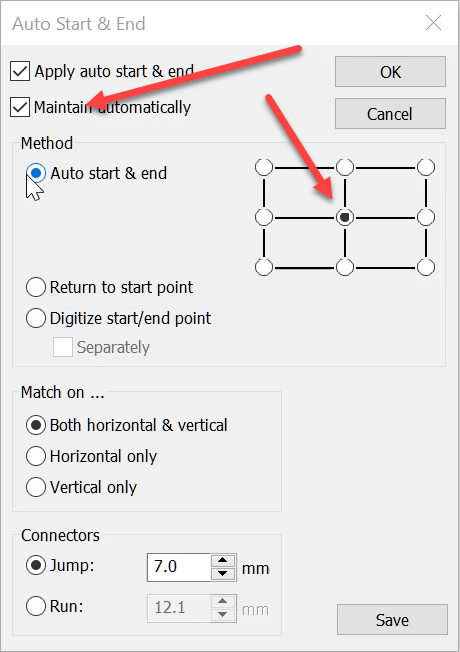
The Auto Start End feature is critical to have set correctly to avoid driving the needle into a hoop but it is more useful than this basic function.It is possible to place the start and finish point at any point in a predefined location around the design. The icon is found in the View Toolbar…
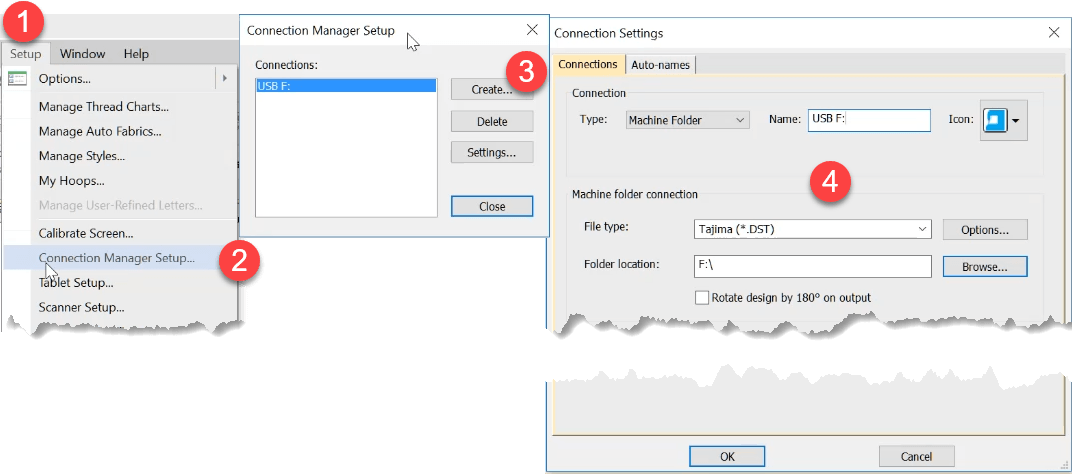
Thanks to Paula, Anne Marie, Crystal, Bob and others who have raised this issue. Some people including myself have been frustrated that Windows 10 is not remembering the default drive to export machine files to.Here is a great feature in Embroidery Studio 4 that solves the problem and makes the process ultra simple.All levels of…
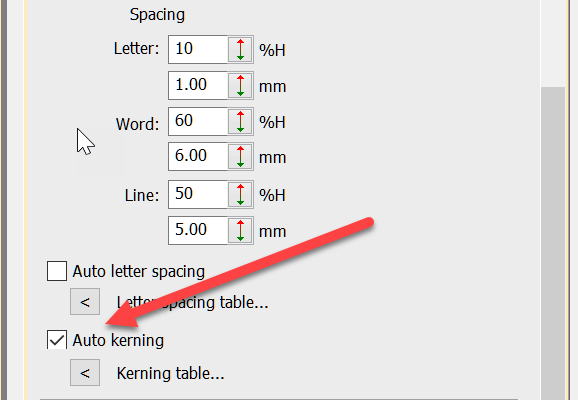
Kerning is the term used to describe the space between letters. Even in print different letters have different kerning values.Two O’s are usually spaced closer together than two I’s. This is particularly important in embroidery. Two I’s, if too close together will look like a single very wide letter while two O’s can be closer…
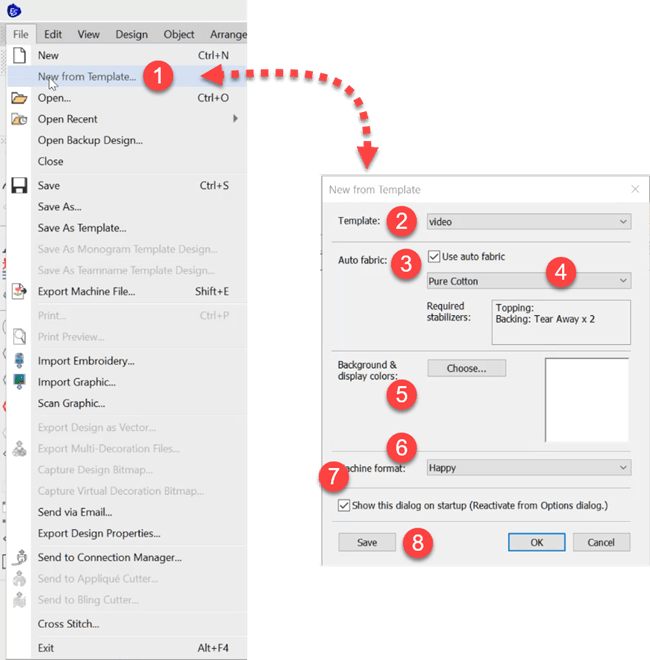
To do this The Auto Fabric Assistant controls three quality control properties in your designs. Pull compensation Underlay settings Stitch Spacing/Density These settings will change depending on the fabric you choose and the size of the object. To use the auto fabric assistant look in the Design Menu and then Auto Fabric. There are two…
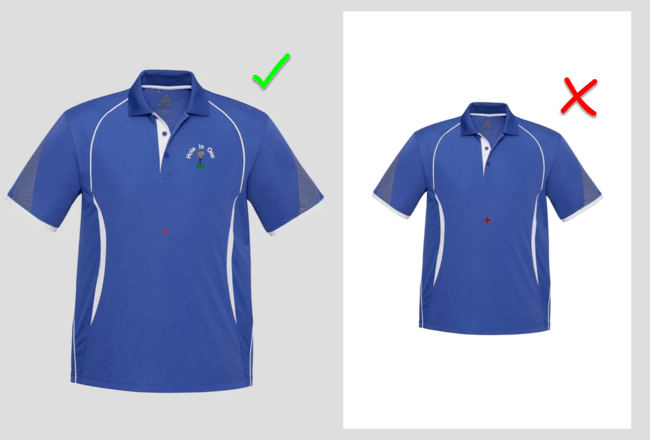
Product Visualizer When displaying an image in the product visualizer an image with a transparent background in more professional than showing a white background. Corel PhotoPaint is included in the CorelDRAW suite of software that comes with Embroidery Studio Designing and Decorating In the video below I…
| Powered by WordPress | Theme by TheBootstrapThemes