In this article and video I would like to discuss some ideas about sequencing objects in a design and choosing the tools and stitch types I think are most suited to create the vector shapes. When planning the design I take into account, the garment and fabric the design is to be stitches on to,…
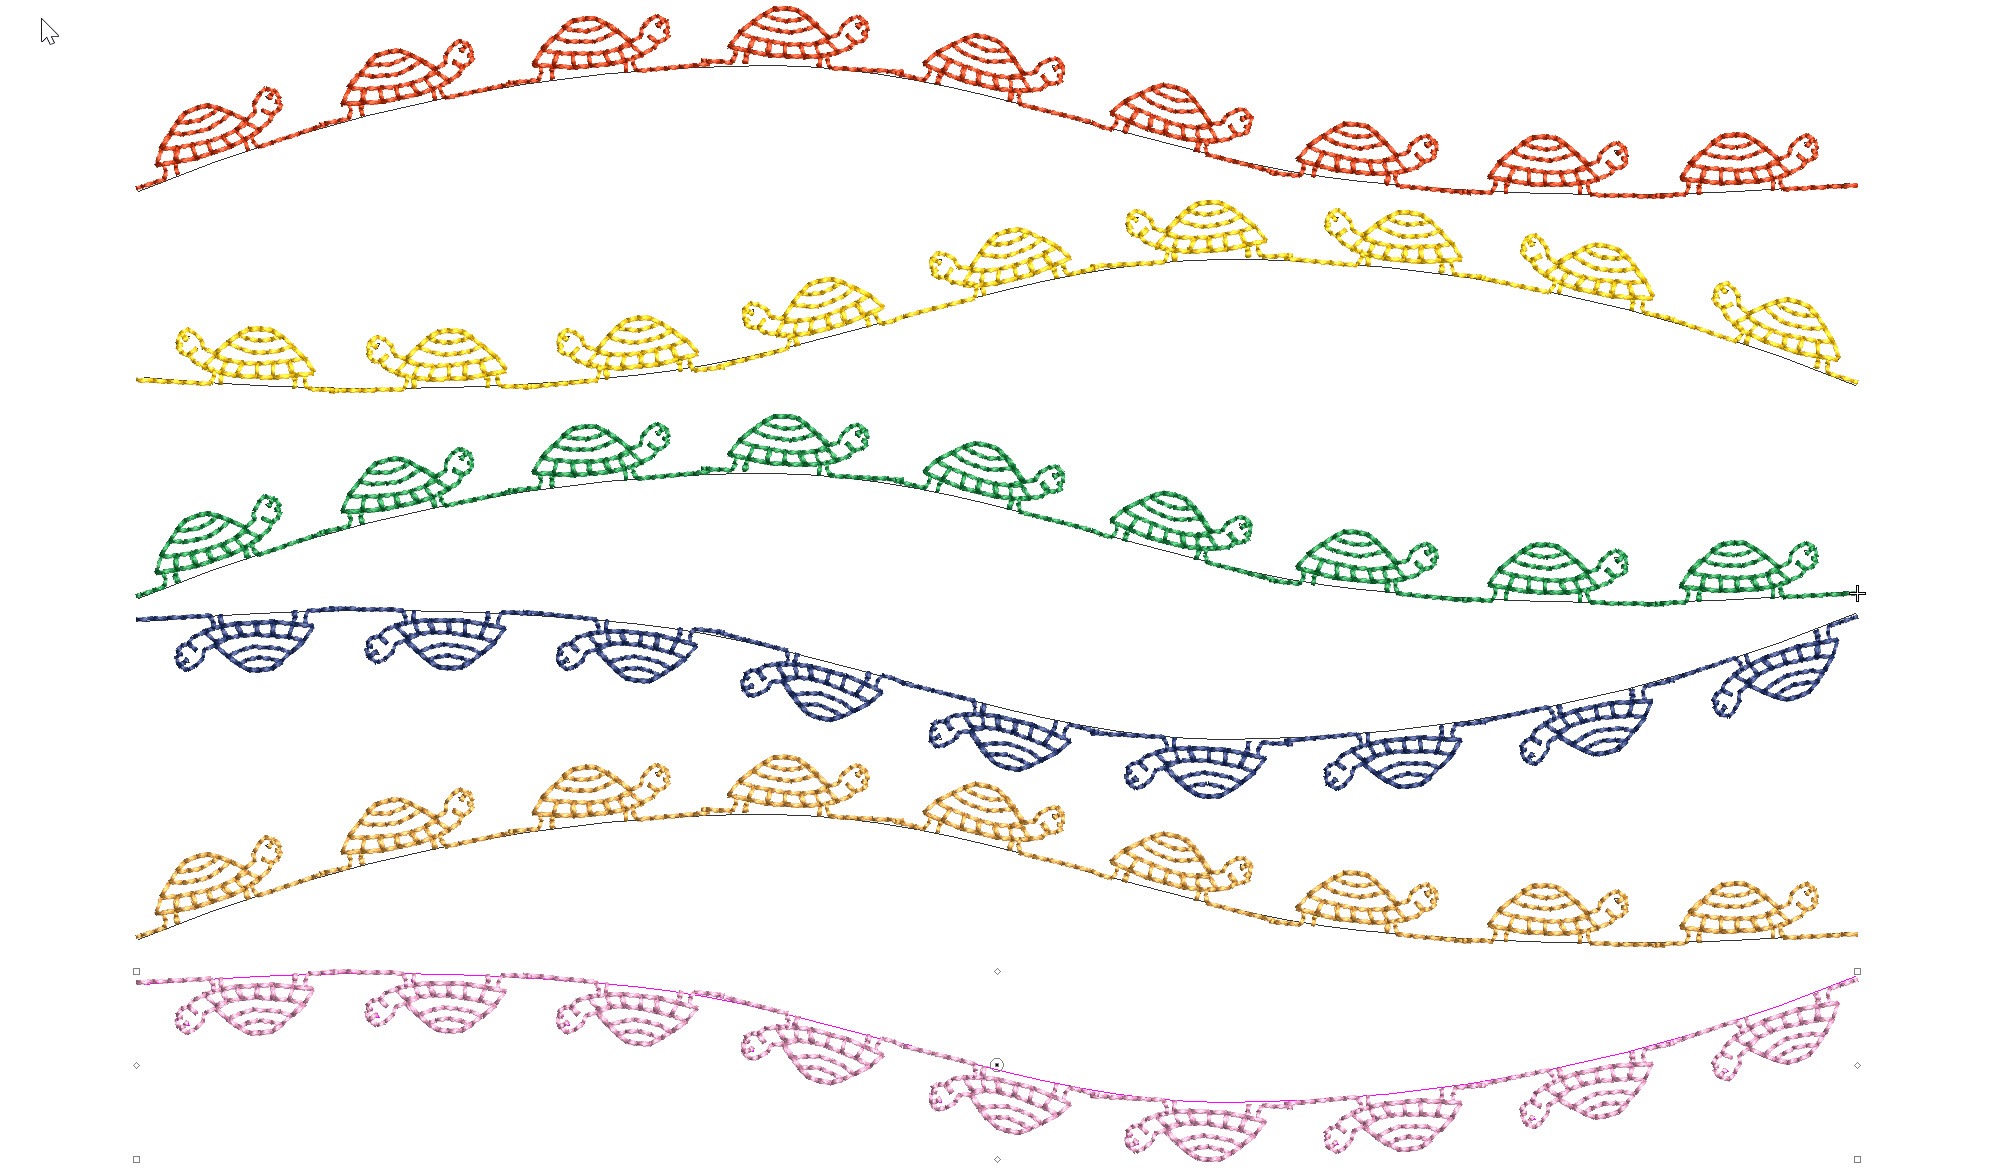
Reversing the direction and or orientation of an open ended motif run can be changed with the Transform Tools.The Transform tools can also be found in the Edit Menu.Or if you are a Shortcut person CTRL 1 for mirror horizontally and ALT 1 for Mirror vertically. For closed objects to change the orientation use the…
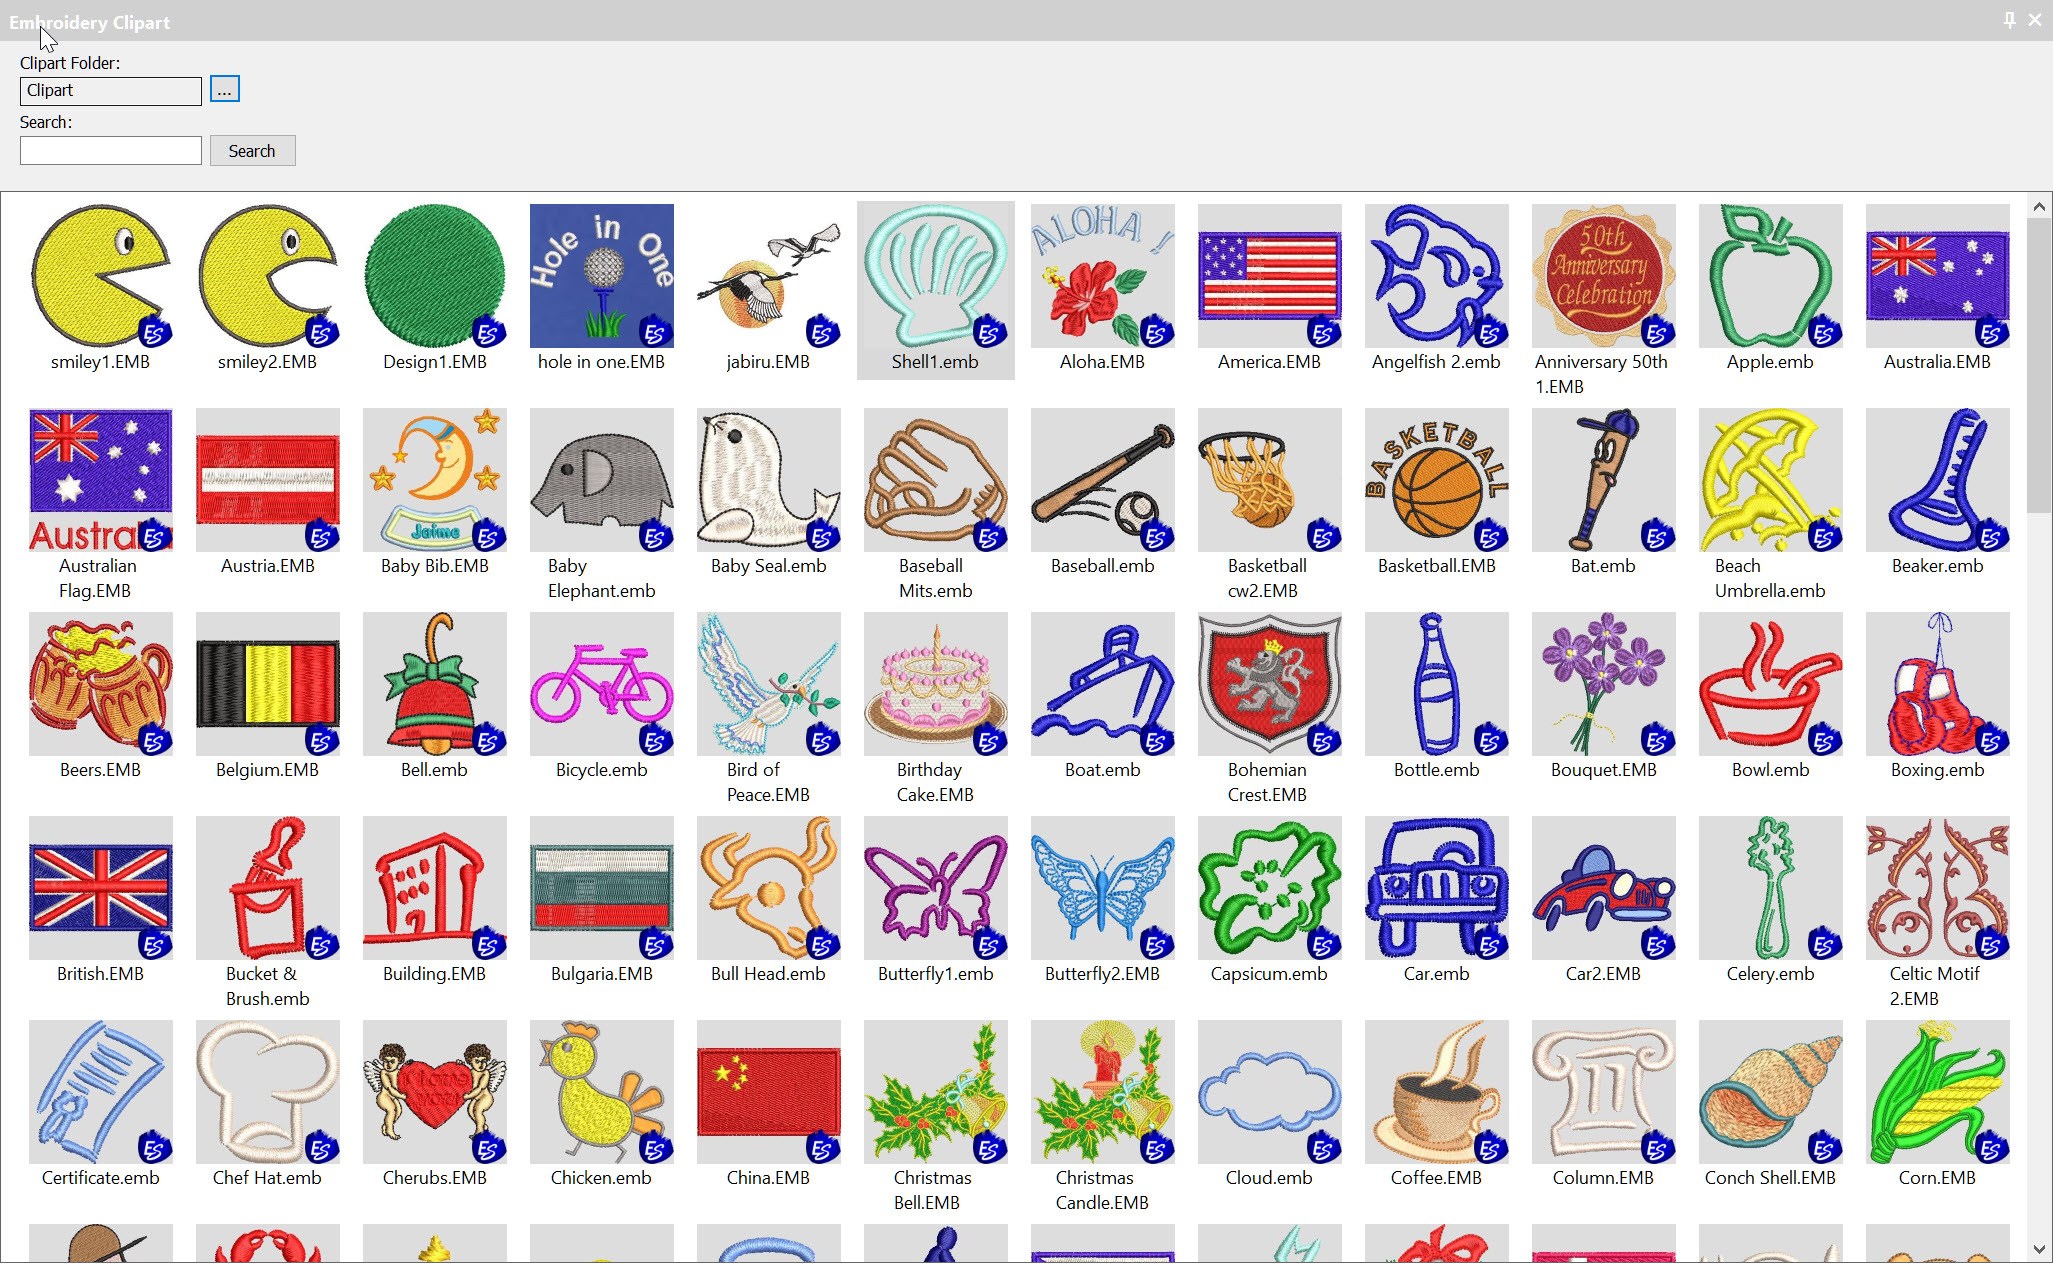
Clipart is a convenient way to store and add embroidery files to your designs.Clipart is usually used for generic type files that can be re used in more than one design.But you can add any file or part of a file that you create yourself to Clipart.The Clipart icon is found in the Docker Toolbar.Once…
All lettering has maximum and minimum recommended sizes, to find these recommendations go to the HELP MENU and ONLINE MANUAL. In the Navigation Bar Look for Appendices and Embroidery Fonts. CTRL F will open the Find dialogue to locate the particular font you are looking for.Notice Adelle font has a recommended minimum of 10…
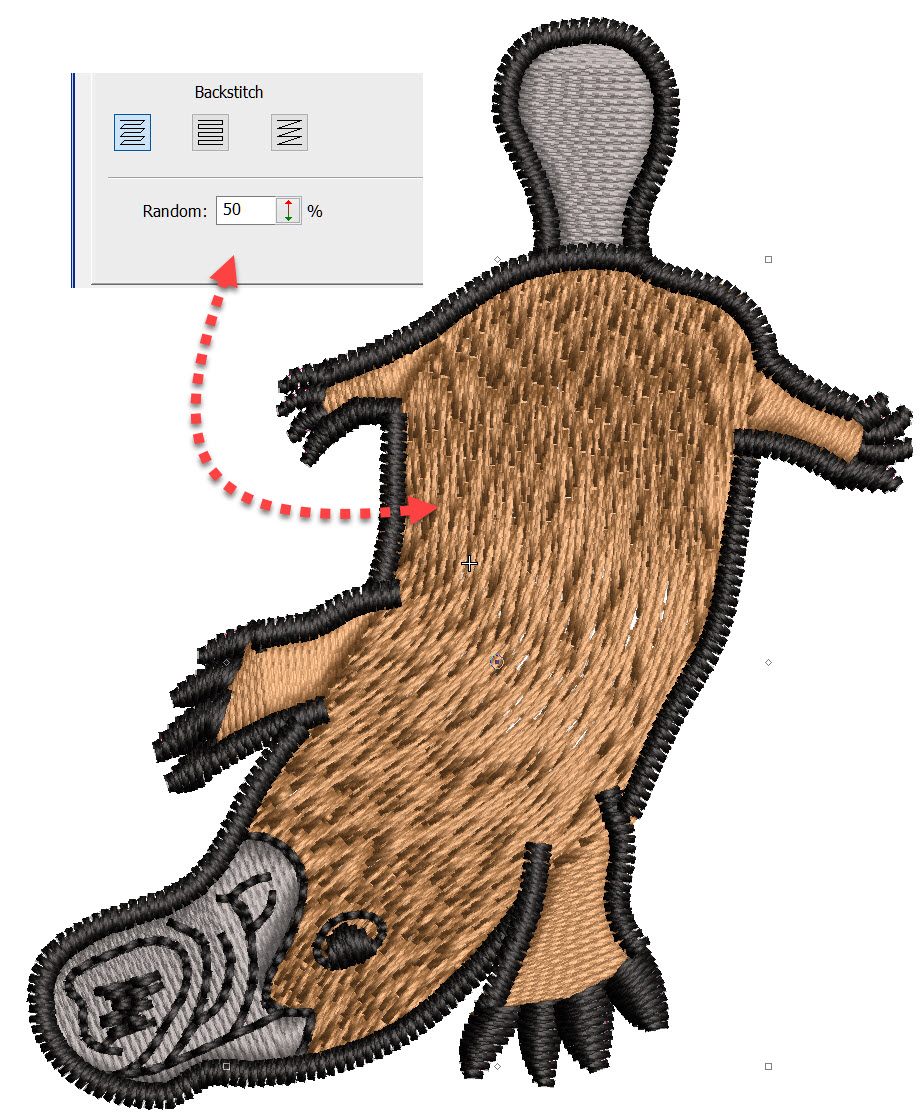
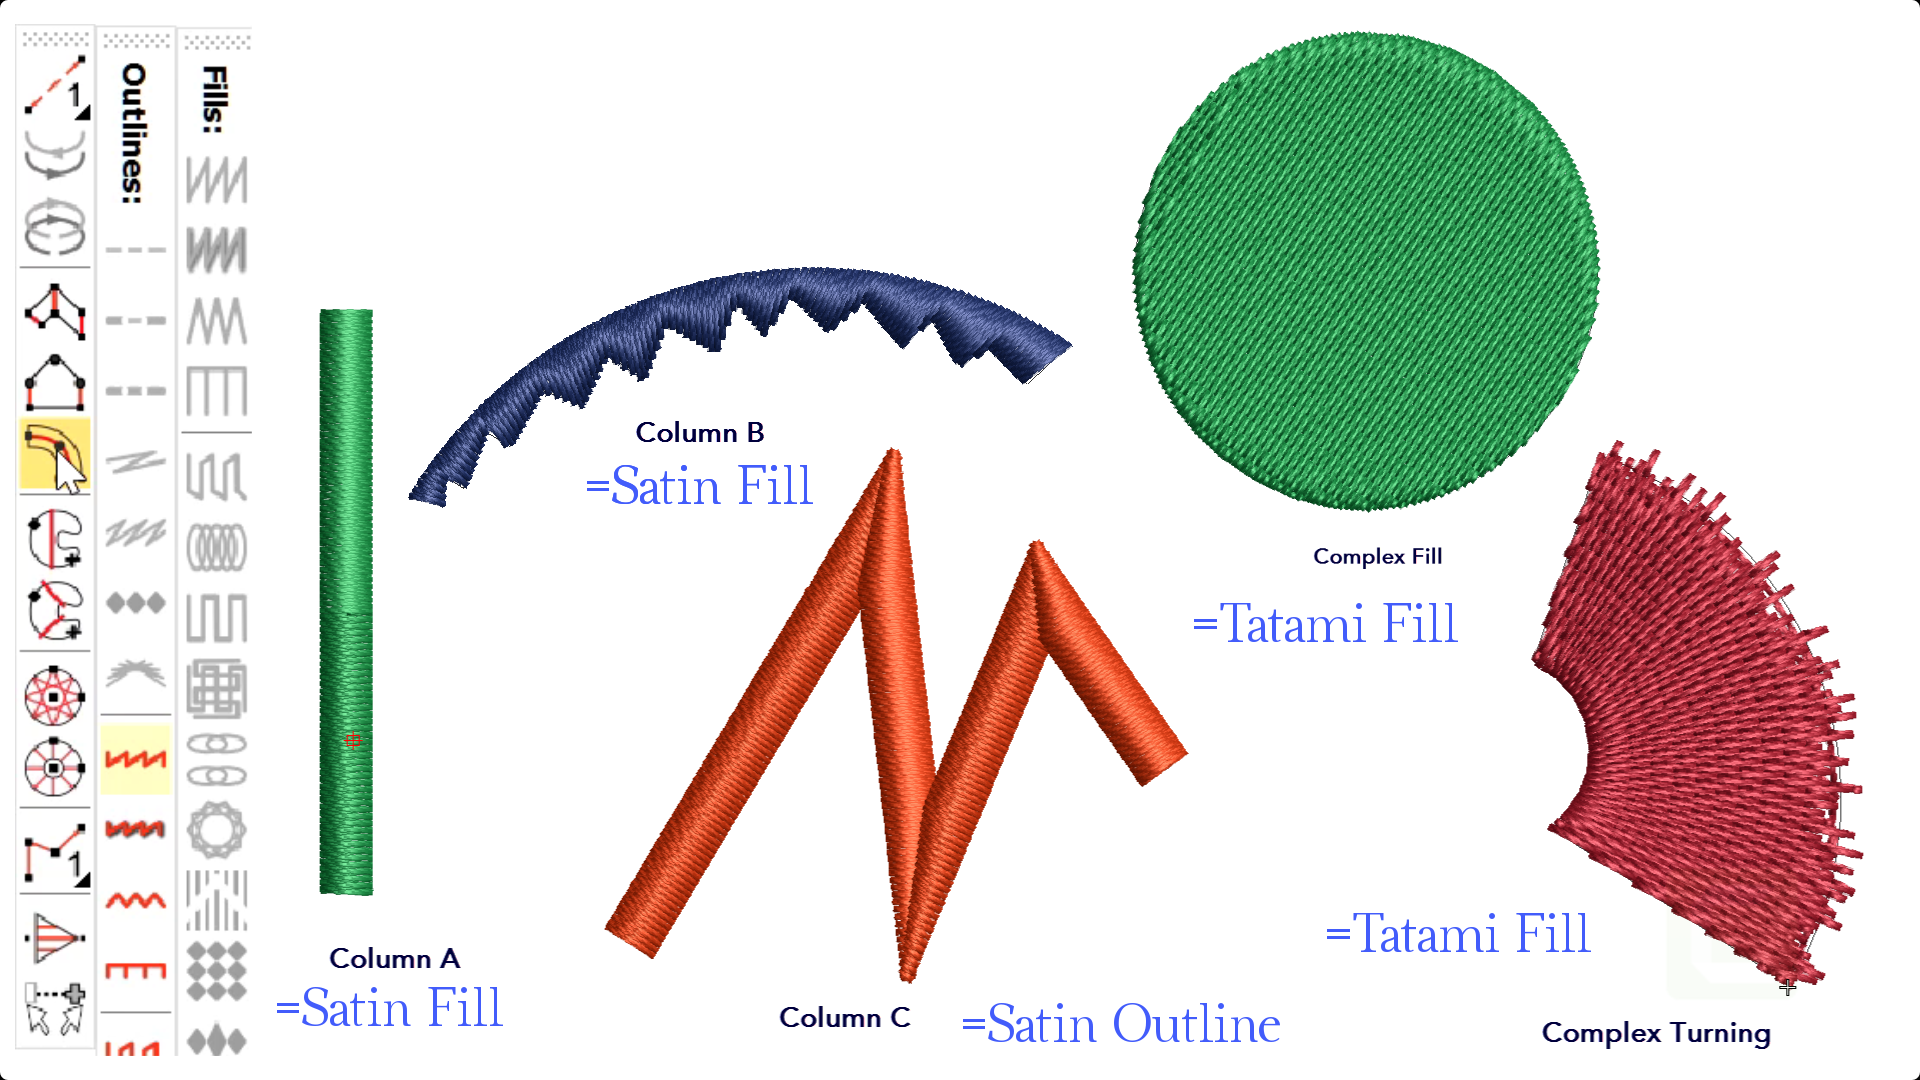
Tatami stitch is generally used for larger areas of fill in an embroidery design, which often will be the background for lettering or other objects in the design.Normally this would require an even stitch pattern, with a regular arrangement of stitch penetrations between to rows.However tatami can be so much more than a backing by…
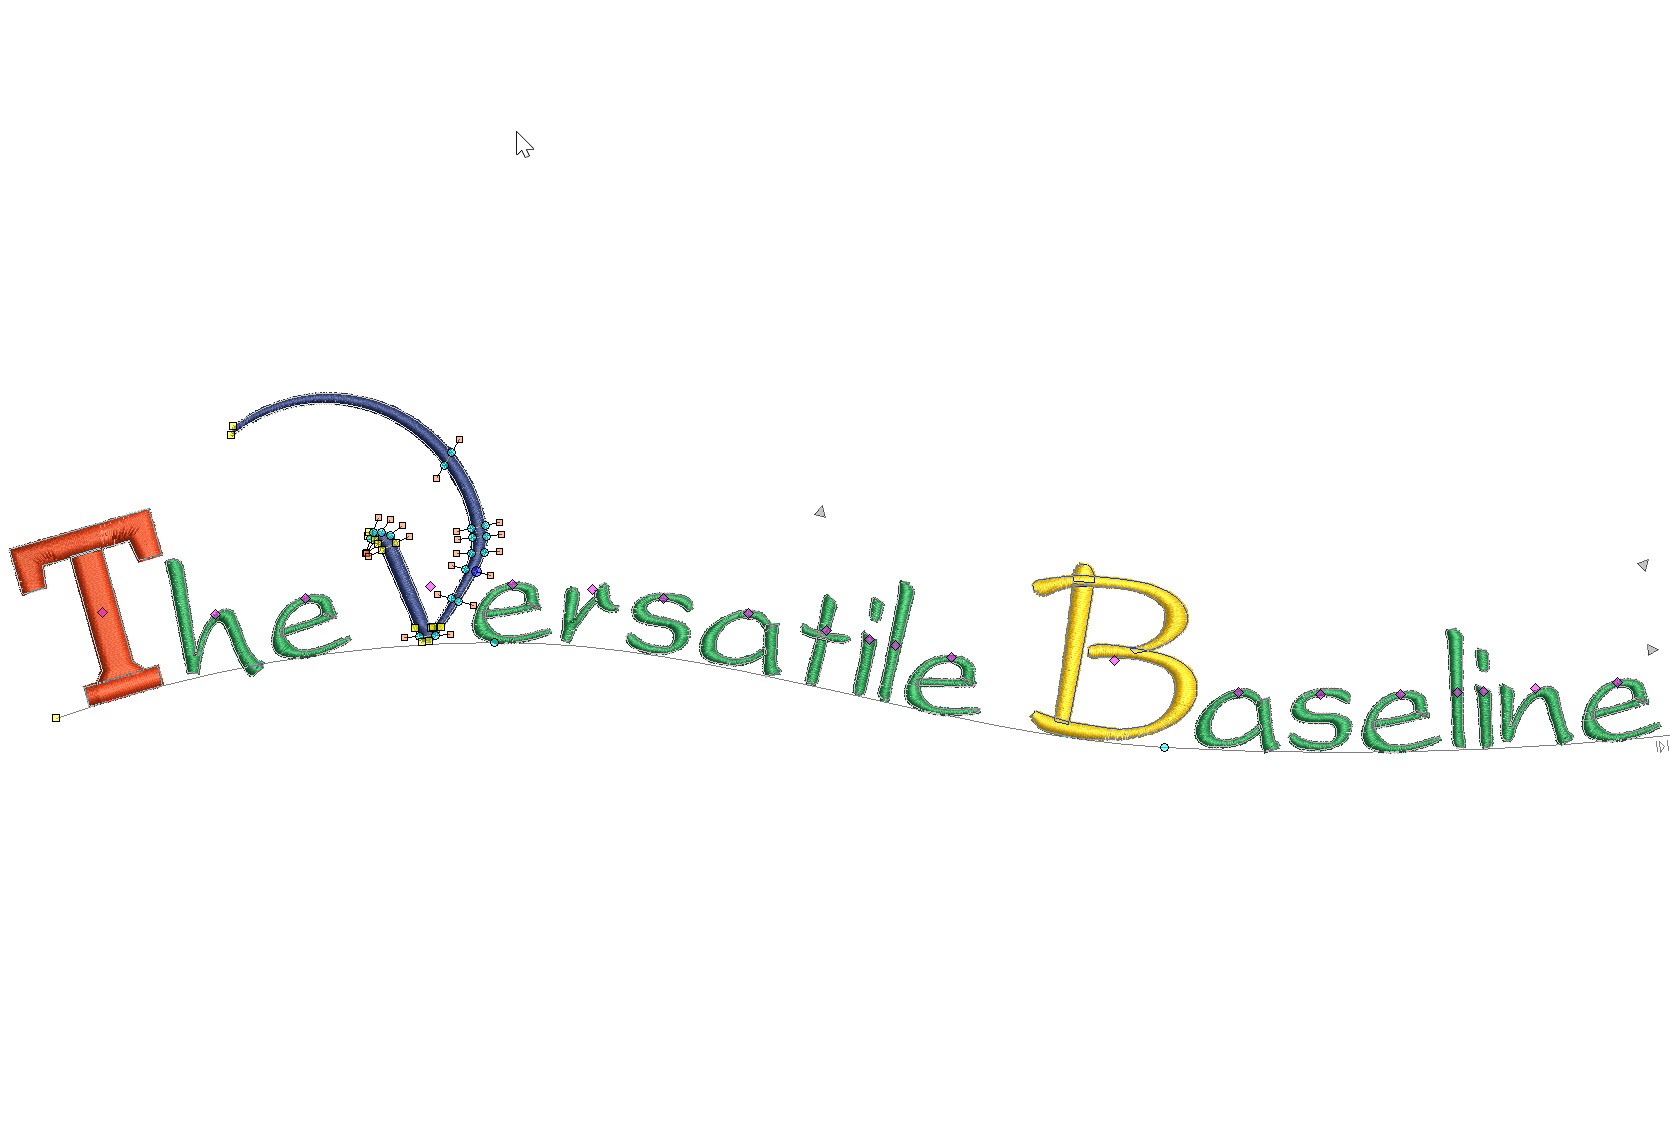
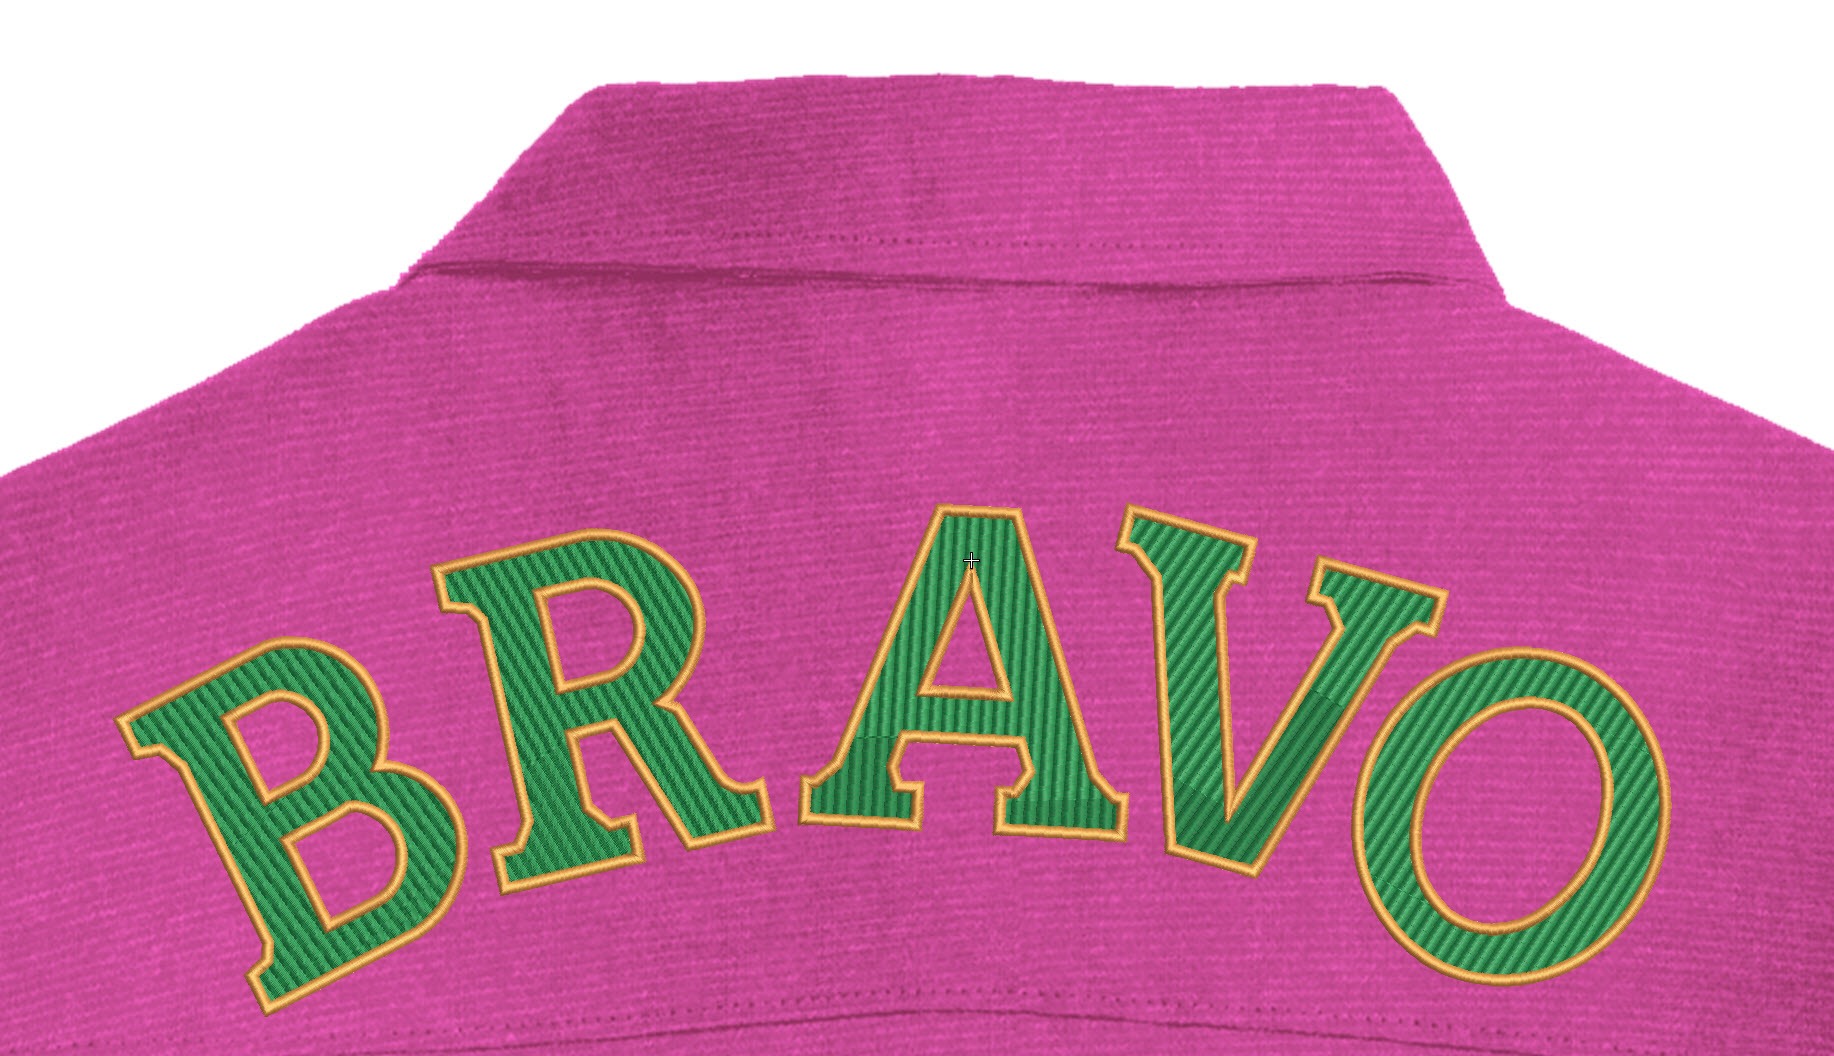
The Baseline is a property of a lettering object and may be changed at any time, even after the object has been created. The Baseline is one of the great benefits of the Embroidery Studio lettering system and should be preserved.There is no need to break the lettering object apart to manipulate a single letter,…
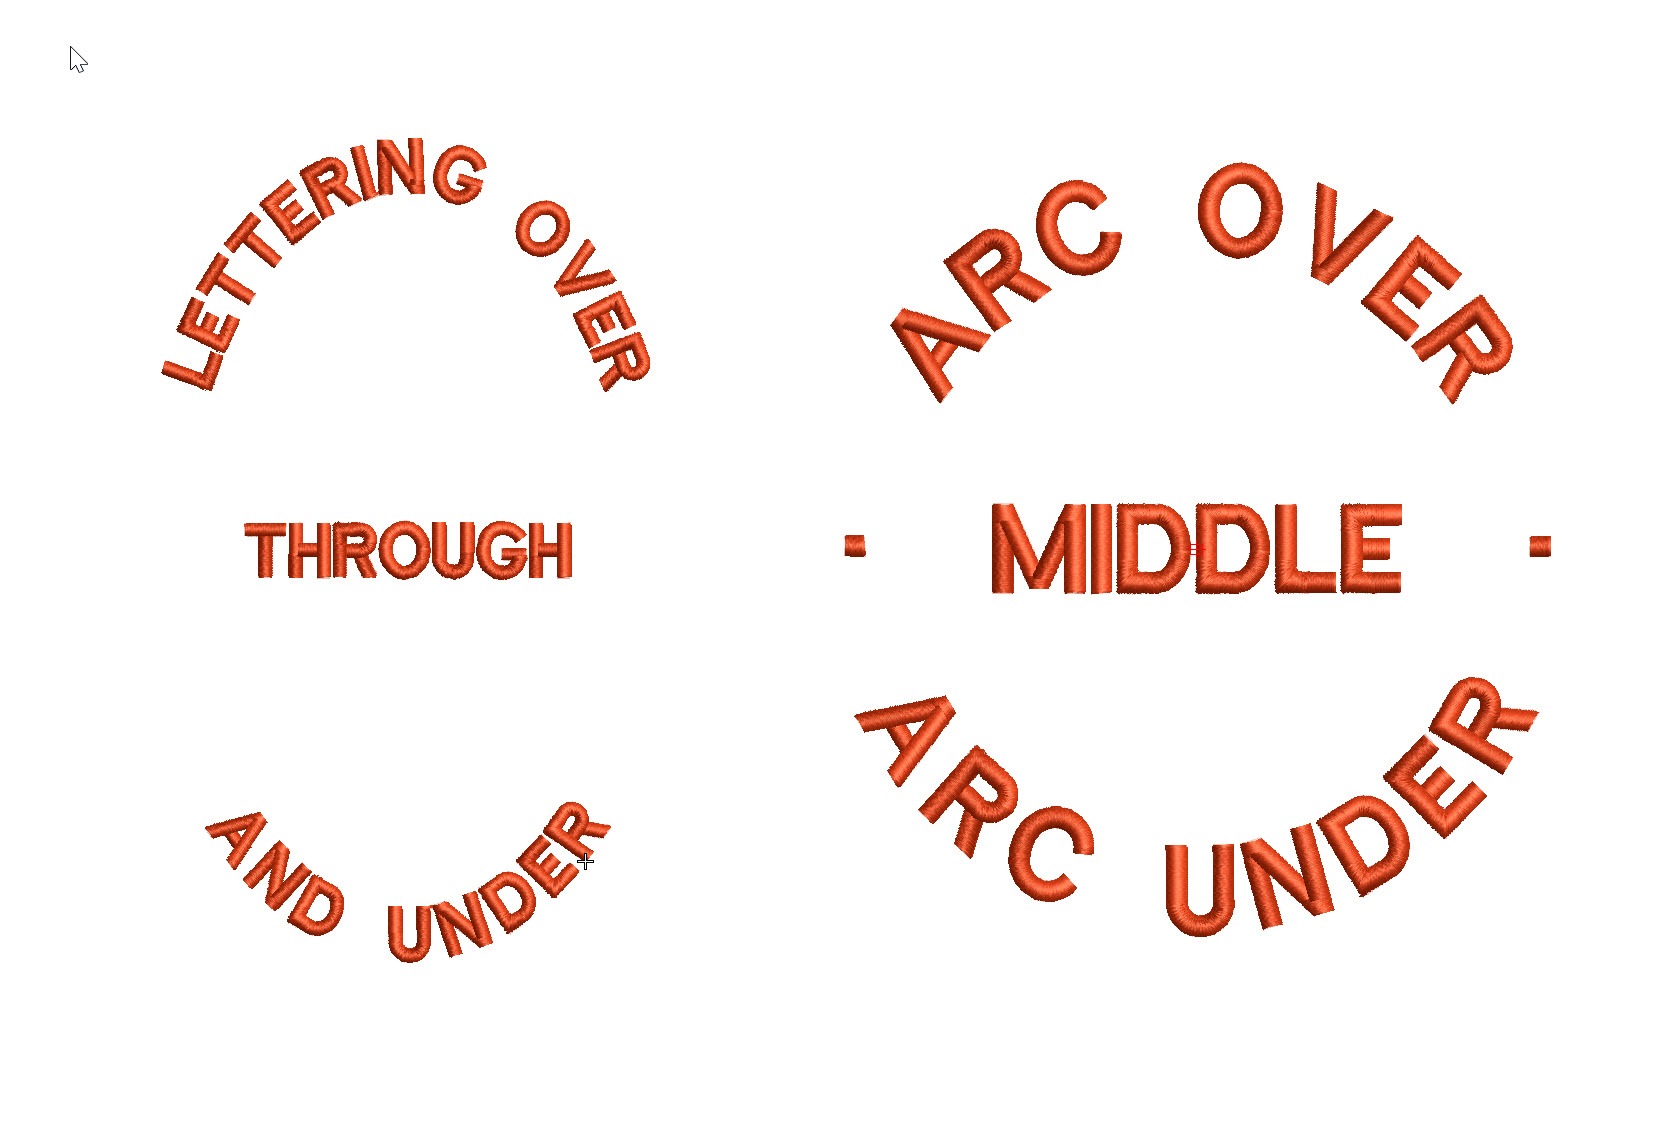
Actually the process of creating a Predefined Baseline creates 3 separate baselines that can be treated individually once they have been created.The feature is particularly useful for circular and elliptical designs that have lettering around the logo and possibly through the middle. The procedure is exactly the same as for a circular baseline but involves…

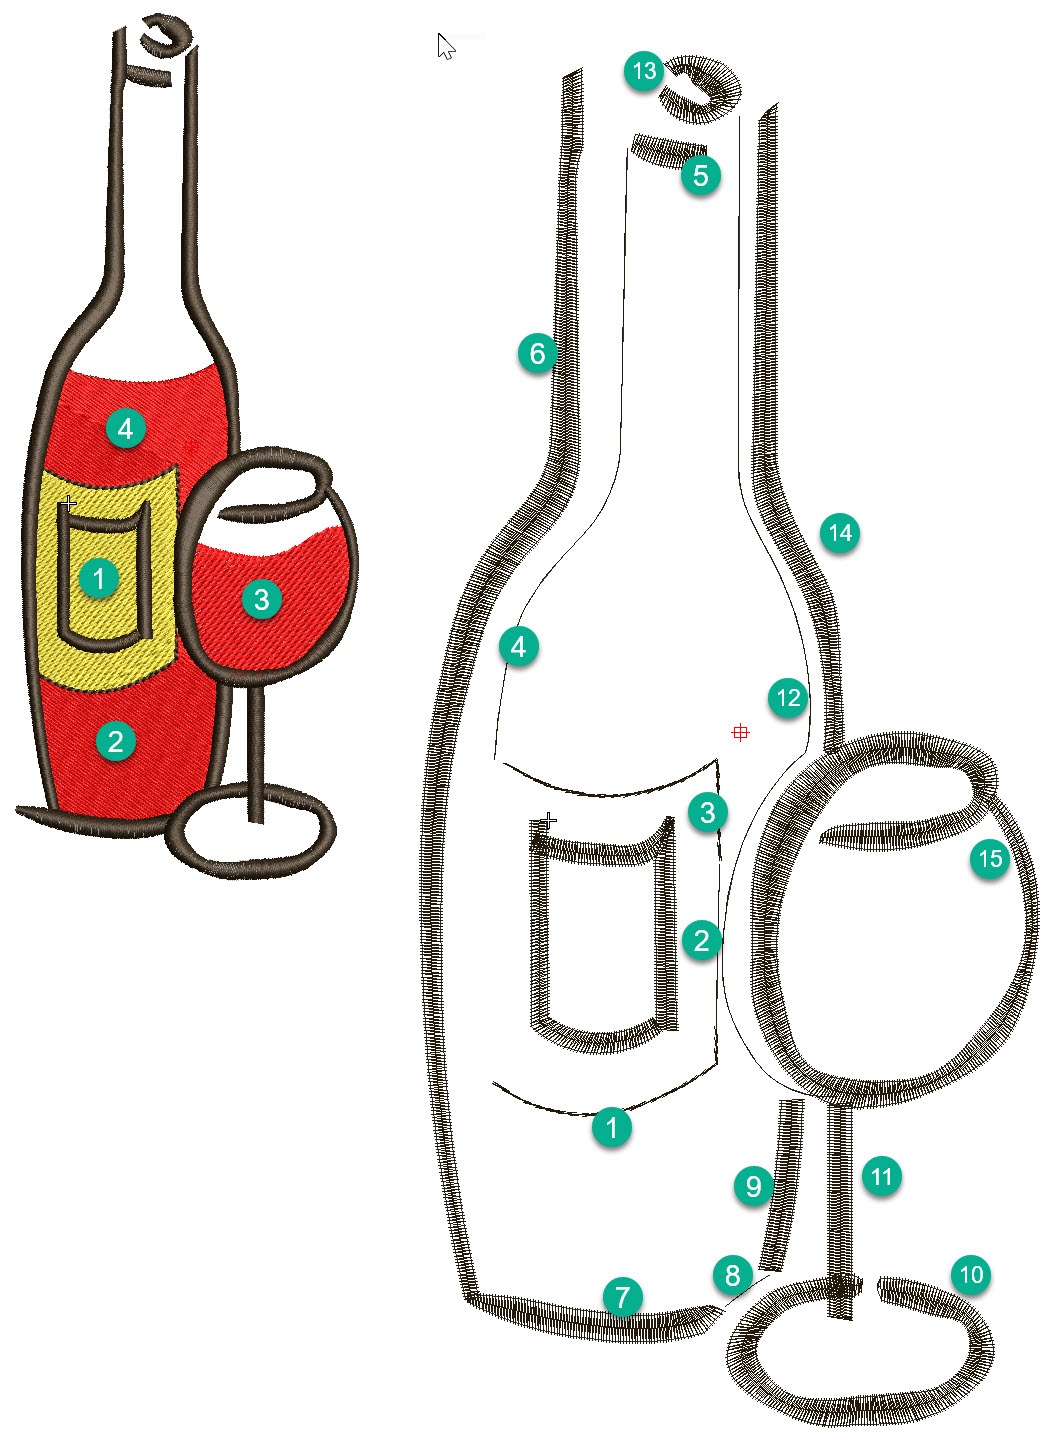
Keyboard Shortcut “H” is one of my top 10 shortcut keys. Objects need to be reshaped for all sorts of reasons, perhaps to make a slight adjustment to correct a registration issue or improve the shape of a design element. The Reshape icon is found under the Object Select icon in the Toolbox. When the…
Templates are designed to save time and give a consistent result for all of your design work.Embroidery Studio 4.2 allows you to save specific property values to 6 of your main digitizing tools. For example you may, in one template prefer the turning satin tool to default to tatami stitch with a specific stitch spacing…
With the correct information saved to your embroidery file you could have a paperless system. Nothing will upset a customer more than the wrong colored thread in their logo.Why not keep all the color information in the .emb file? Notice in the image below each element of the design is named and a Madeira thread…
| Powered by WordPress | Theme by TheBootstrapThemes